
The Best Virtual Tour Workflow for Insta360 Cameras
Jan 13, 2023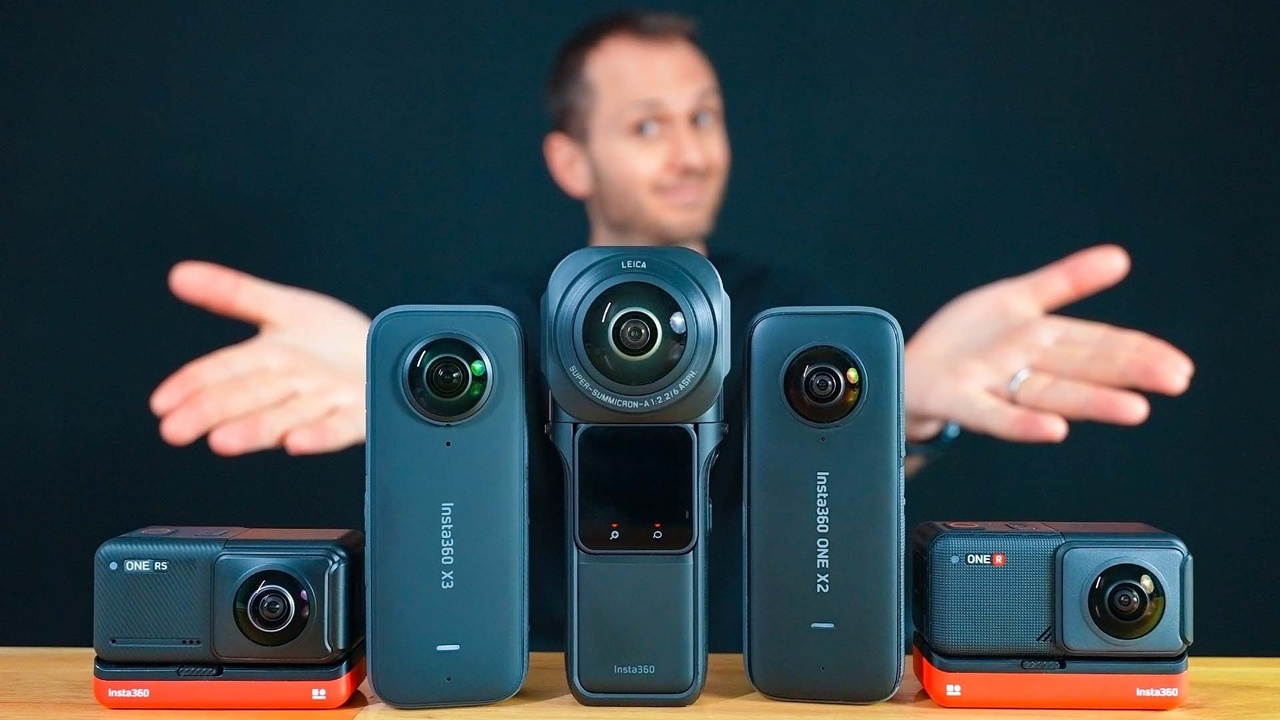
If you've ever thought about making virtual tours and own an Insta360 camera, you're probably wondering which:
👉 Is the best workflow?
👉 Which shooting settings should you use?
👉 And how should you stitch and edit your shots for maximum quality?
In the Best Virtual Tour Workflow for Insta360 Cameras video I take you behind the scenes as I make a professional virtual tour with the Insta360 One RS 1-inch 360 and reveal all of my best tips for shooting and editing 360 photos to achieve the best results with any Insta360 camera.
Step 1: Put The Lights On 💡
👉 If you're shooting an interior, which most virtual tours are, putting on the house lights will help light up darker areas of your location.
👉 If there's any outdoor areas you want to feature then be sure to make a clear pathway between indoors and outdoors so you can connect them easily later.
Step 2: Tidy The Area 🧹
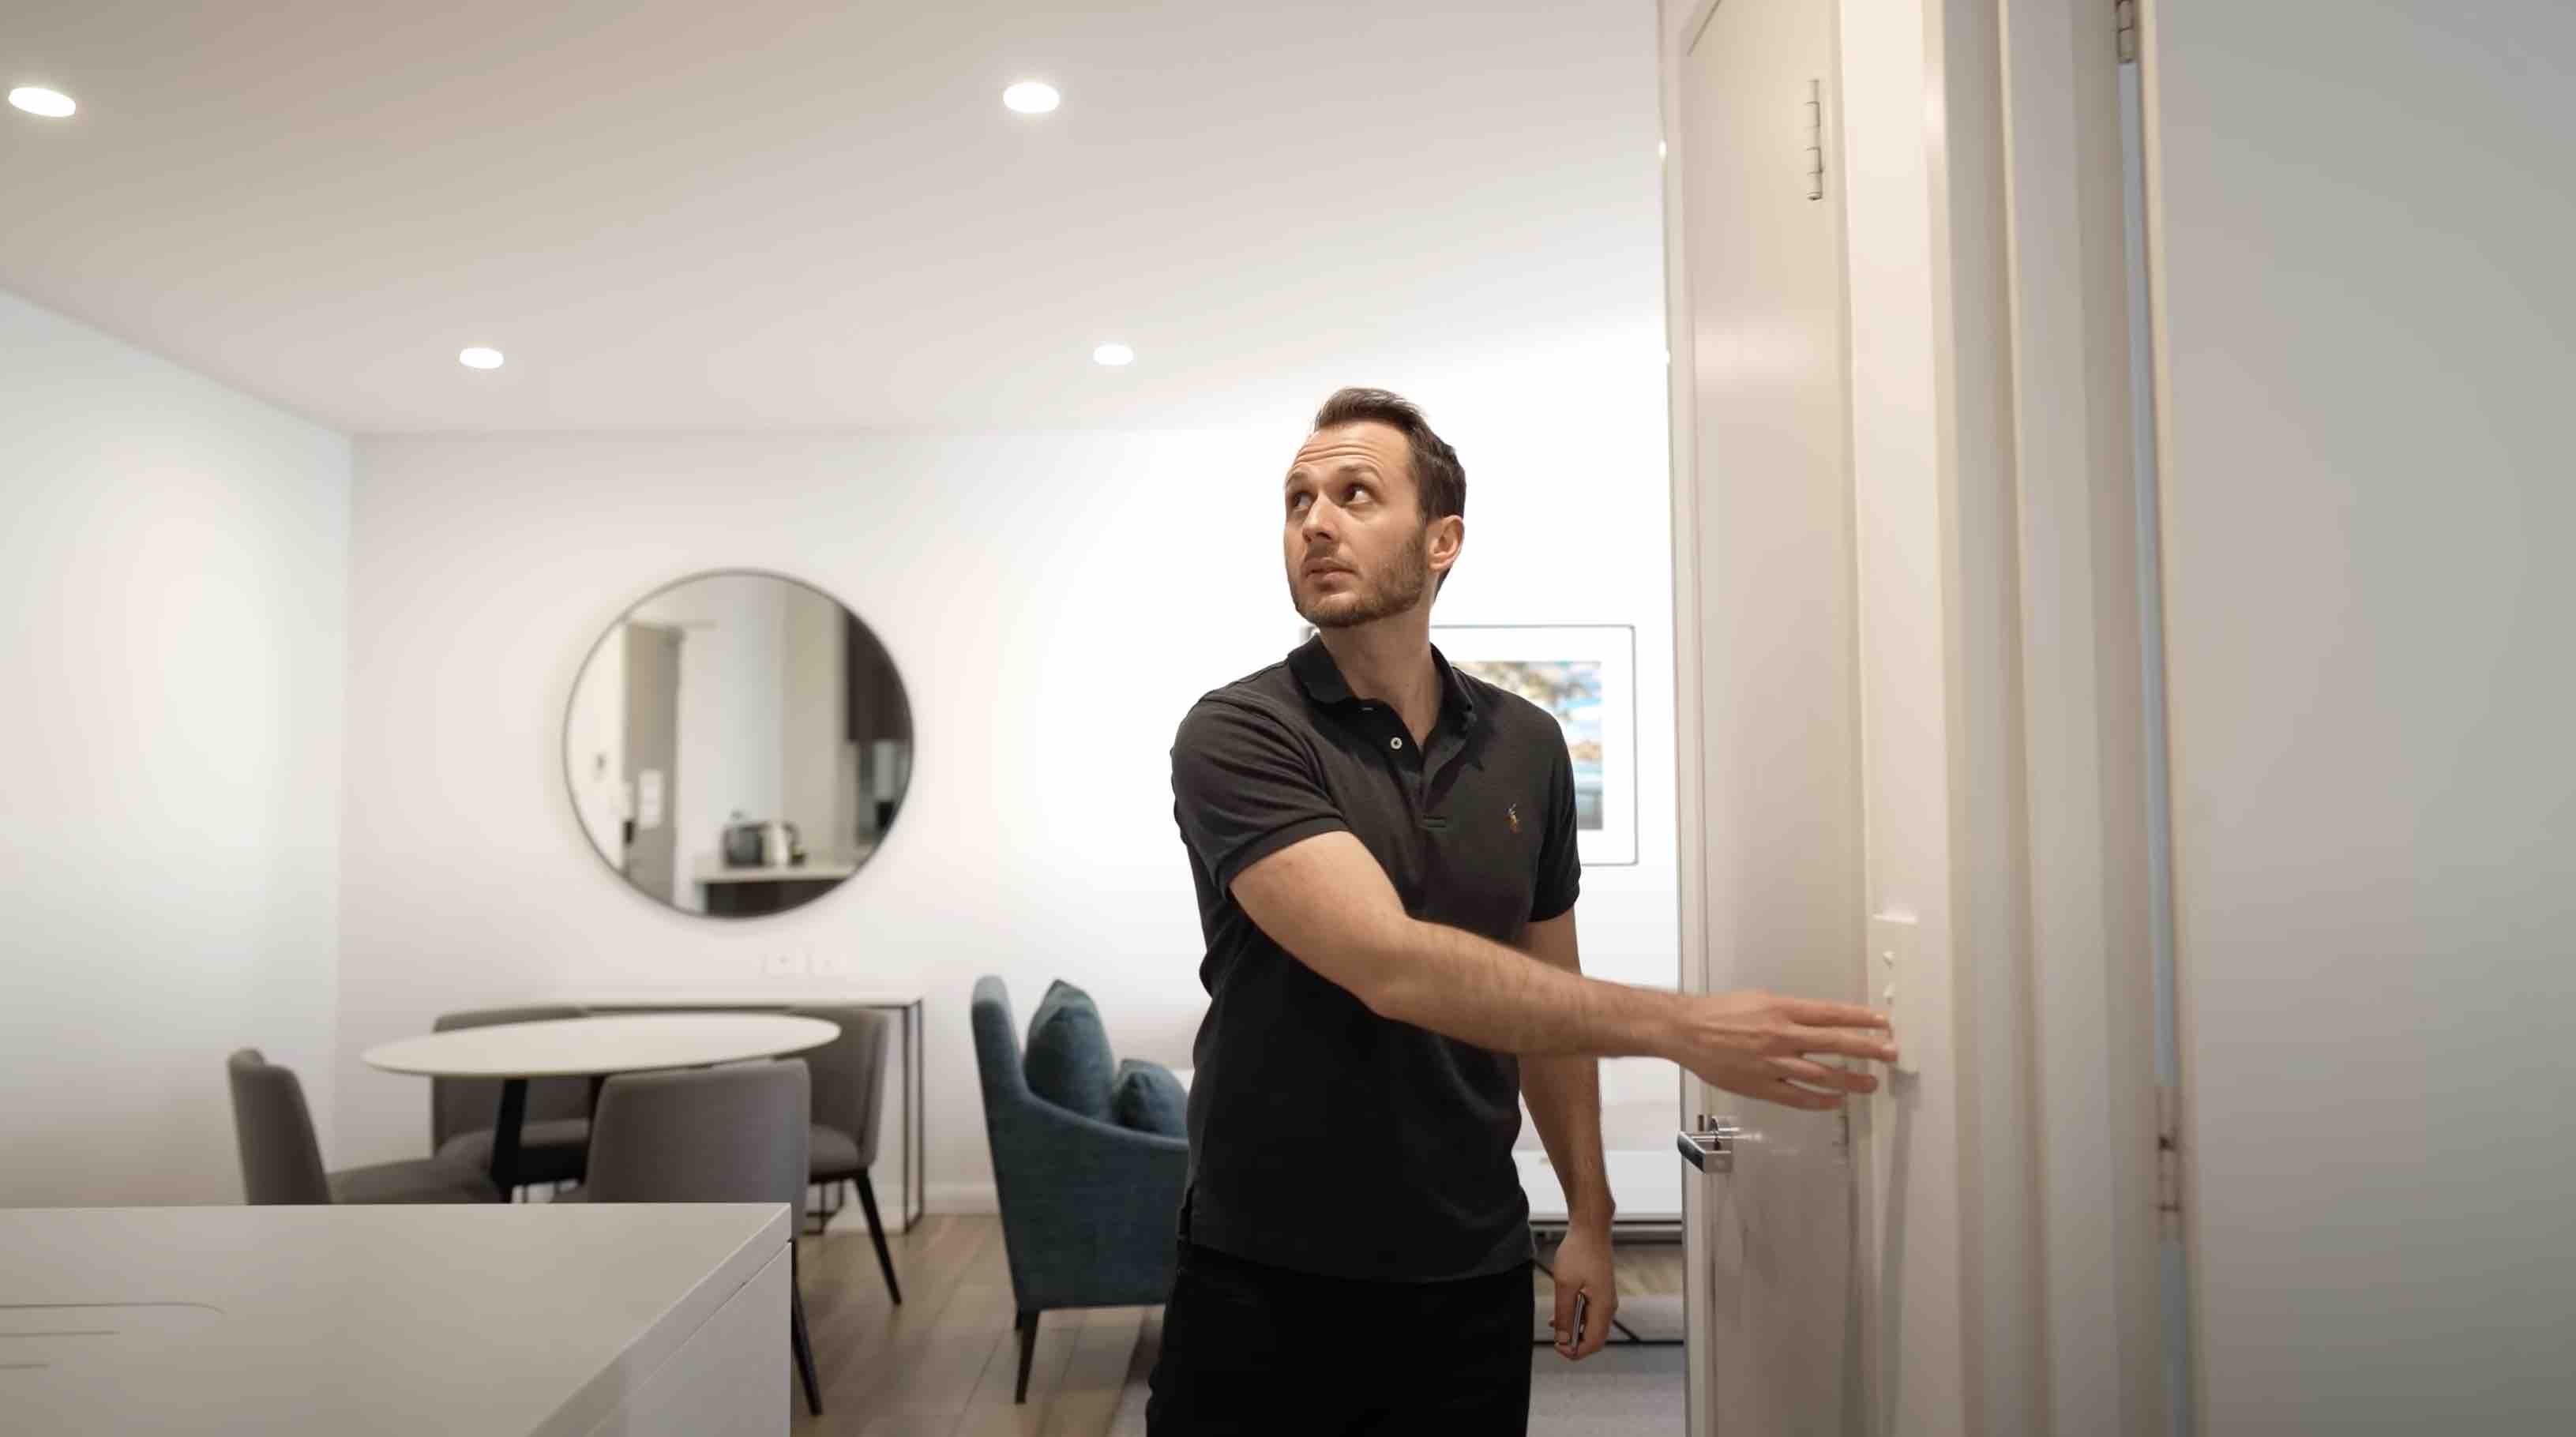
👉 Do a quick walkthrough of your location and do a 360 with your own eyes before shooting to see if anything needs to be tidied or hidden from shot.
Step 3: Grab your gear 📹
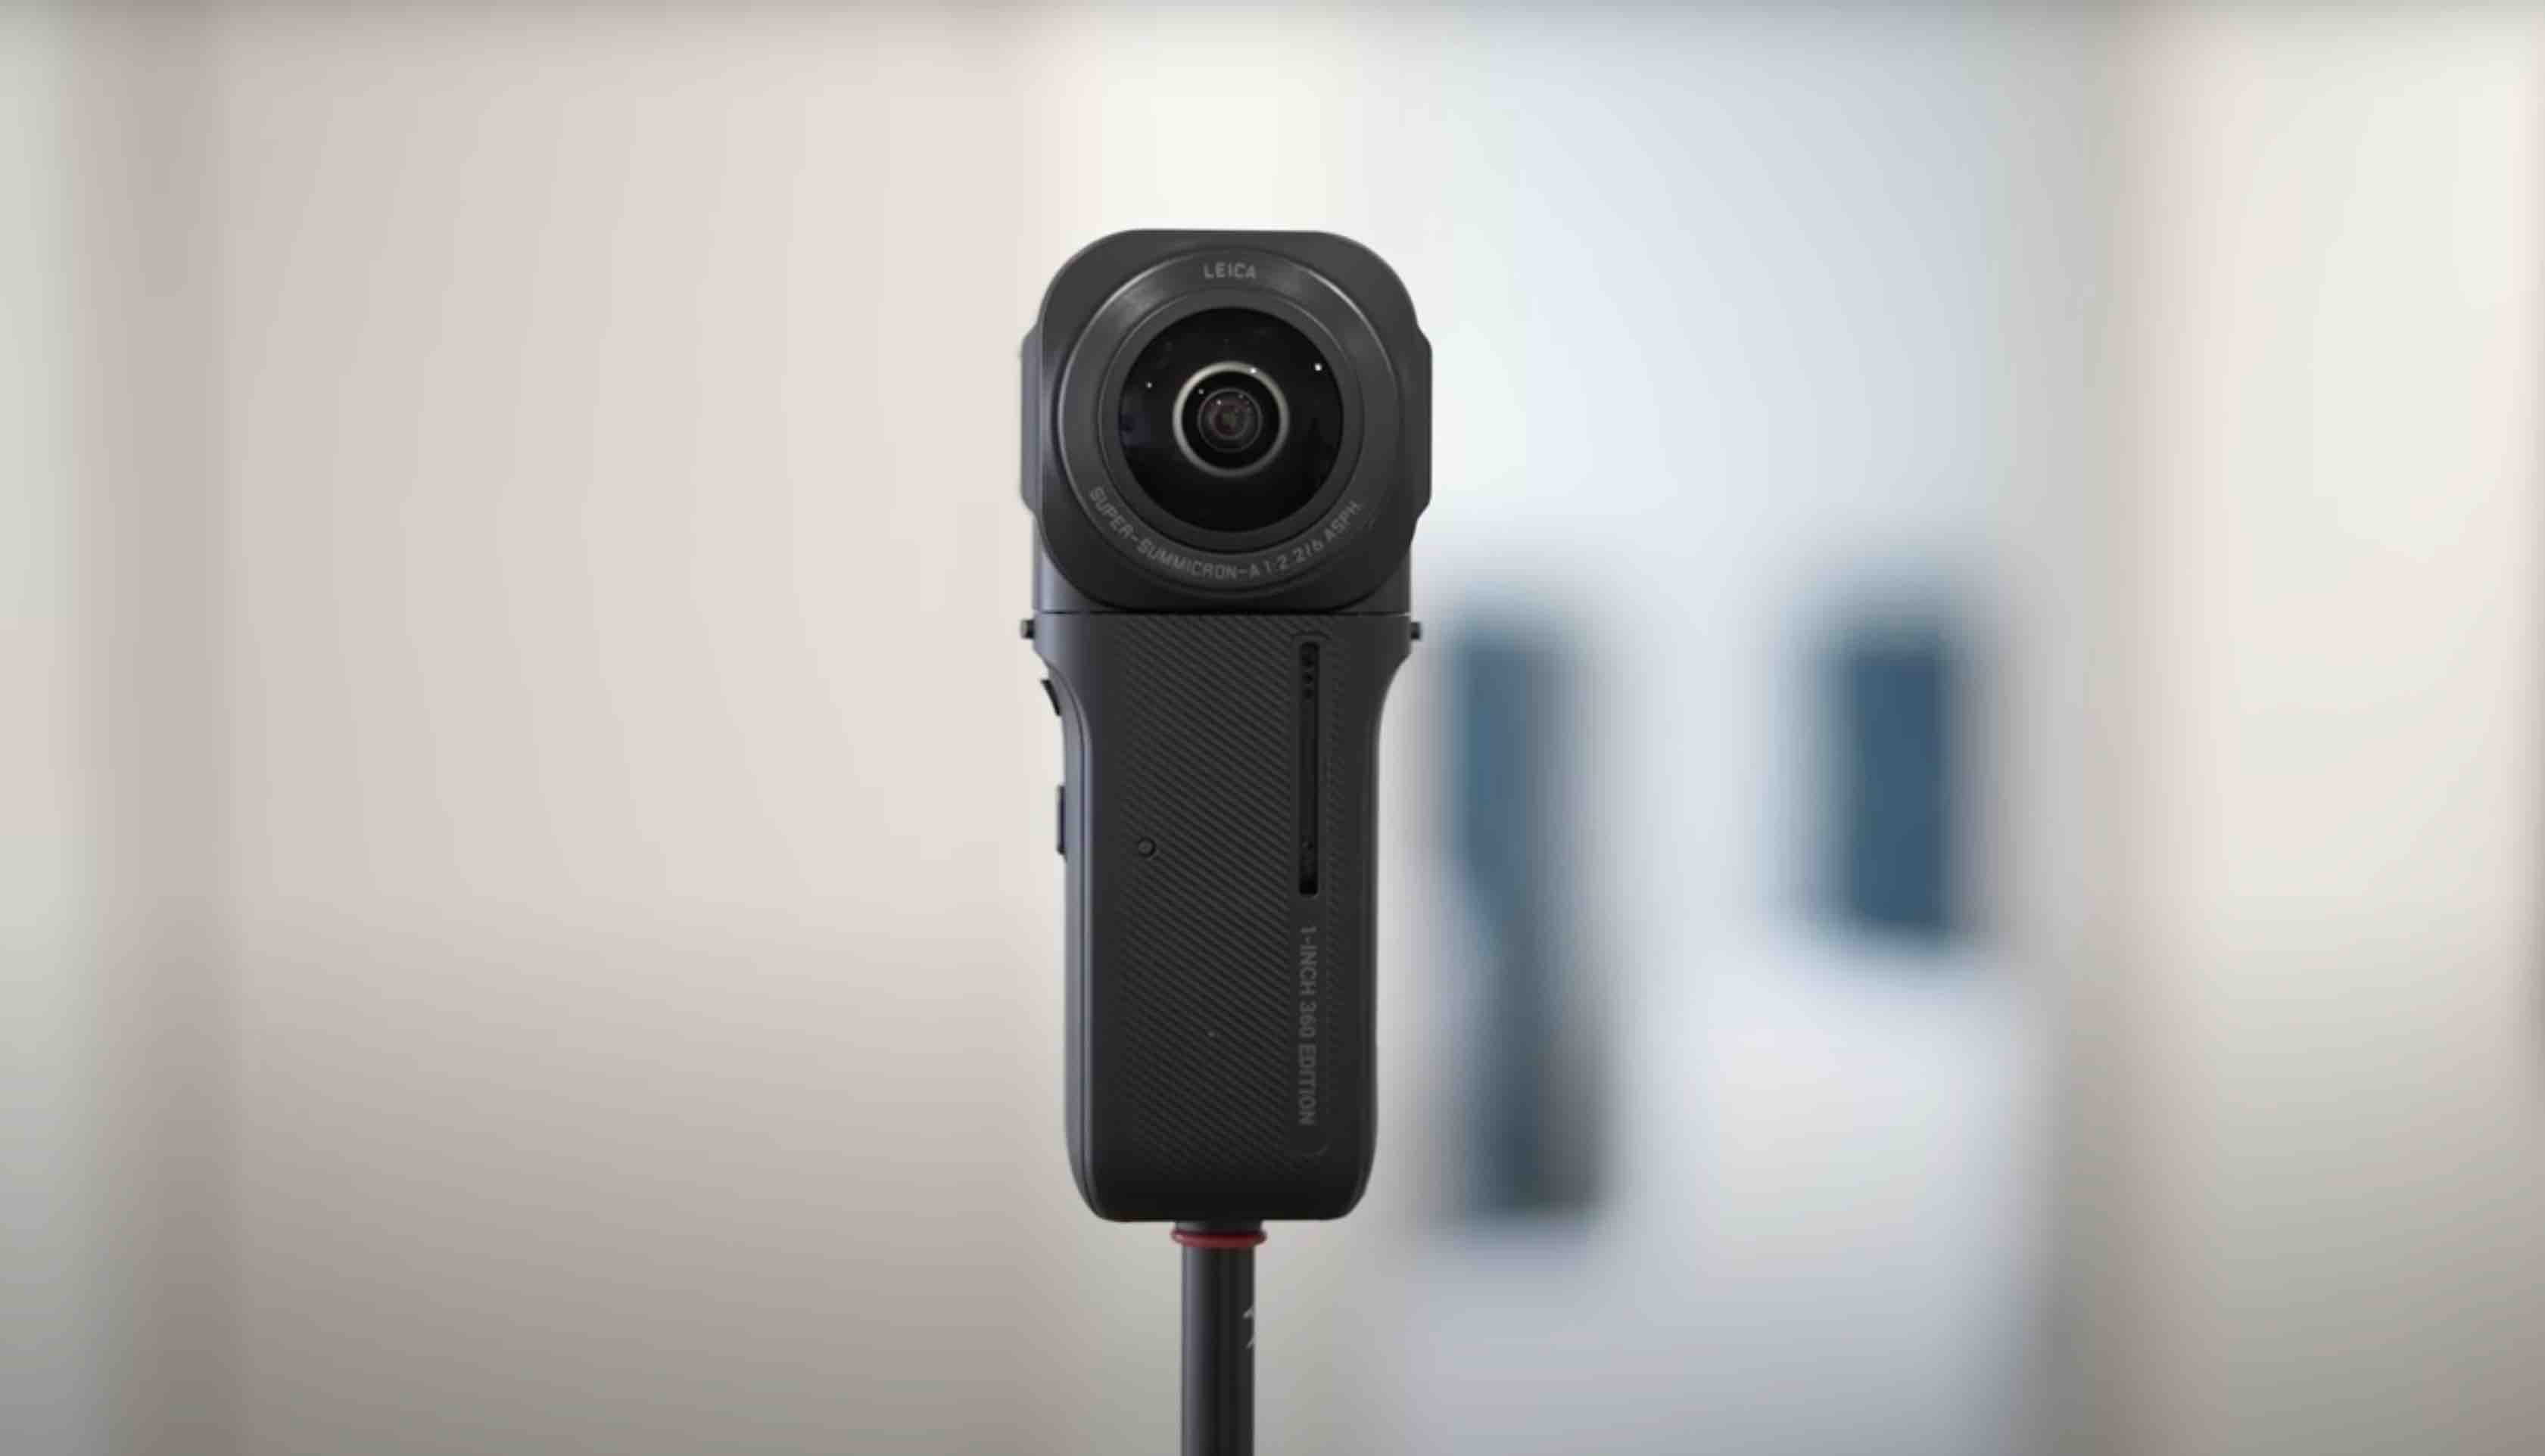
👉 You don't need a lot of gear to shoot virtual tours, the main one being your 360 camera. For this workflow I used the One RS 1-inch and a monopod.
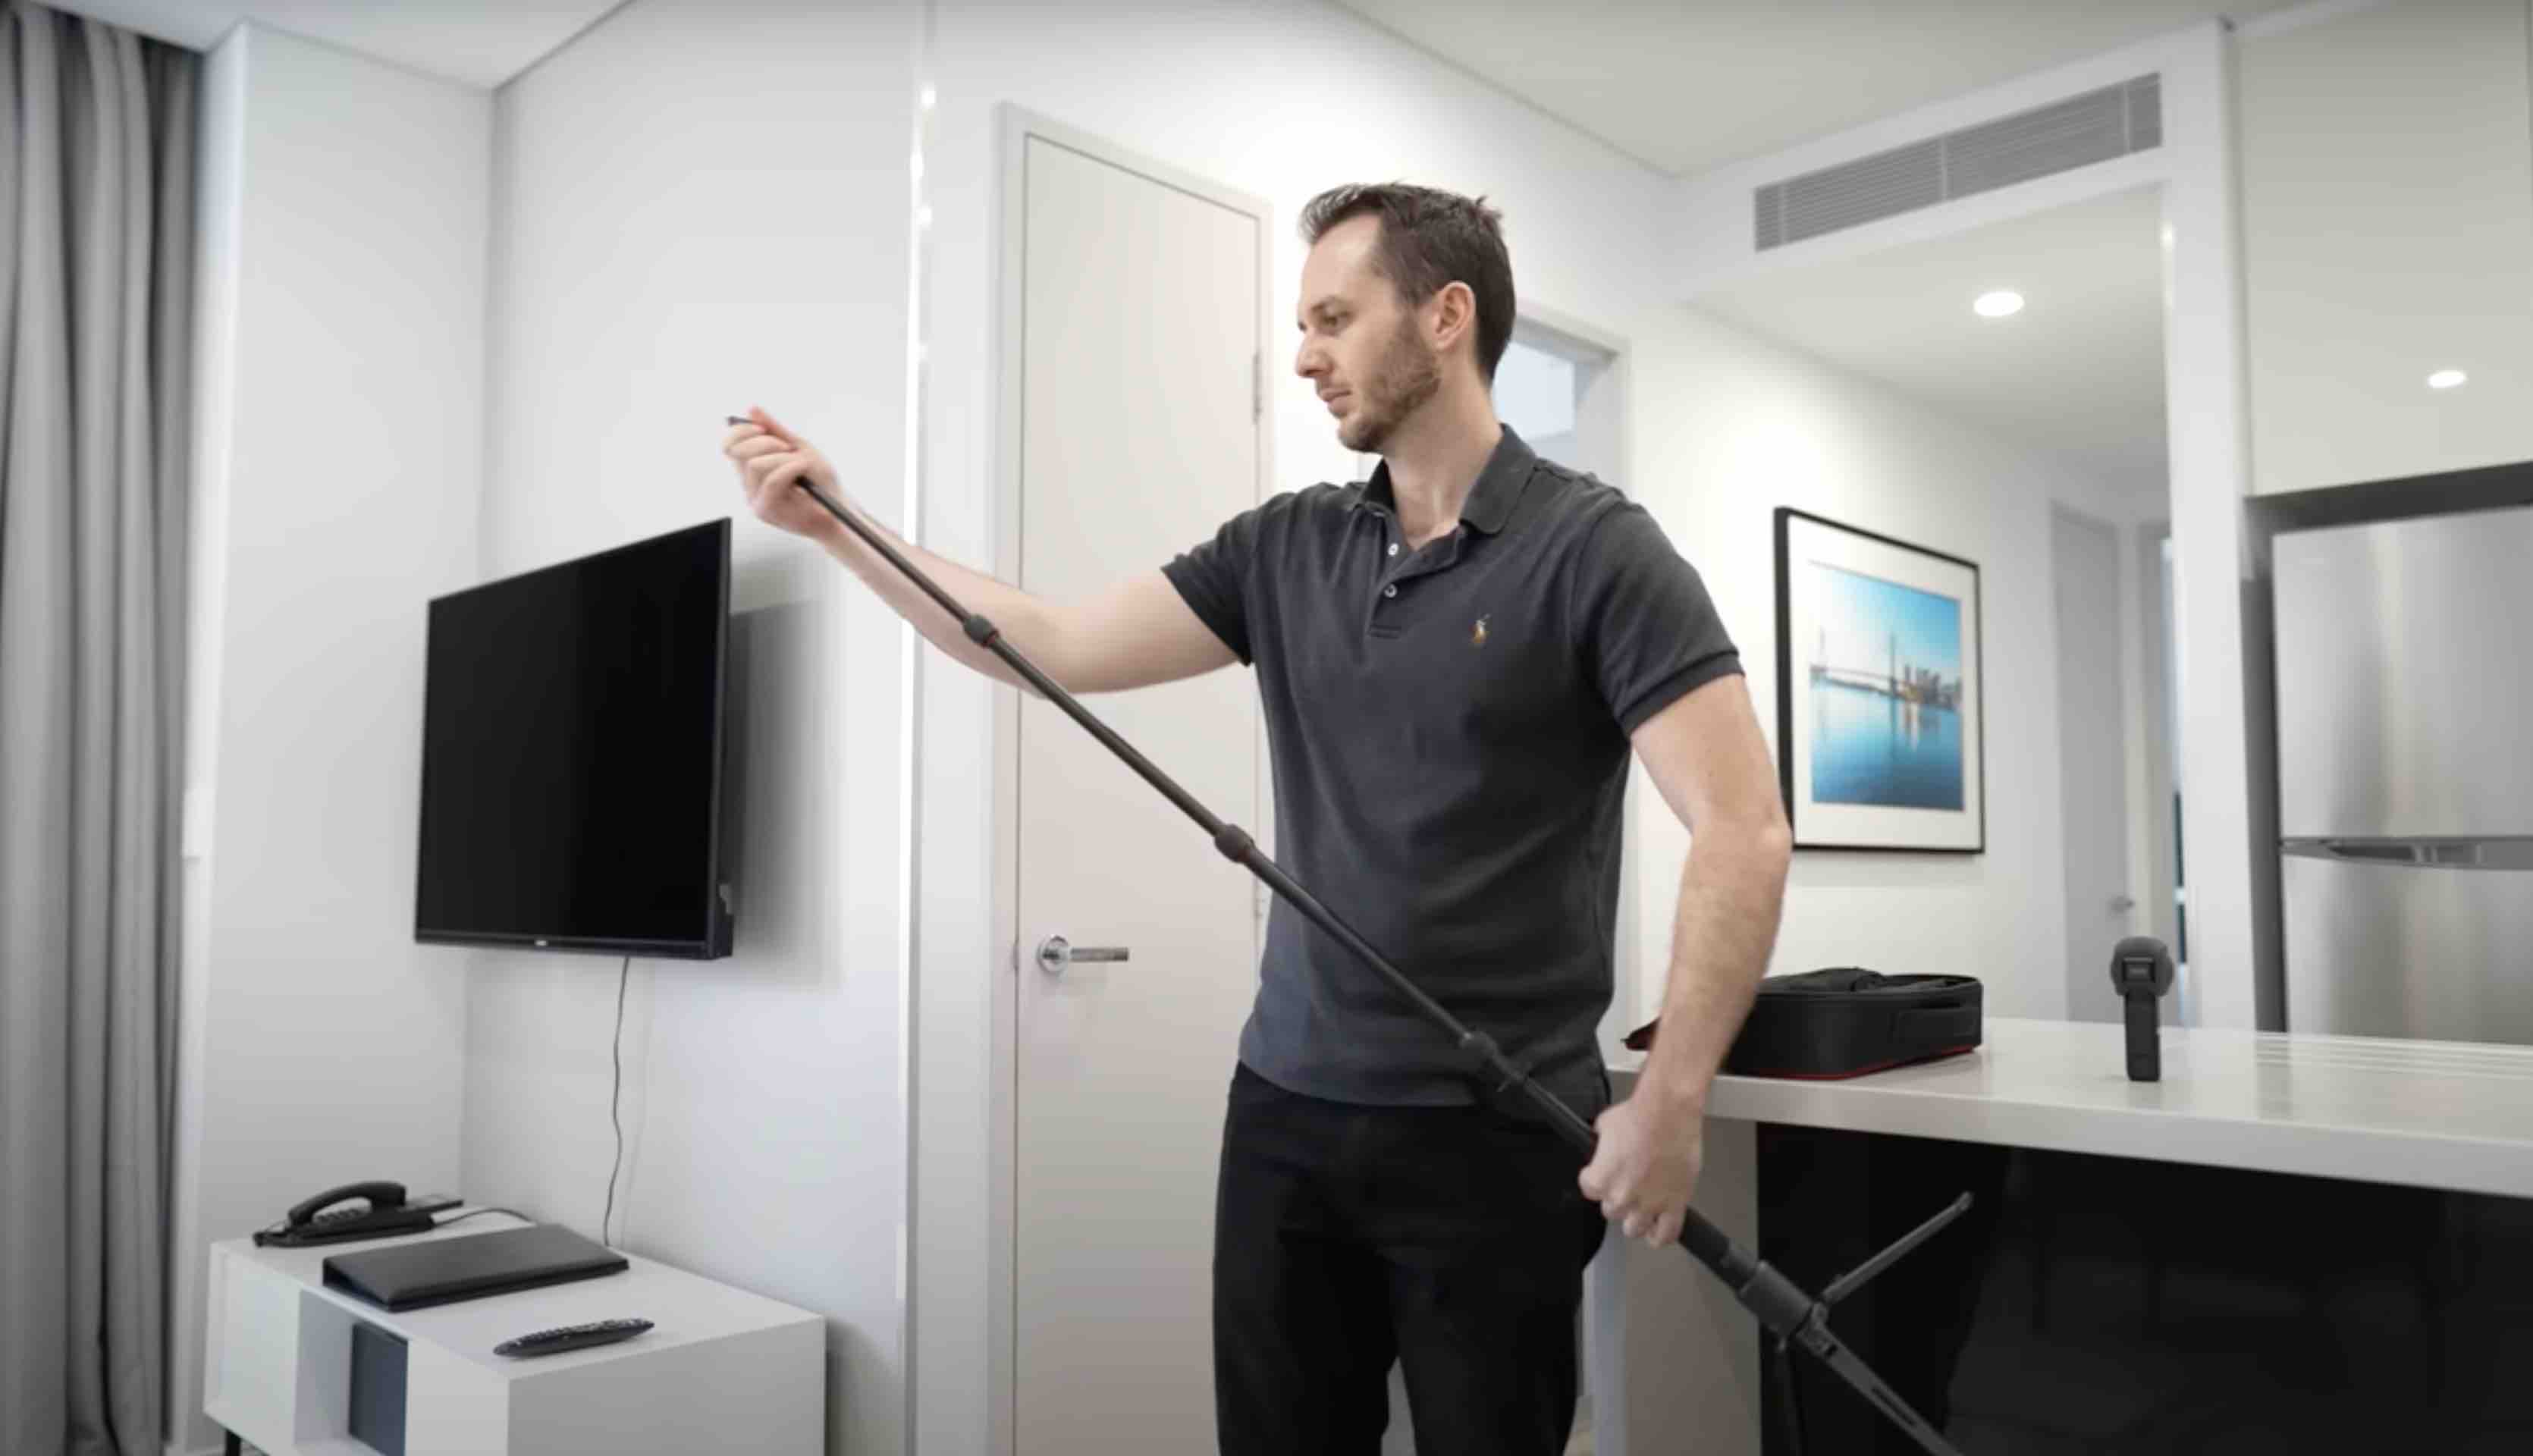
👉 The brand new Bushman Monopod Pro isn’t the cheapest option out there but they are a high quality piece of gear if you've got a budget of around a thousand dollars. You can definitely use a cheaper camera and monopod if you prefer to keep costs down.
Step 4: Final checks ✅
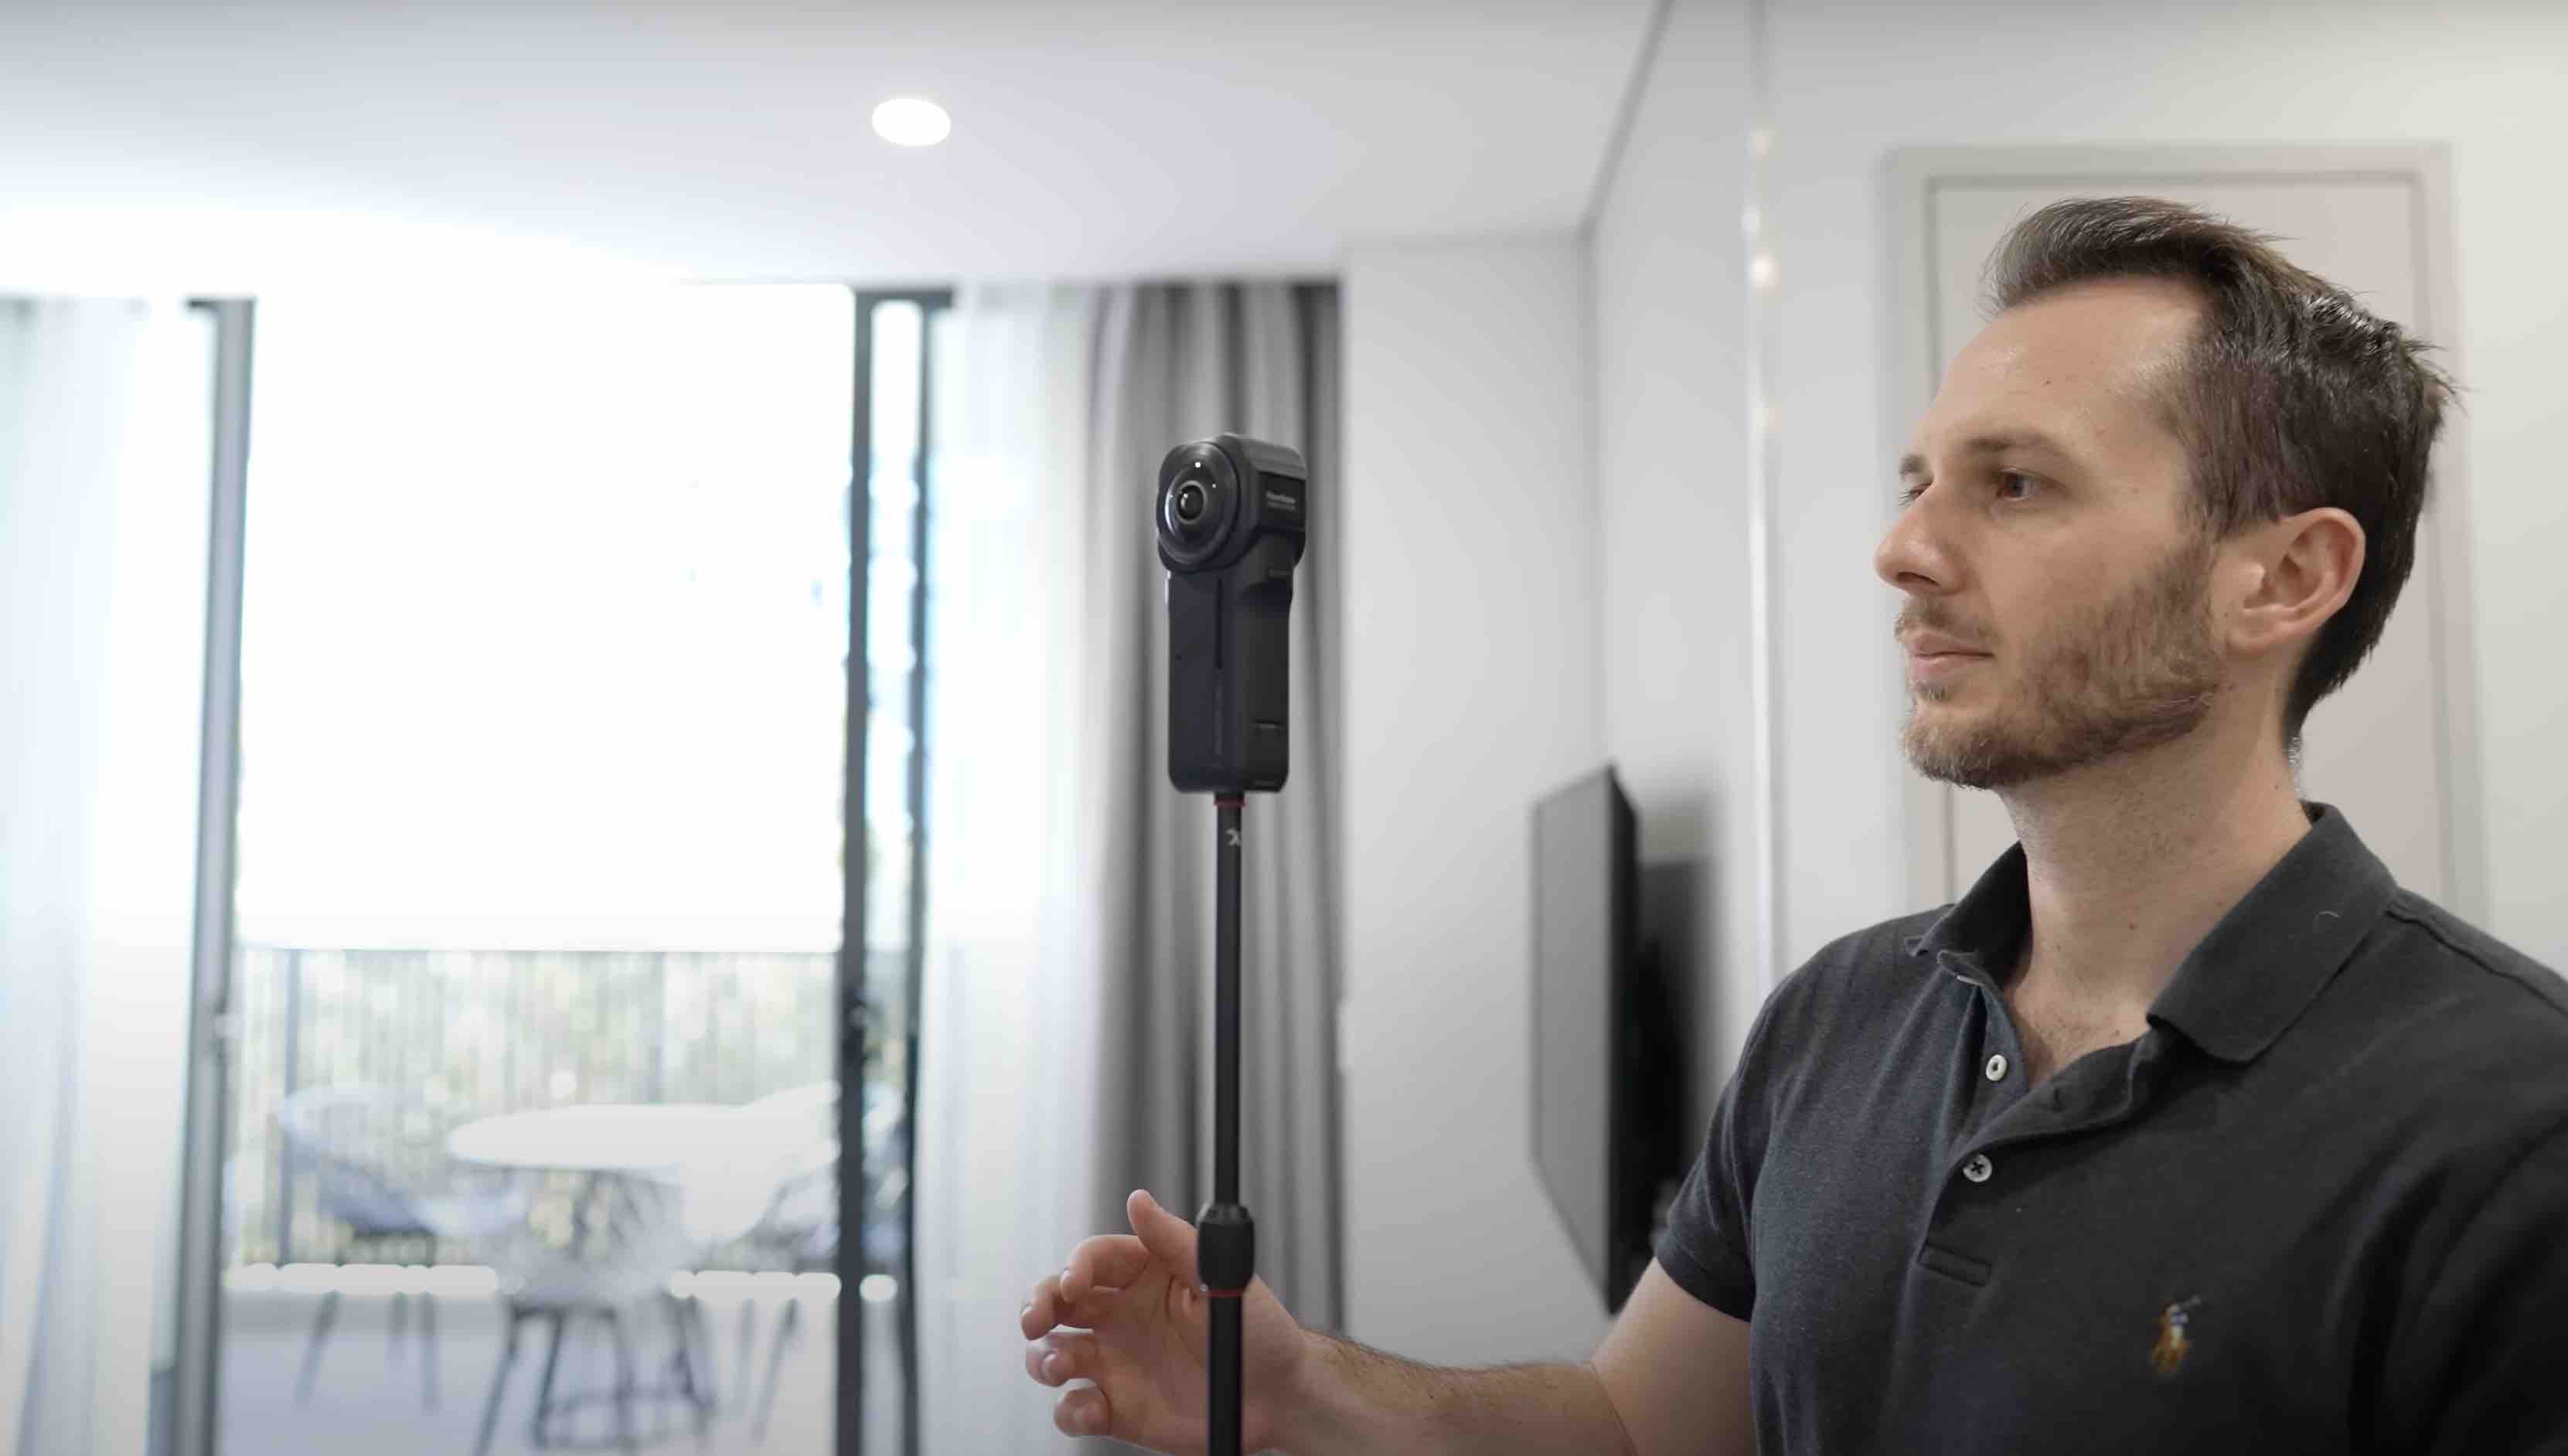
👉 Once you've assembled the monopod and attached your camera you'll want to double check that it's perfectly straight and level. It's a good idea to clean the lens with the lens cloth that came for free with the camera, because who wants smudges in their shots?
Step 5: Choose Your Settings ⚙️
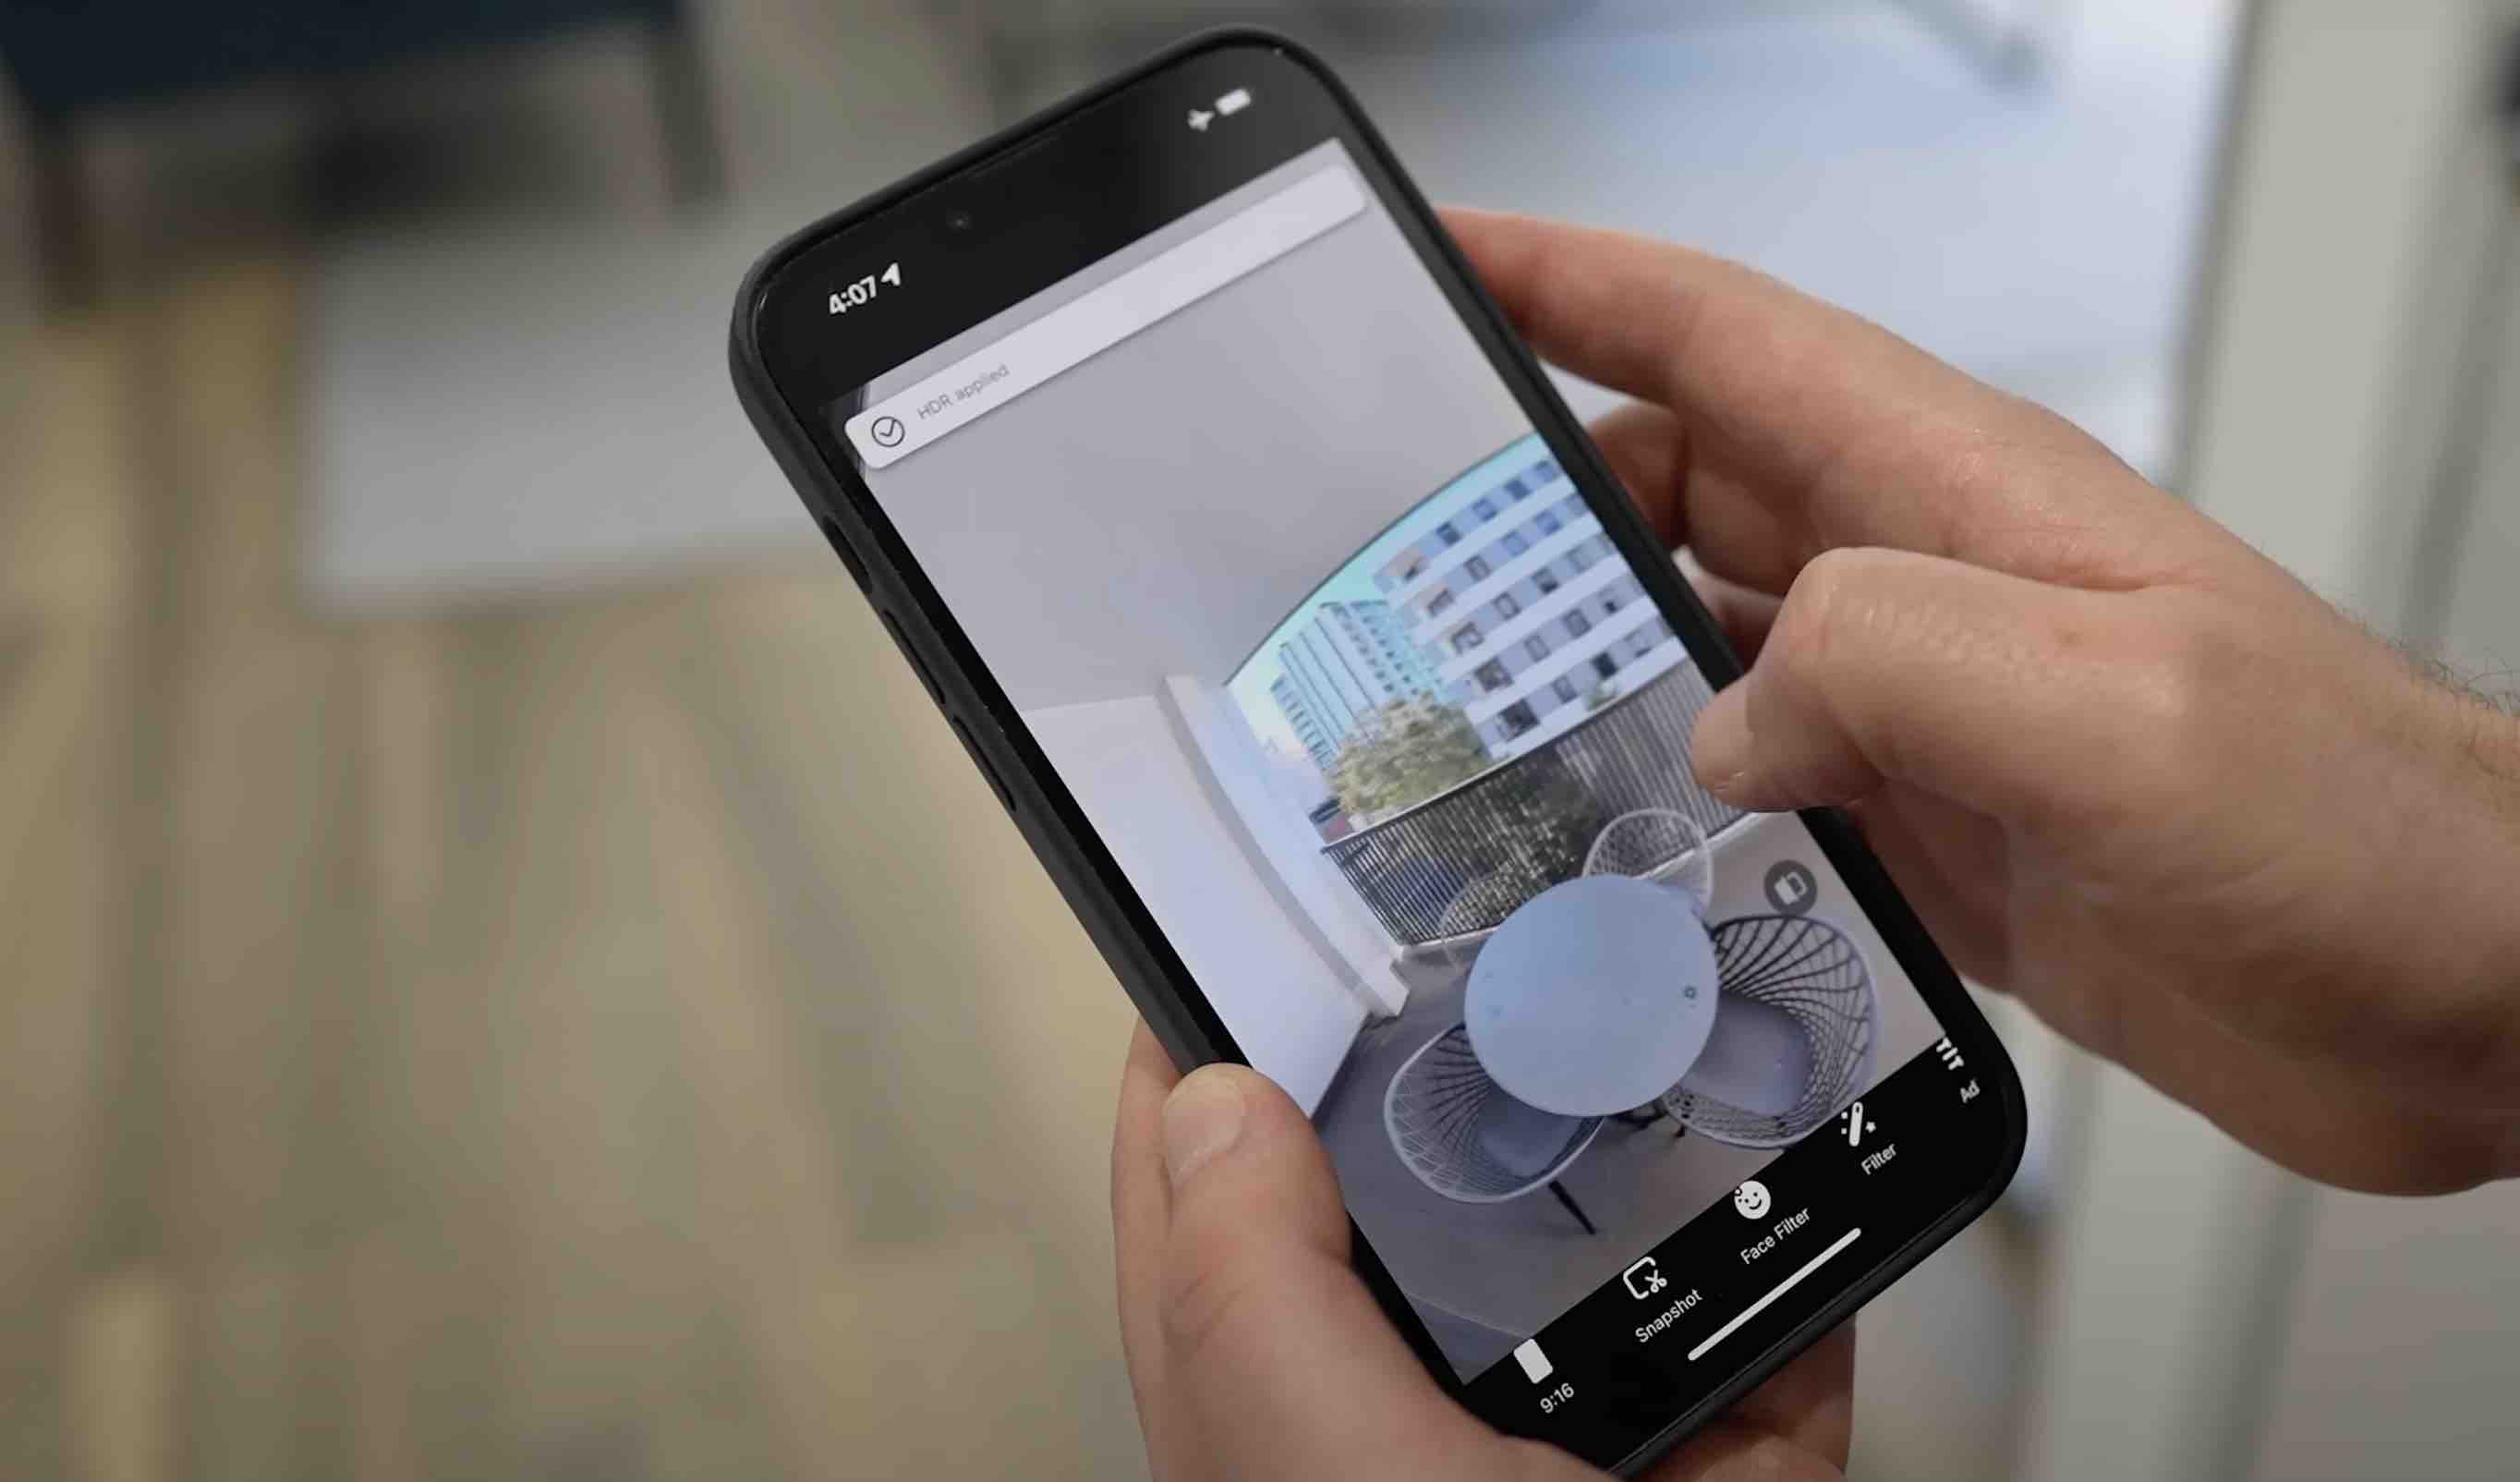
👉 Now that the setup is done, it's time to choose the best shooting settings and there are two ways to change your settings. The first one being on the camera and the second is via your phone.
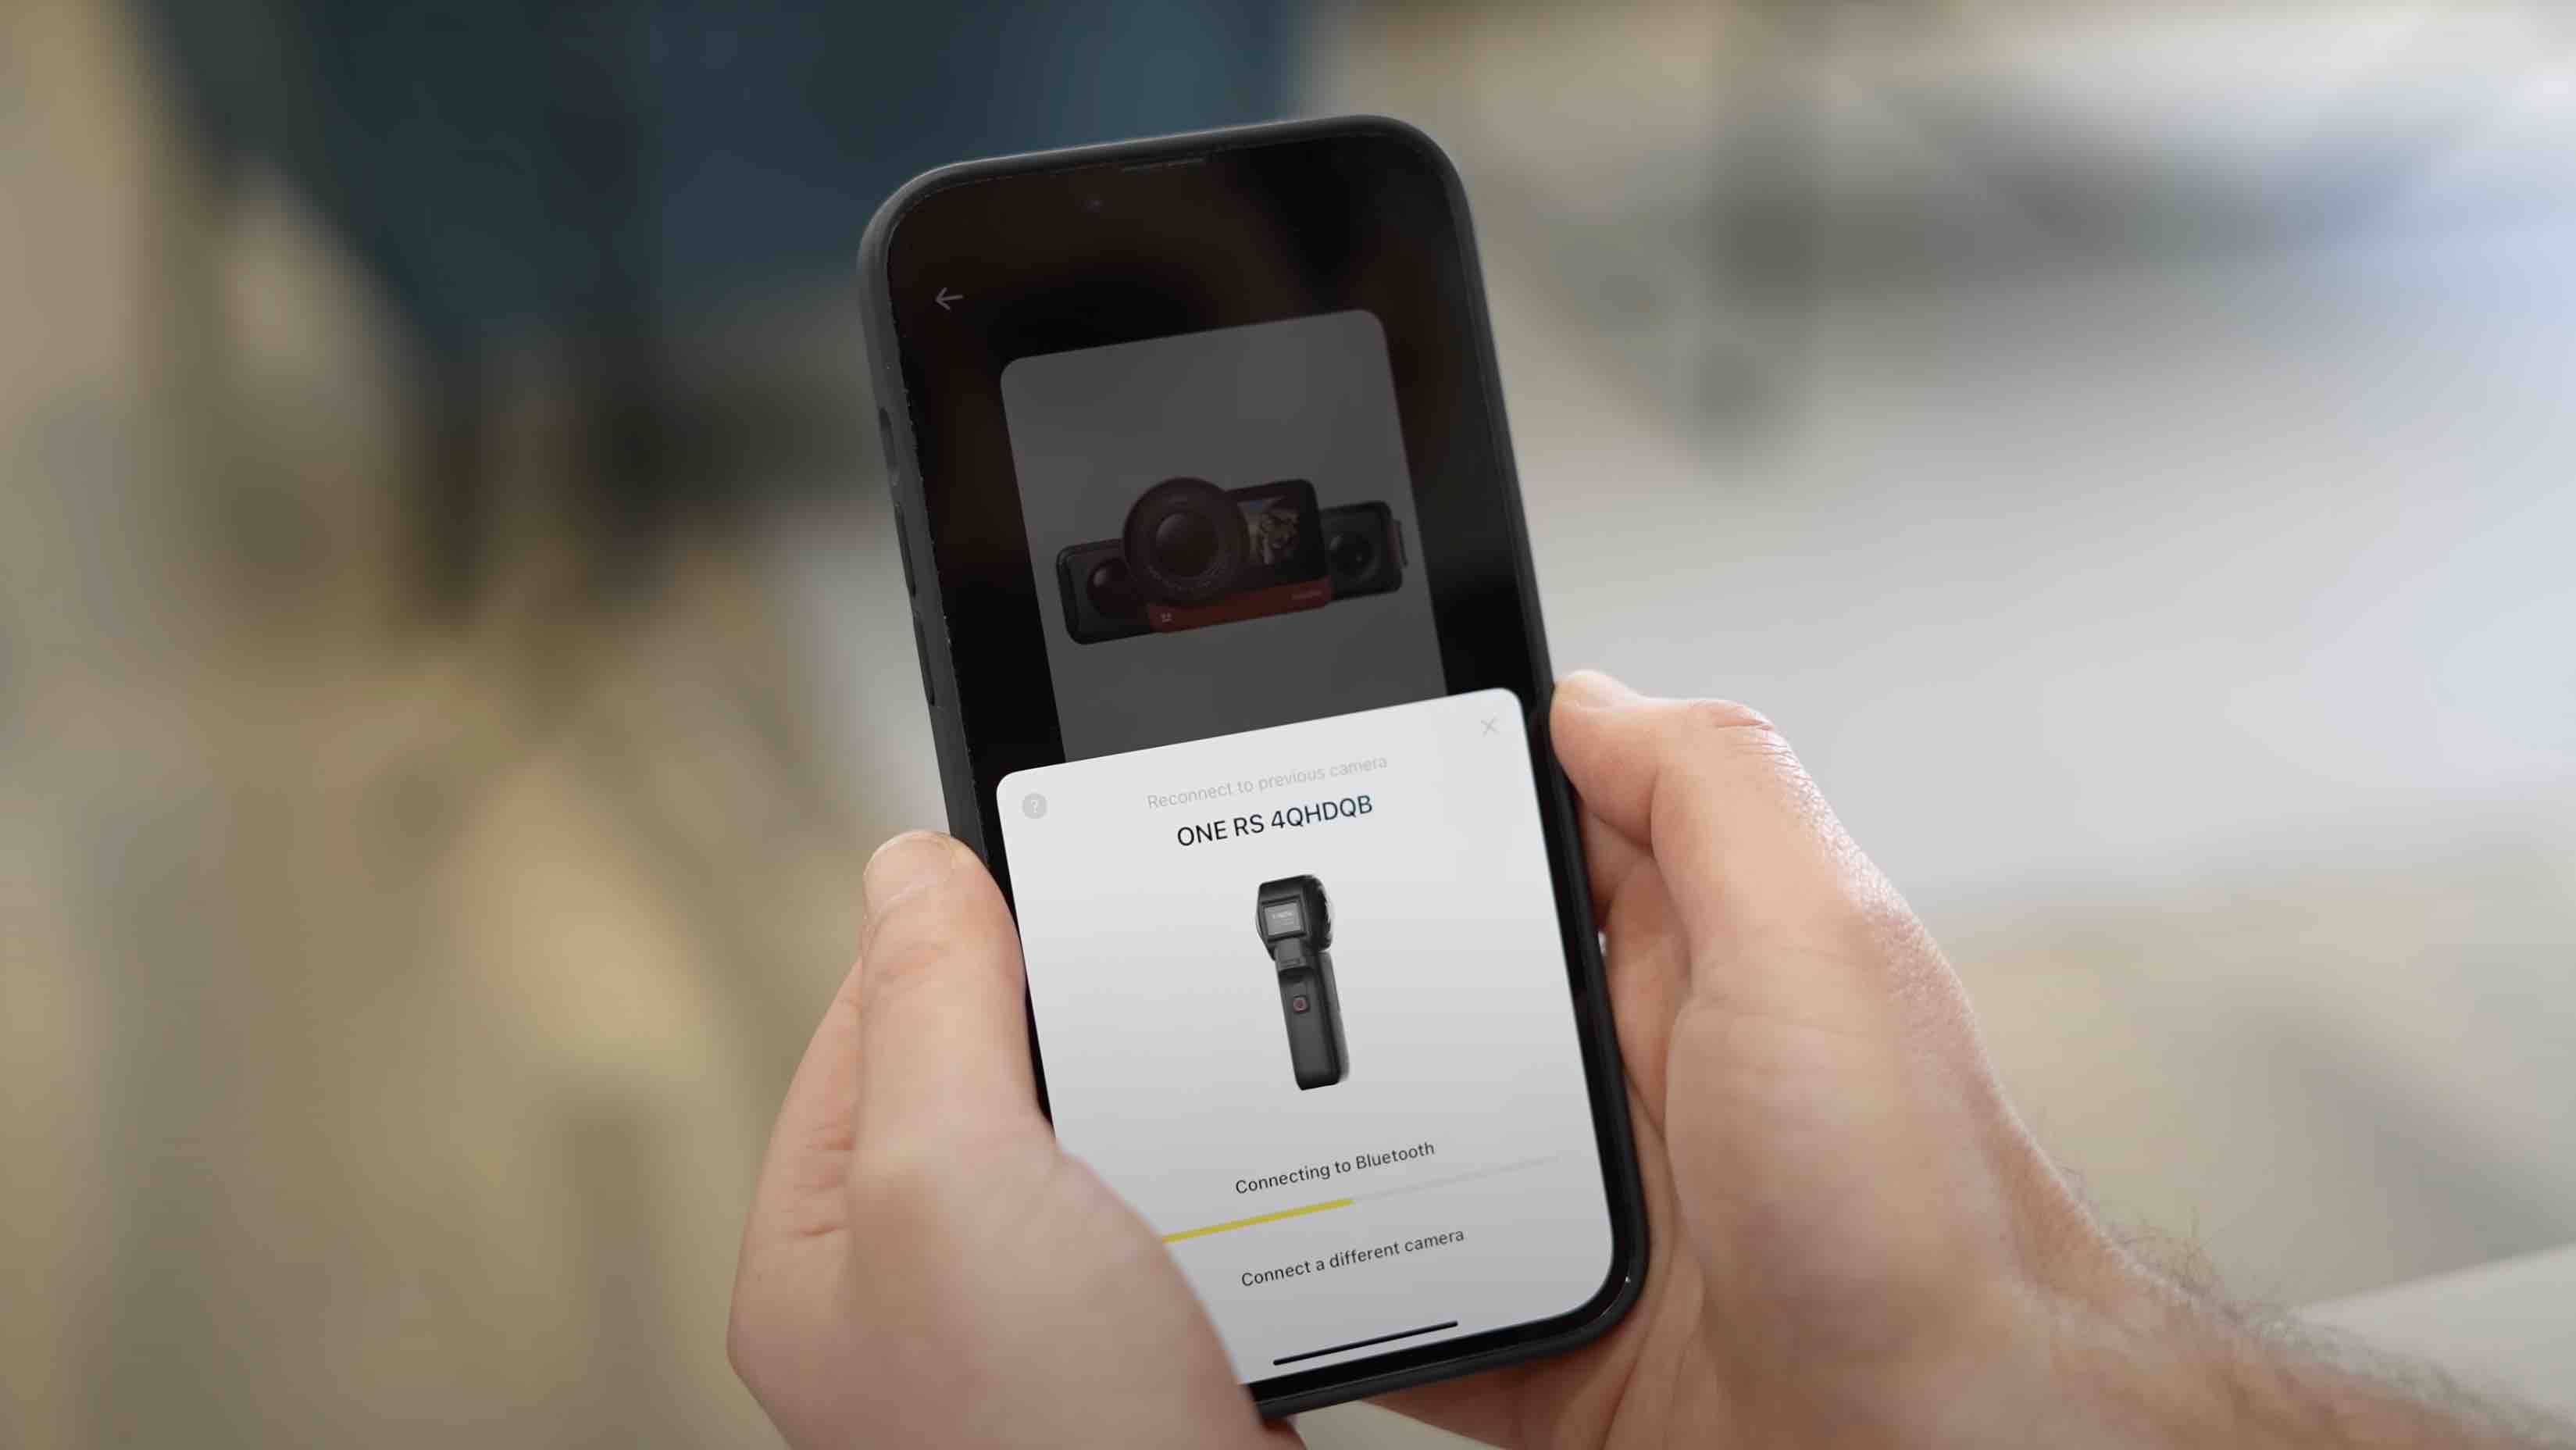
👉 I find with the 1-inch that the screen is a bit too small, which is why instead I connect to the camera through my phone to take advantage of the much bigger phone screen. This will make changing your settings and activating your shots so much quicker.
So, which shooting settings should you use? 🤔
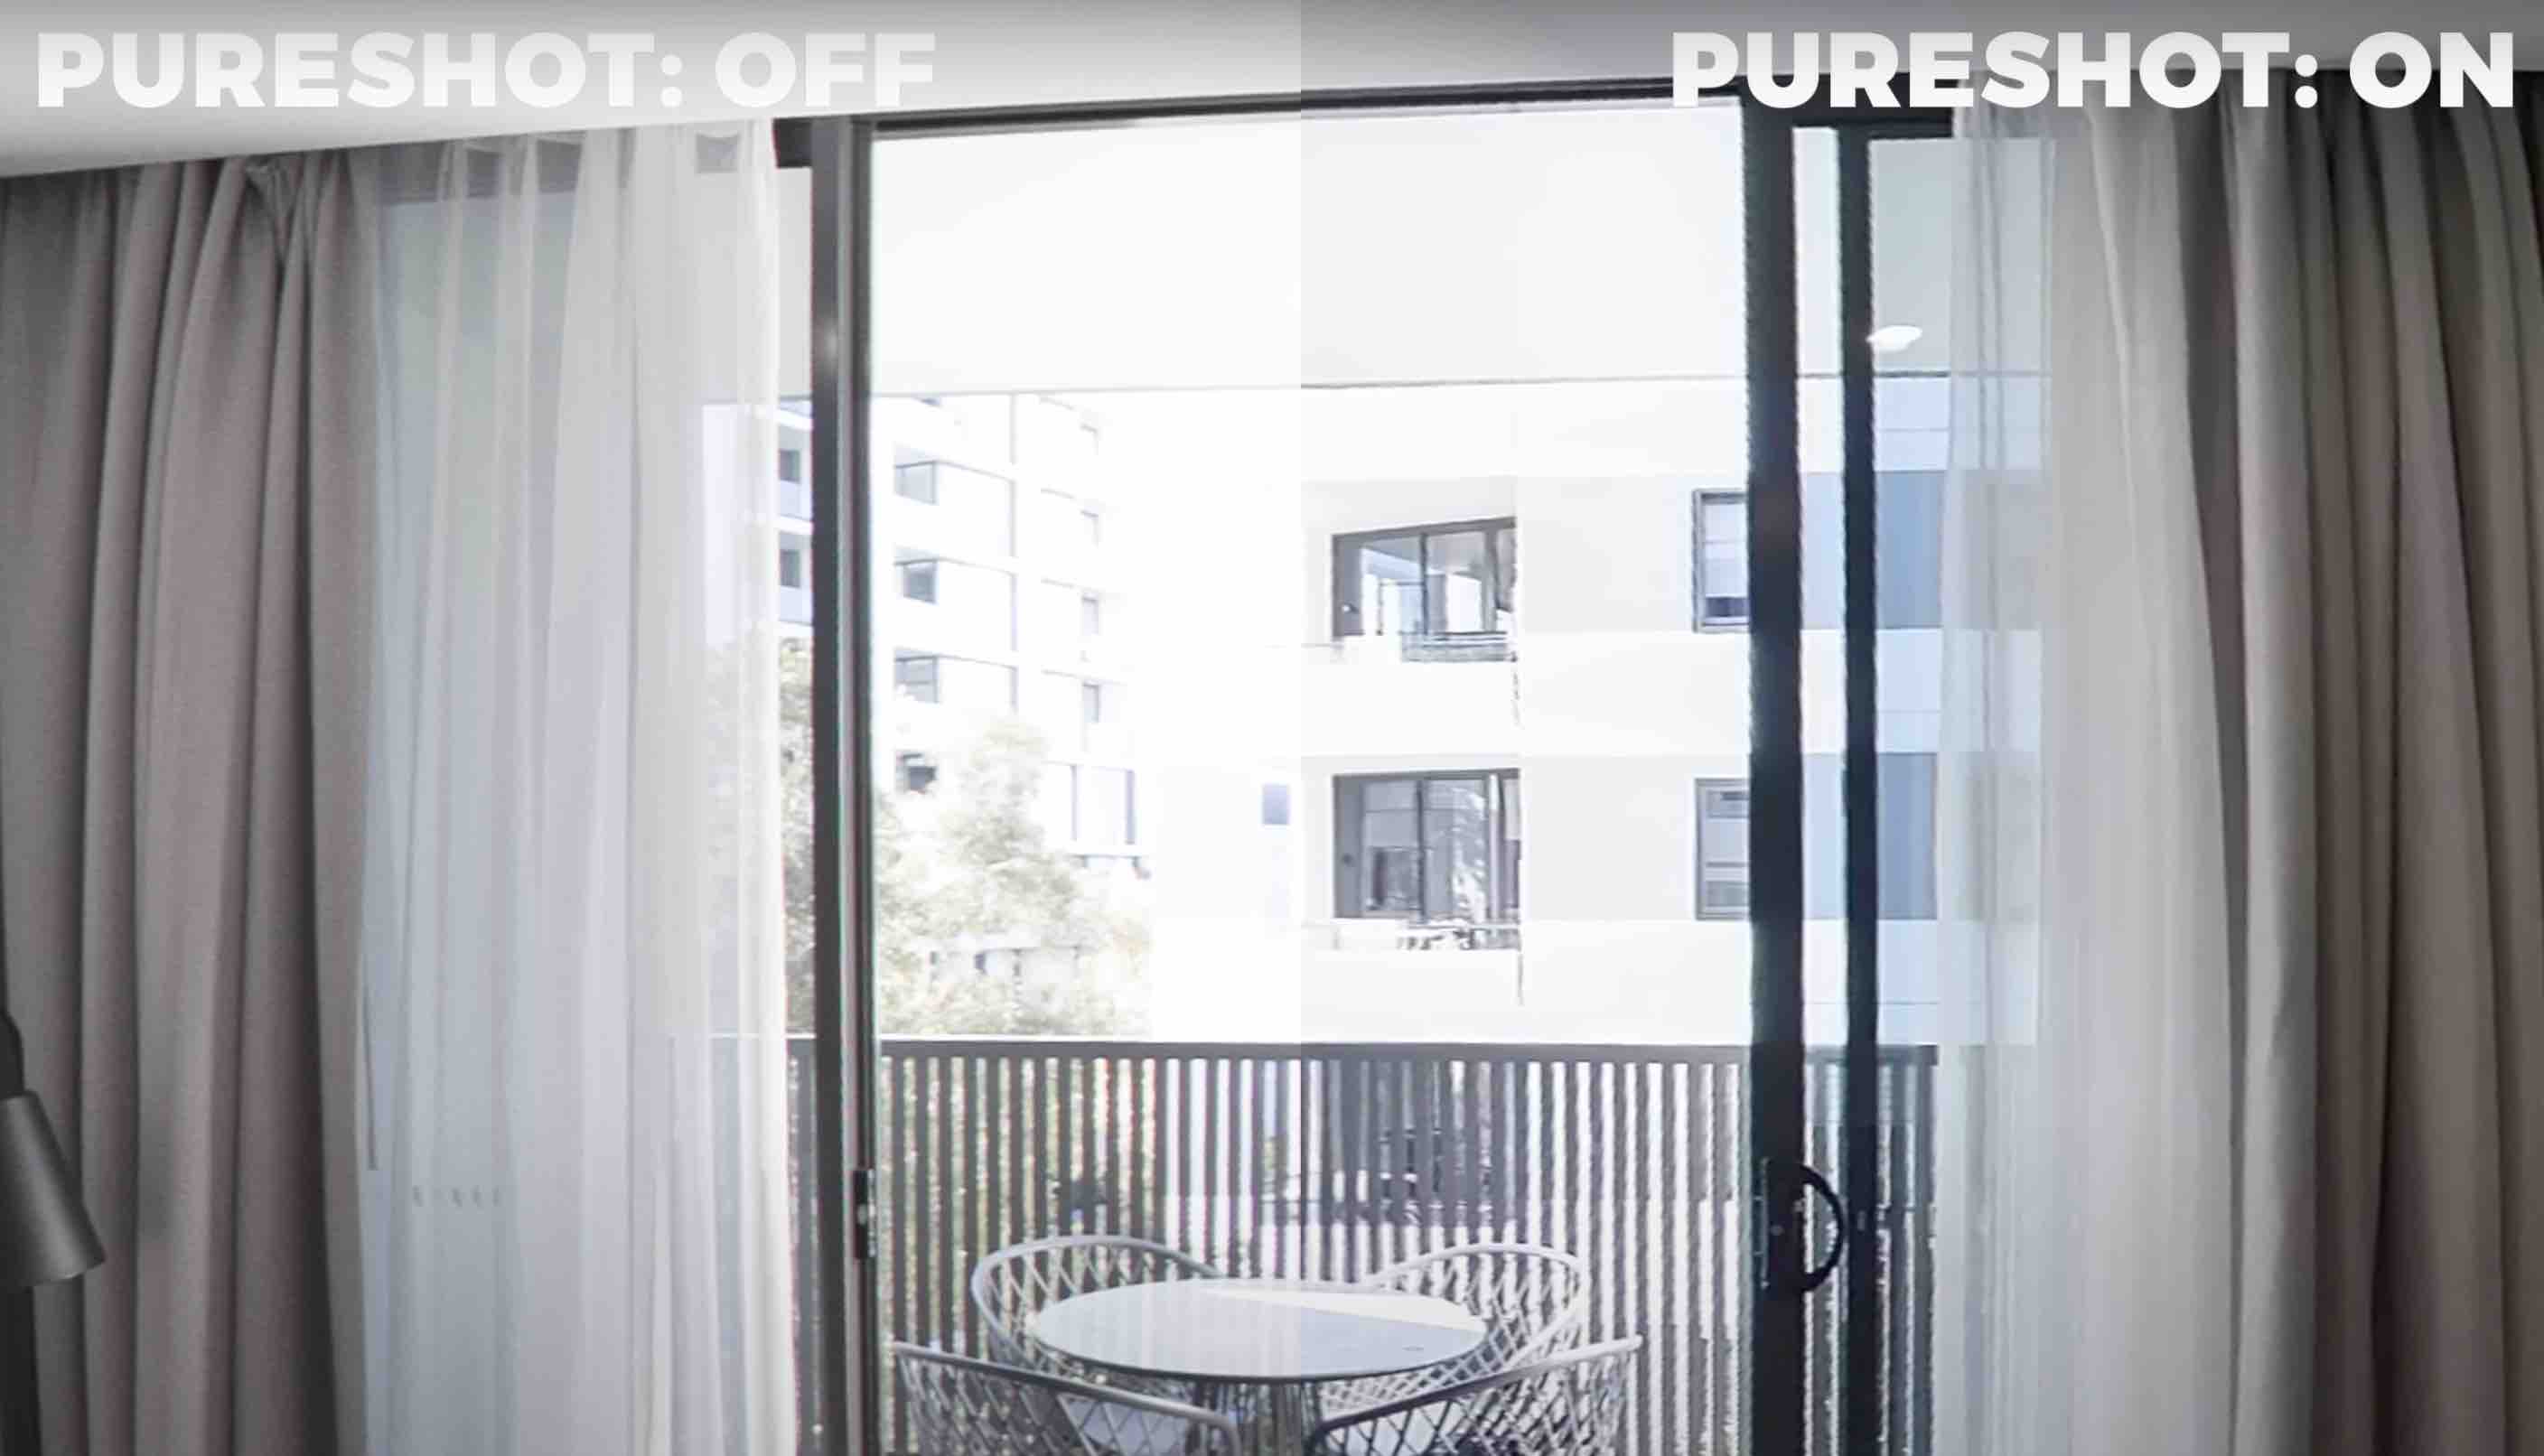
👉 The first place to start and this is something that is unique only to Insta360 cameras, is PureShot mode. They released PureShot mode around two years ago and this essentially enhances the dynamic range of photos through taking multiple shots and combining them into one while also reducing noise and preserving detail, resulting in a much more vibrant image.

👉 If you own the X3 or One X2 you'll want to use PureShot mode as well as with the One R and One RS.
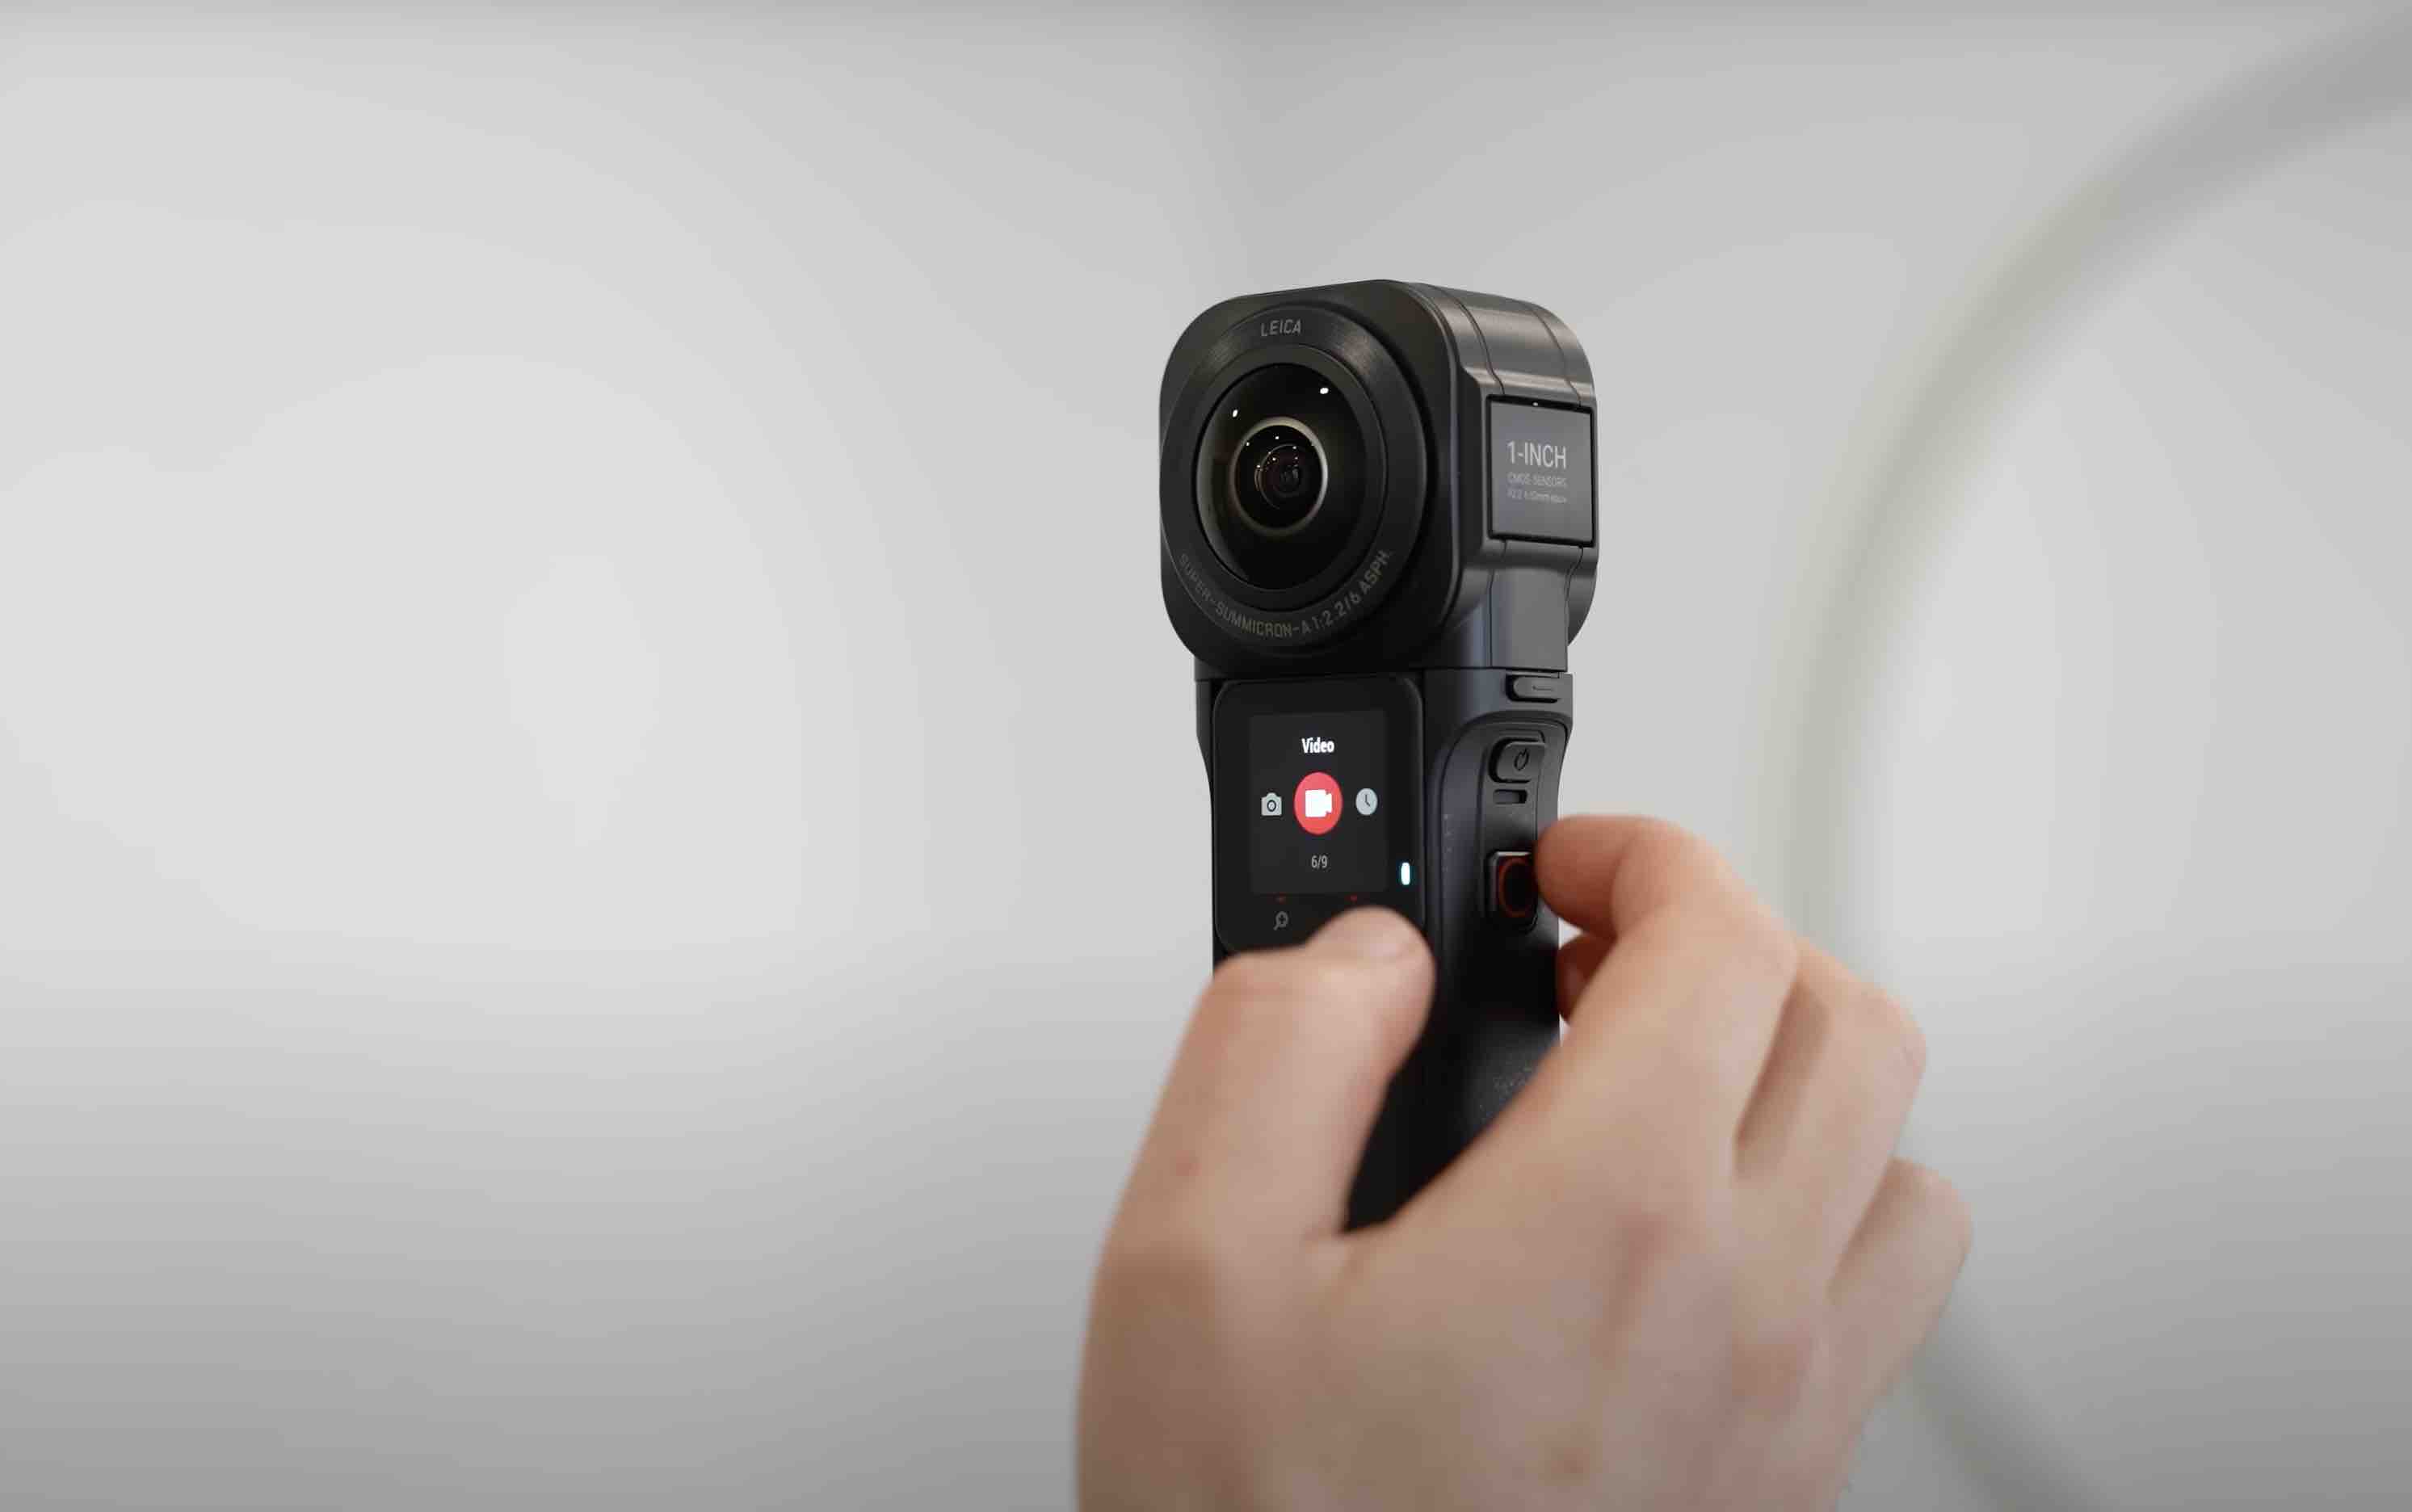
👉 The 1-inch has PureShot mode as well, however it does one up all the other Insta360 cameras in an even better PureShot mode which is called PureShot HDR.
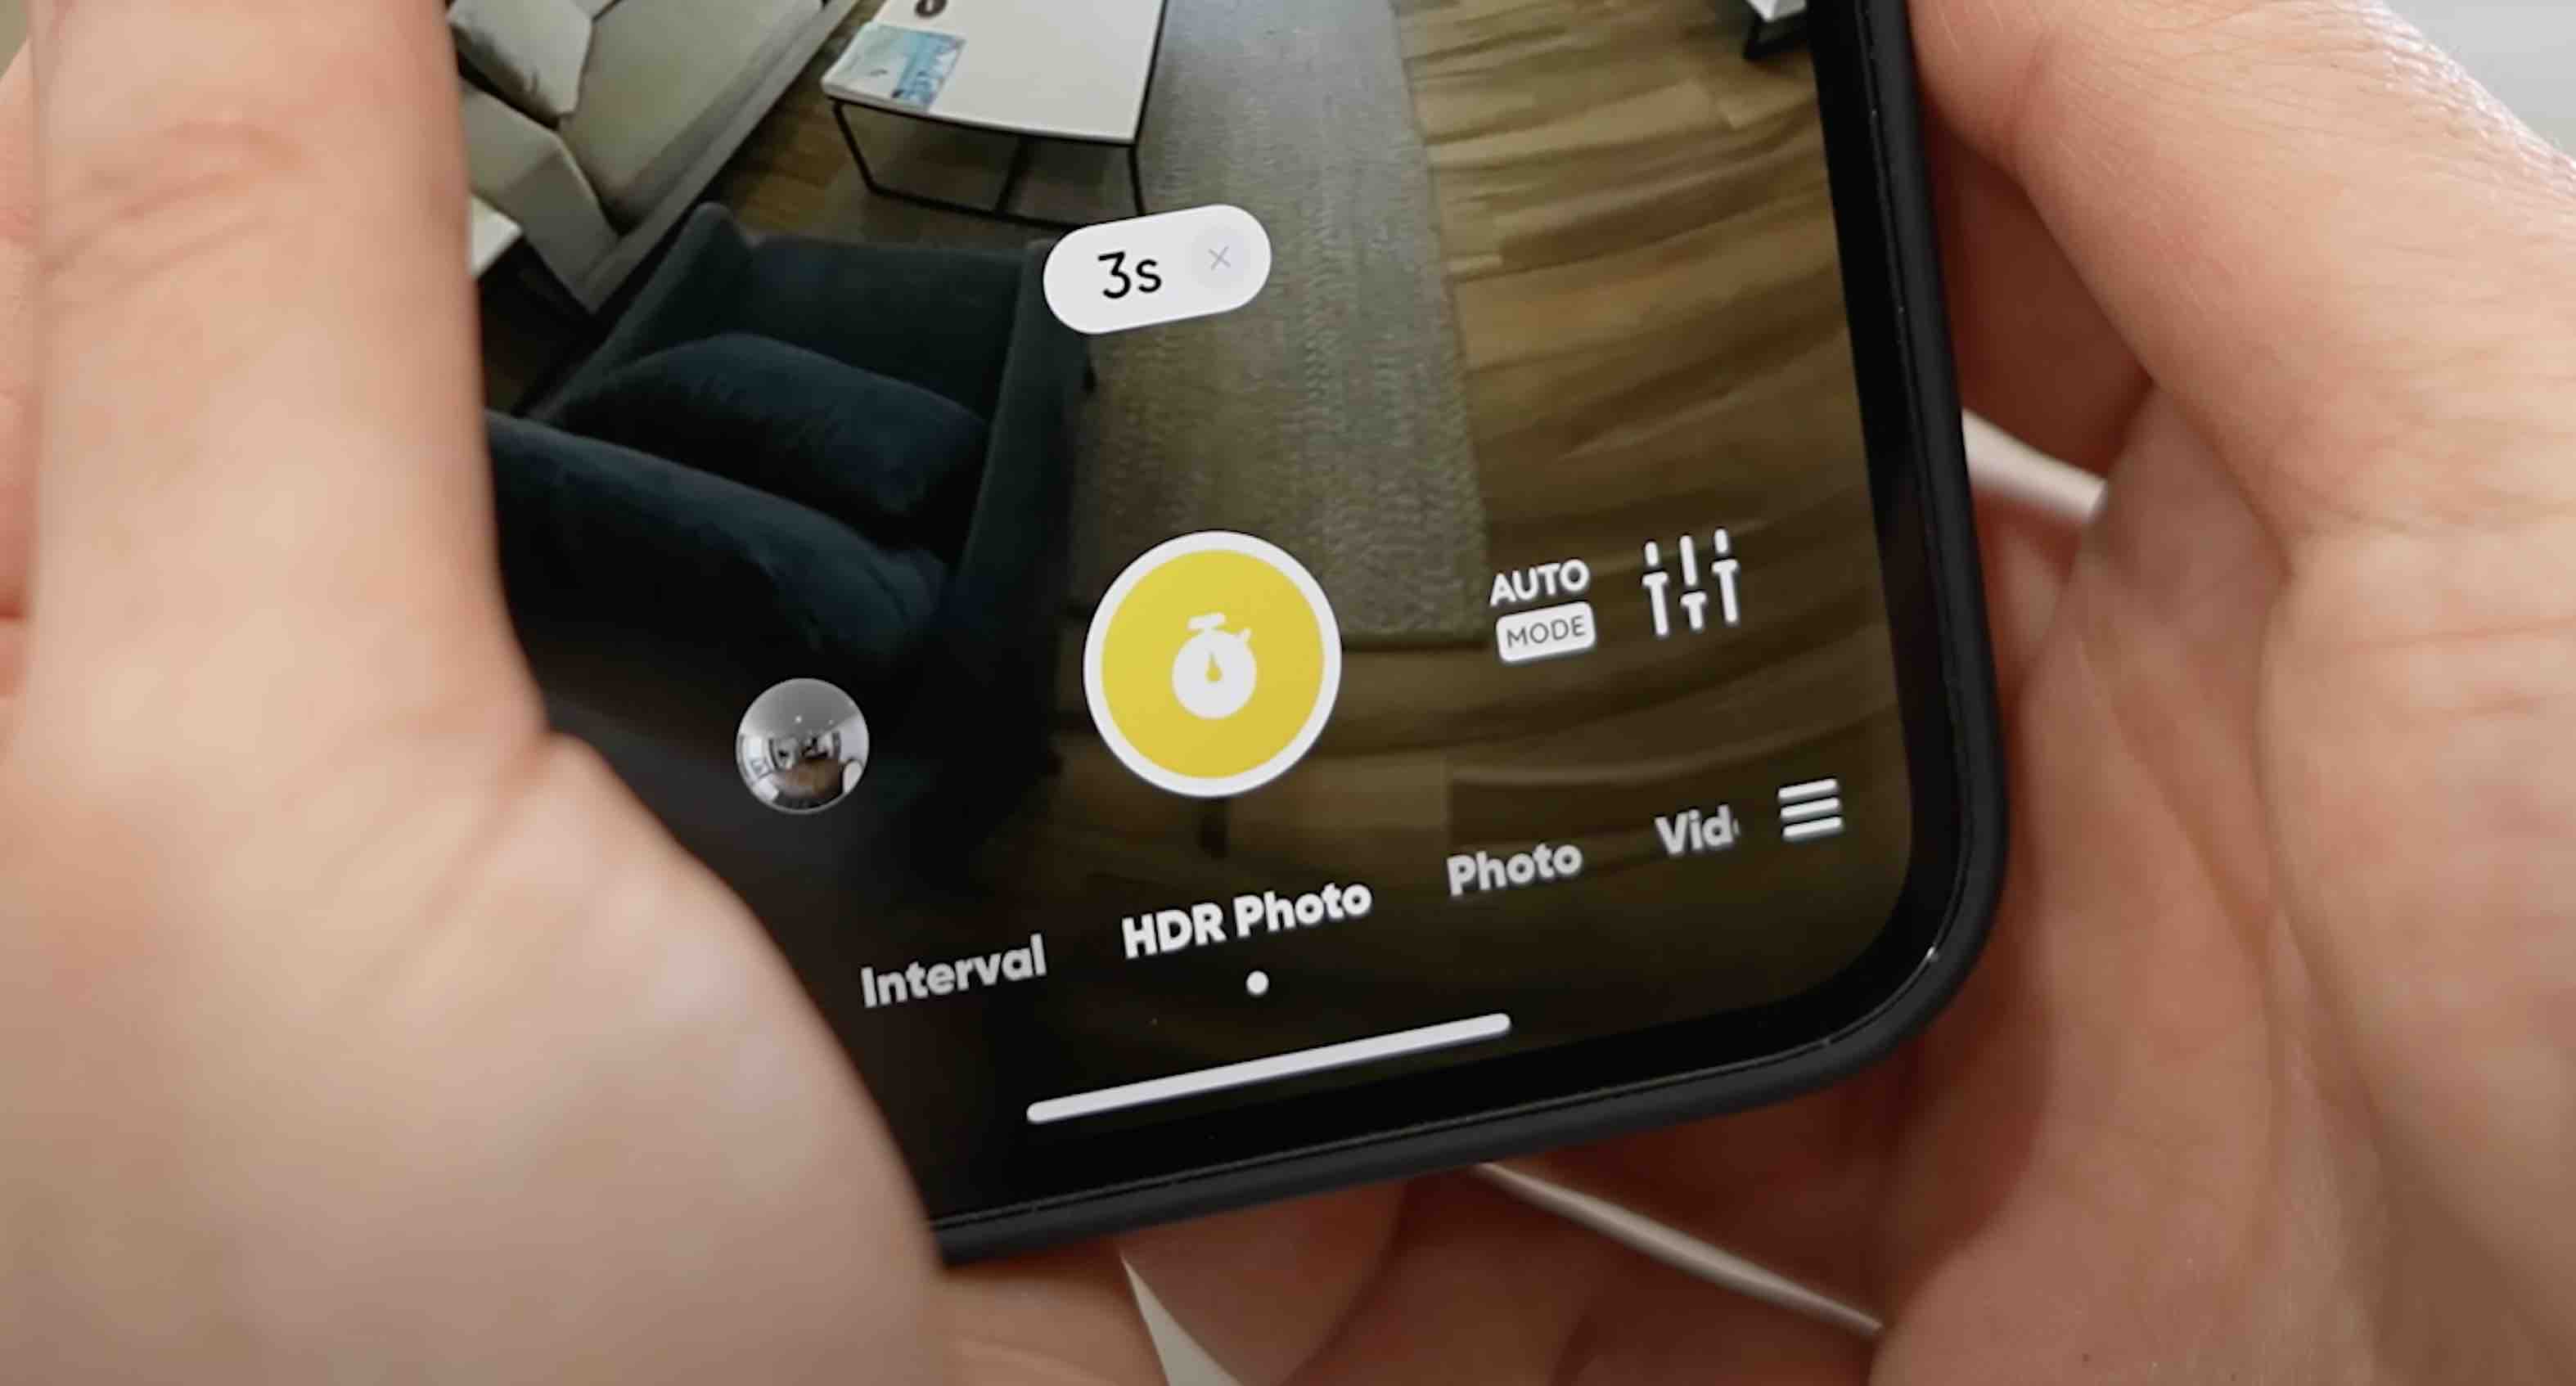
👉 PureShot HDR takes the PureShot that we were shooting before but this time it auto brackets the shots, meaning you can shoot anywhere from three to nine PureShot photos and have them combined into one ultra High Dynamic Range photo. Right now, the 1-inch is the only camera that has this feature. To activate it, go into HDR photo mode and up the top make sure PureShot is selected.
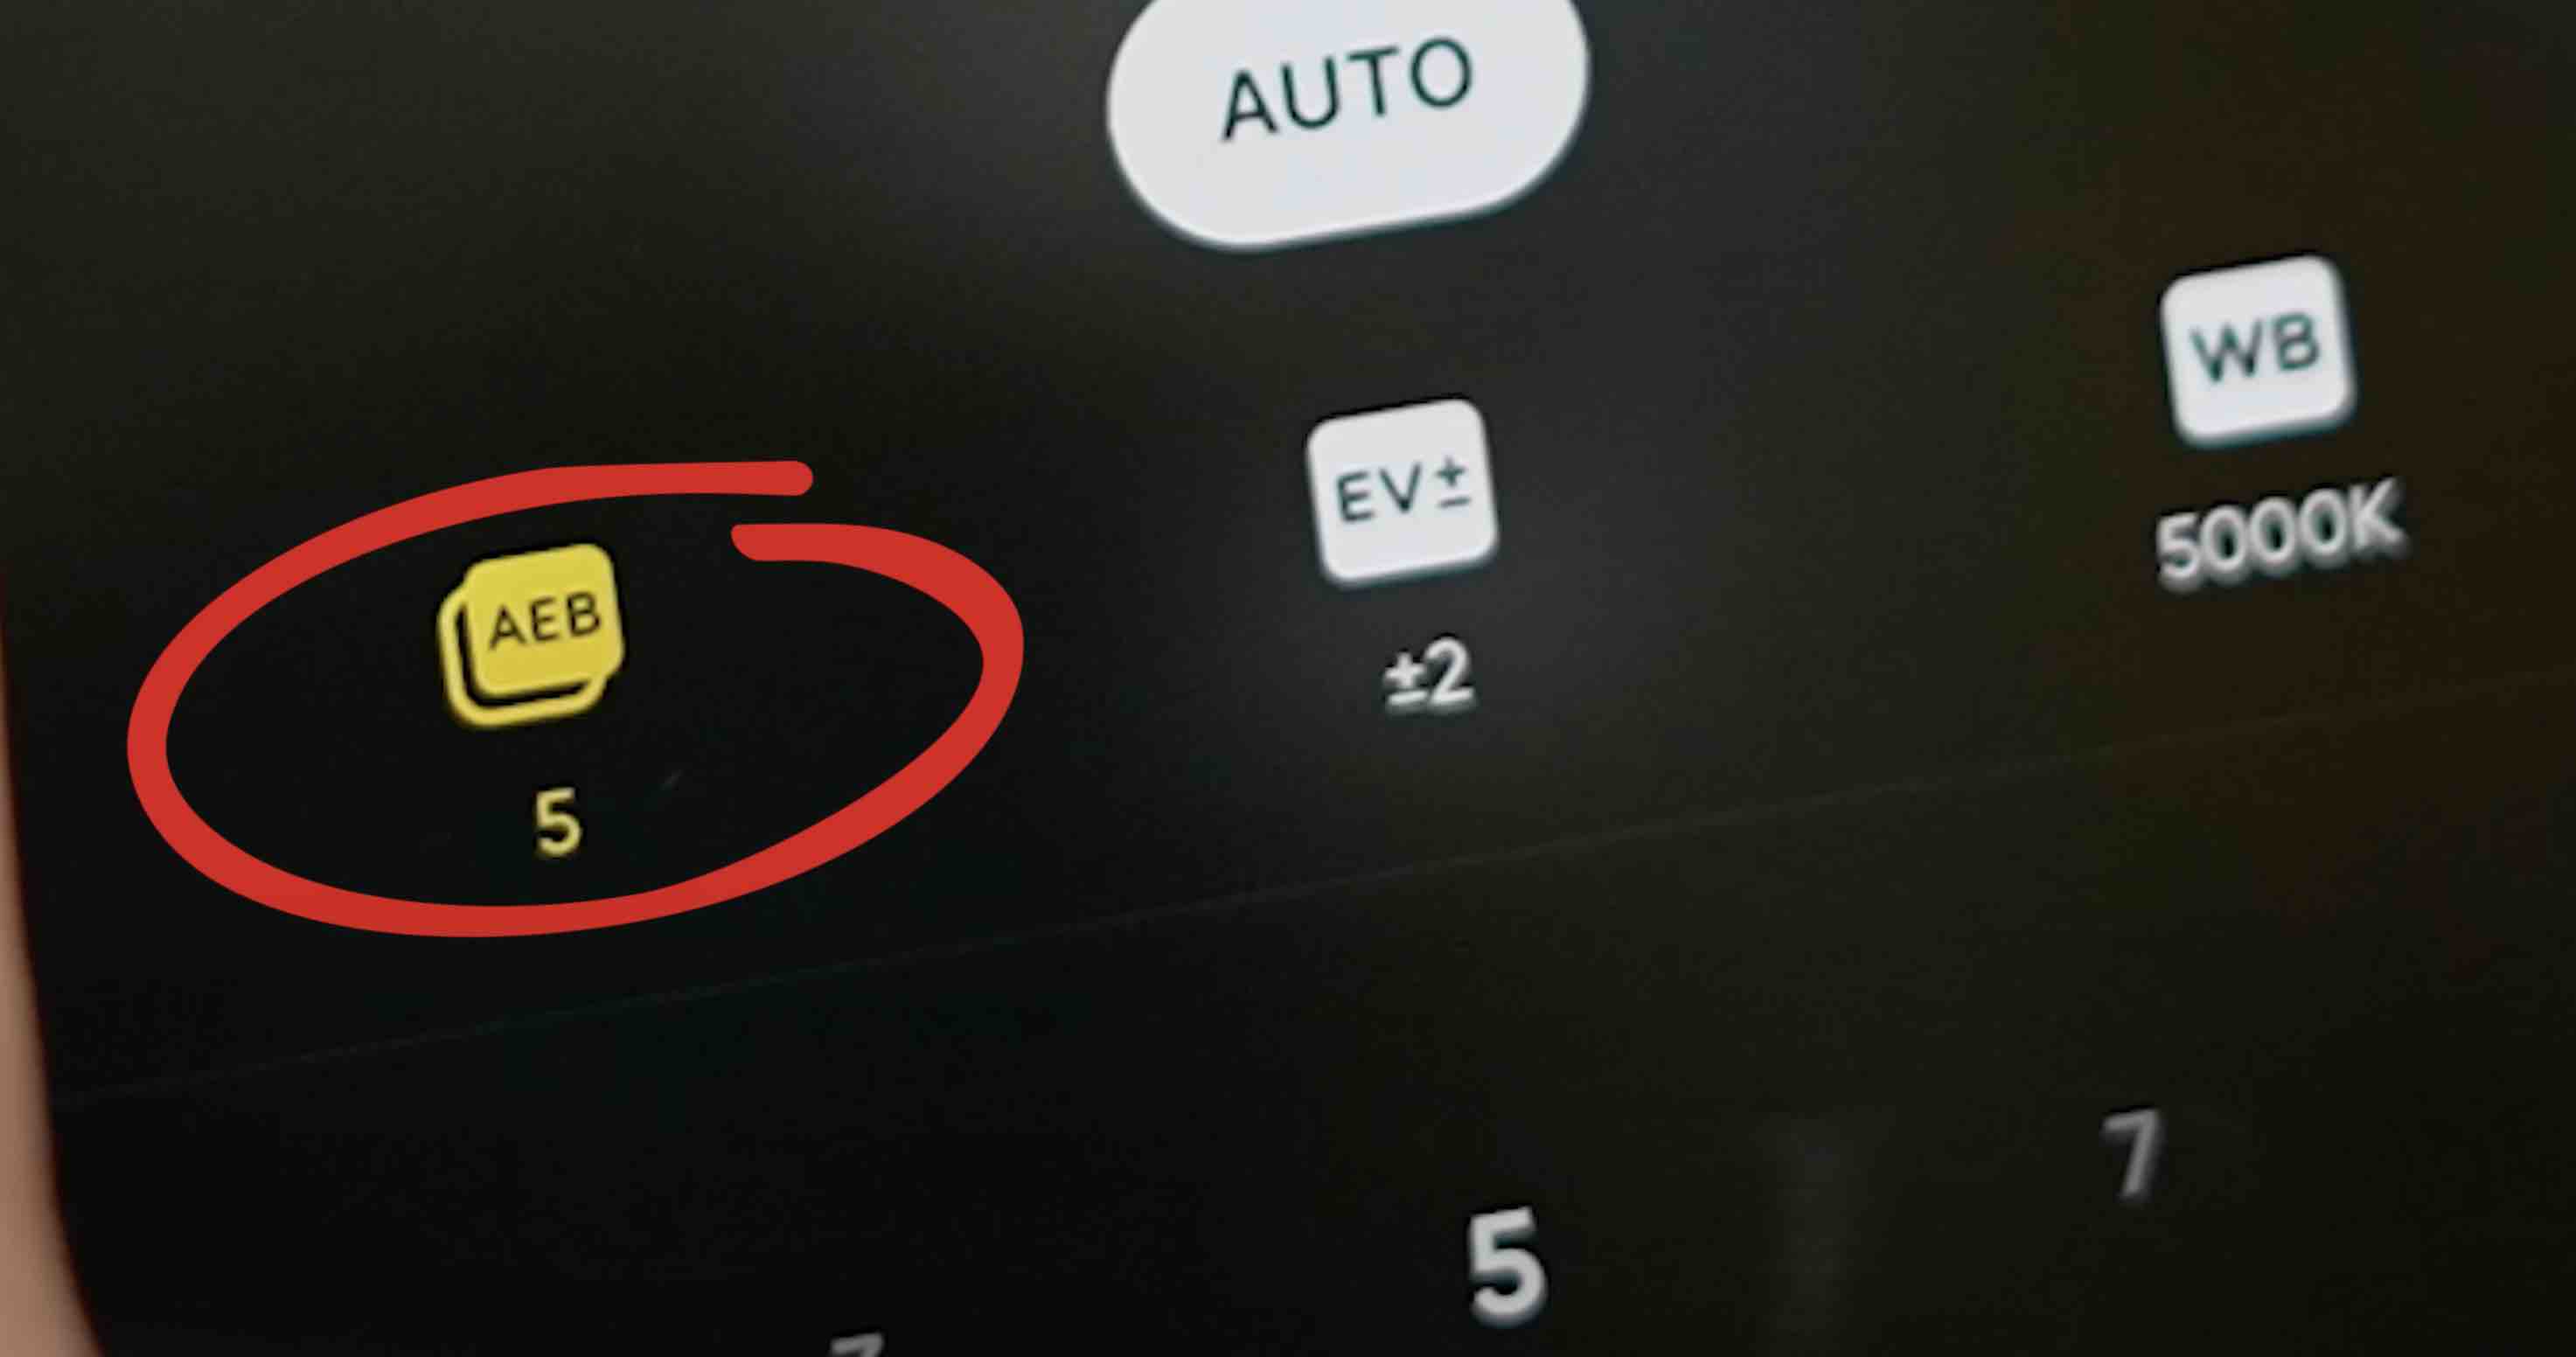
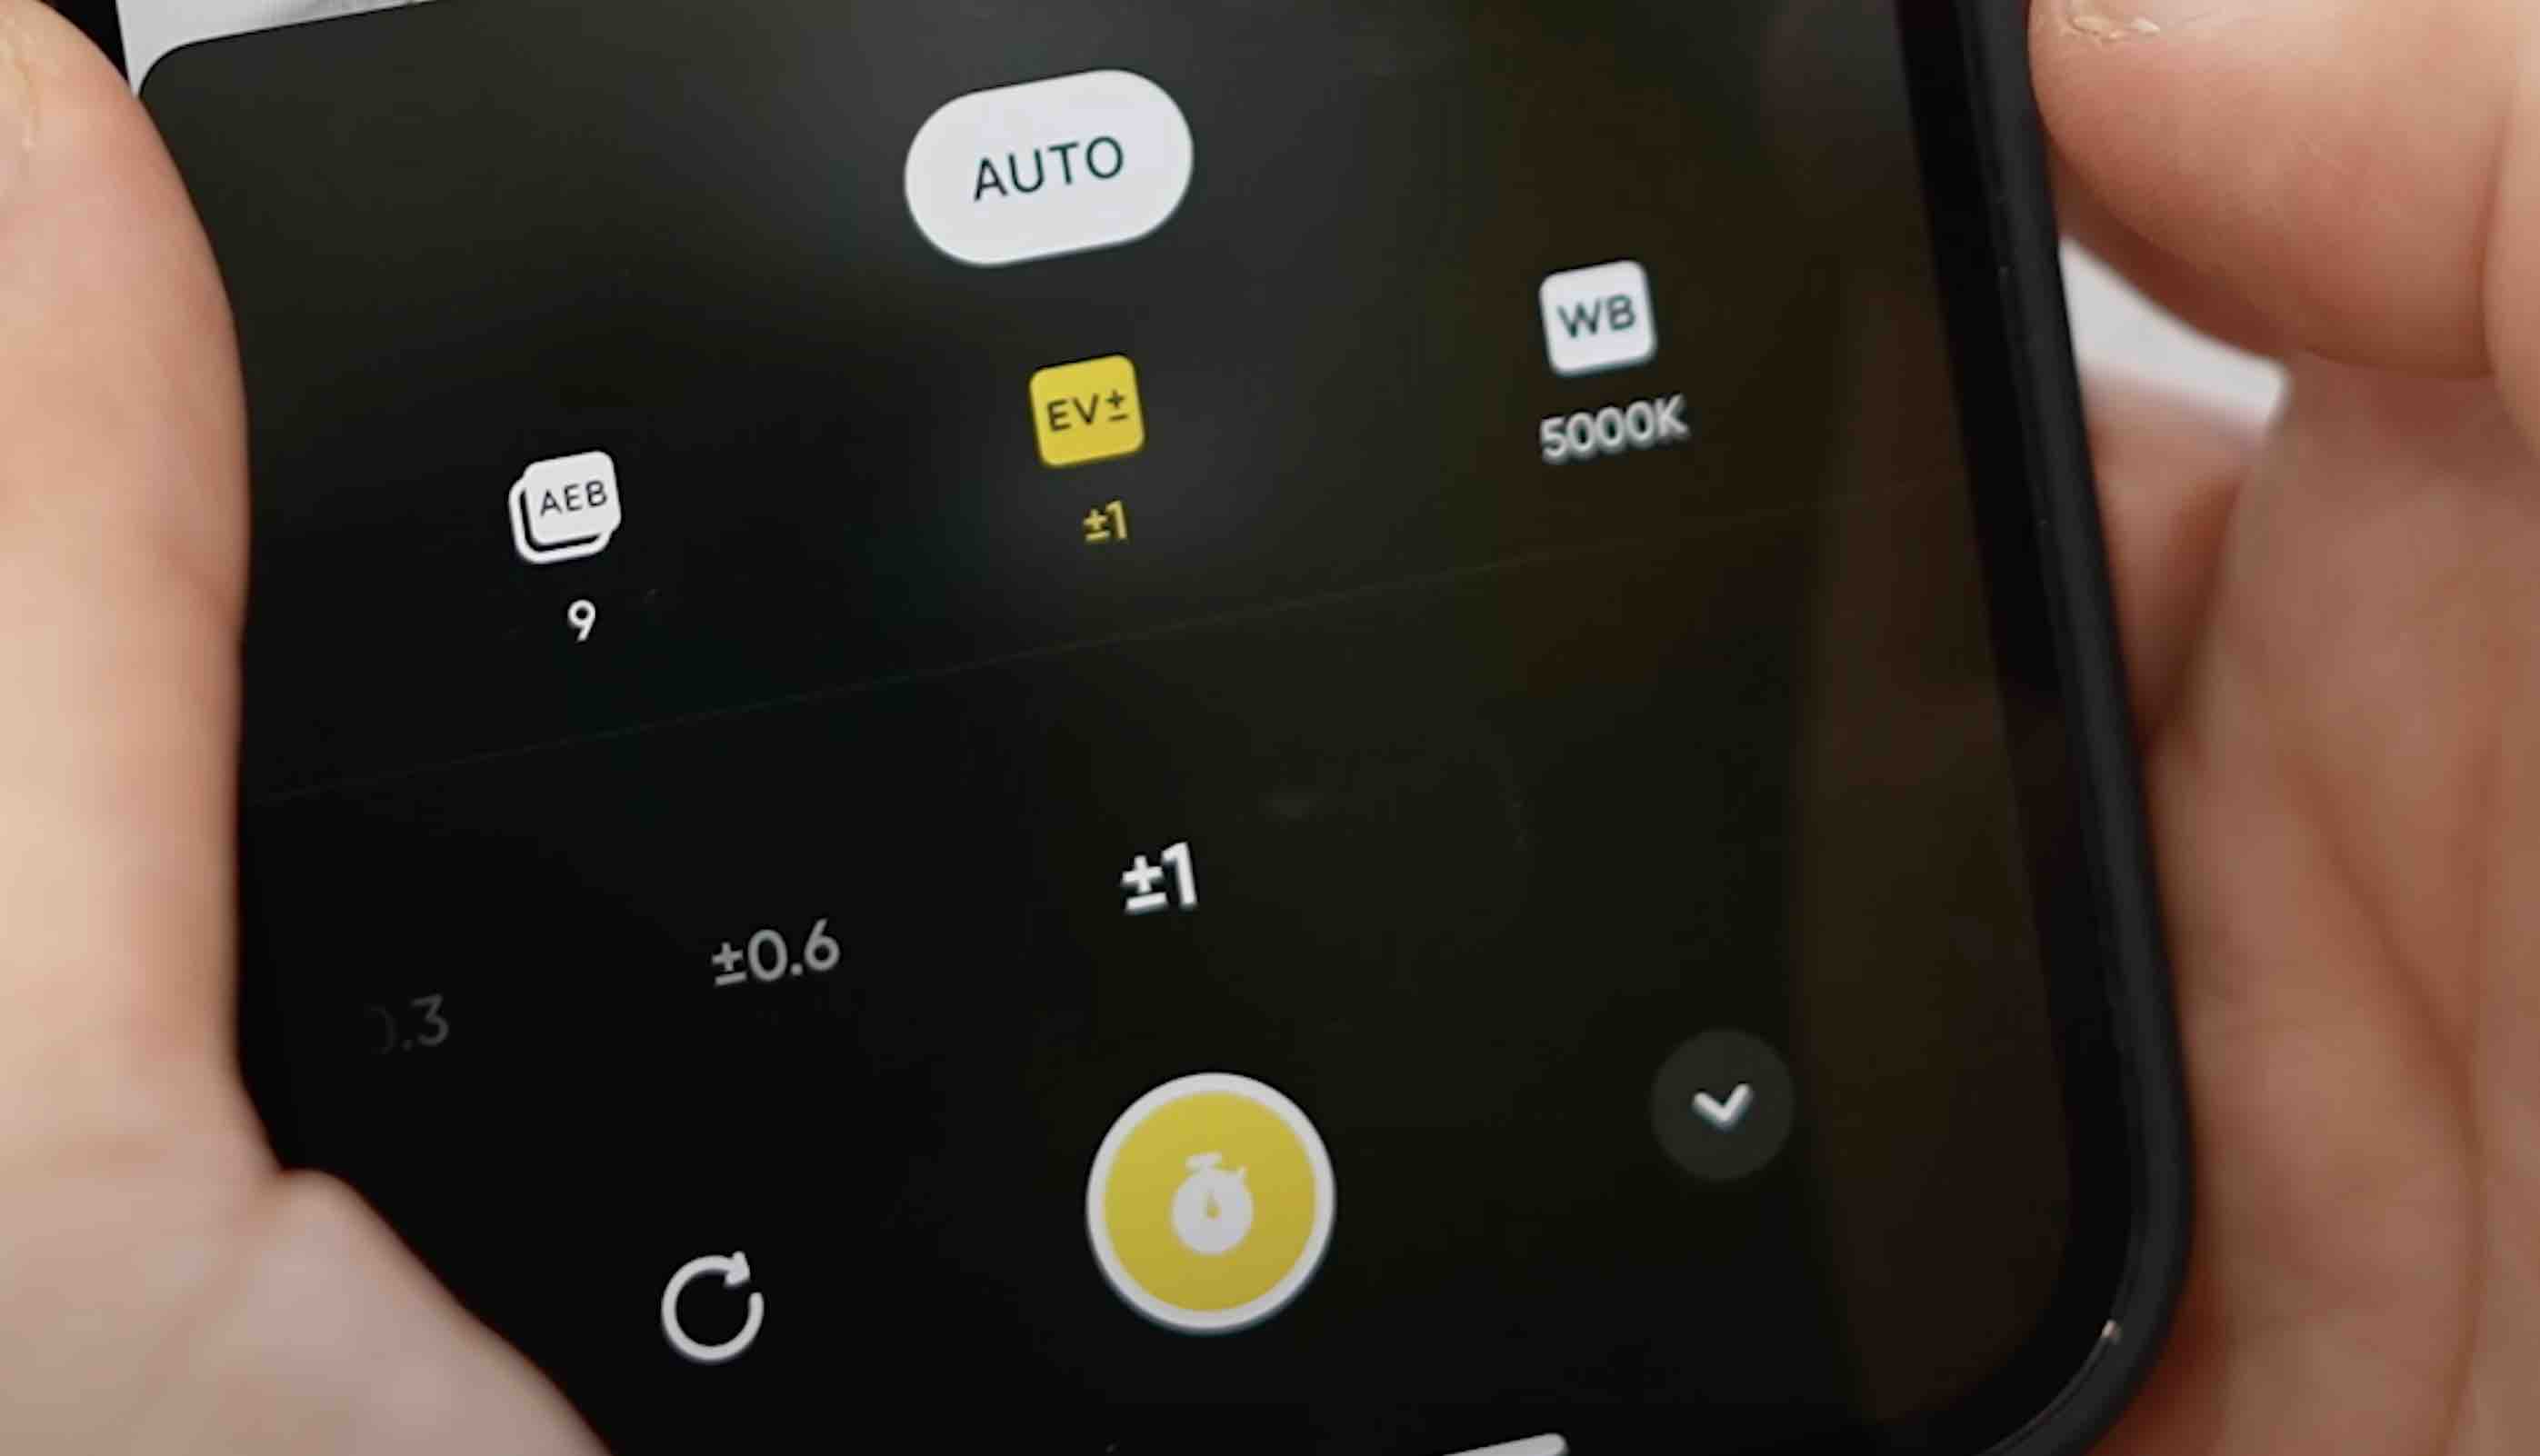
👉 AEB refers to the amount of photos we'll take and EV refers to the amount of stops apart each of those photos are. So you could choose five shots two stops apart or you could choose nine shots one stop apart. Nine shots one stop apart is the setting I would recommend choosing because it's taking more overall shots and they're closer in range, which means you're capturing more of the overall dynamic range over shots that are way darker or way lighter than the other shots.

👉 Once your camera is set up in HDR PureShot mode with nine shots one stop apart it should stay like that for your entire shoot, so you only have to set it once and you're good to go.
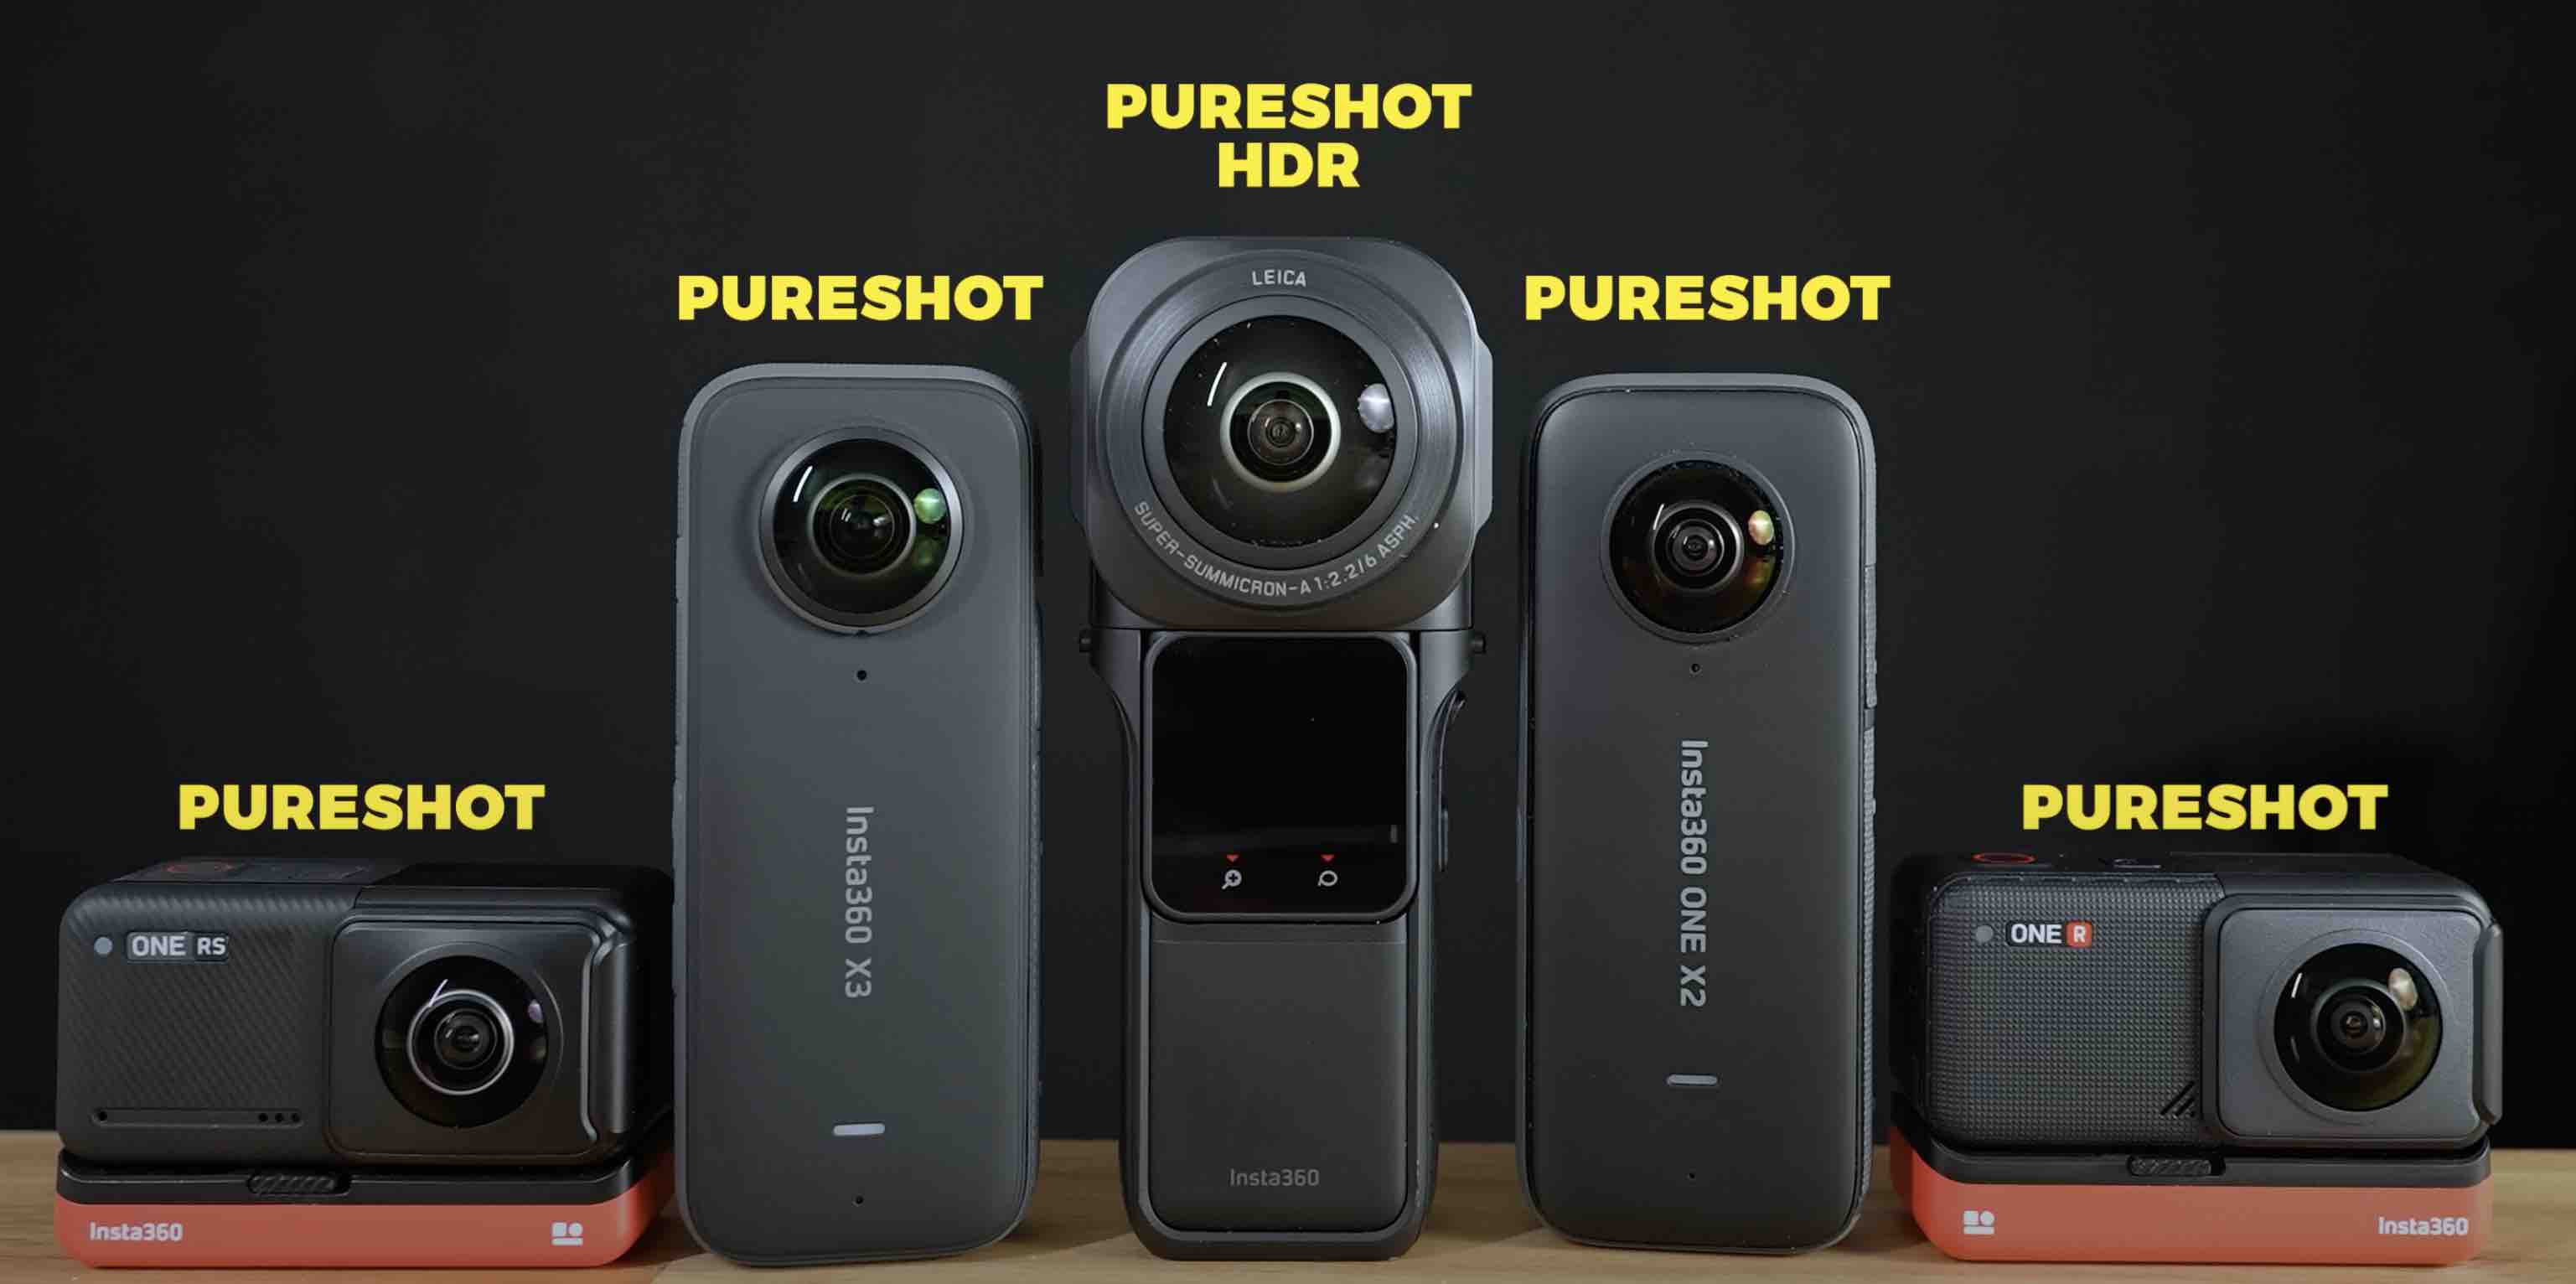
👉 This is by far the best shooting workflow for the 1-inch. X3, One X2, One RS and One R it's choosing single shot PureShot mode. For any of the older Insta360 cameras pre One R, the best shooting mode is going to be using inbuilt HDR.
Step 6: White Balance & Self-Timer ⏰
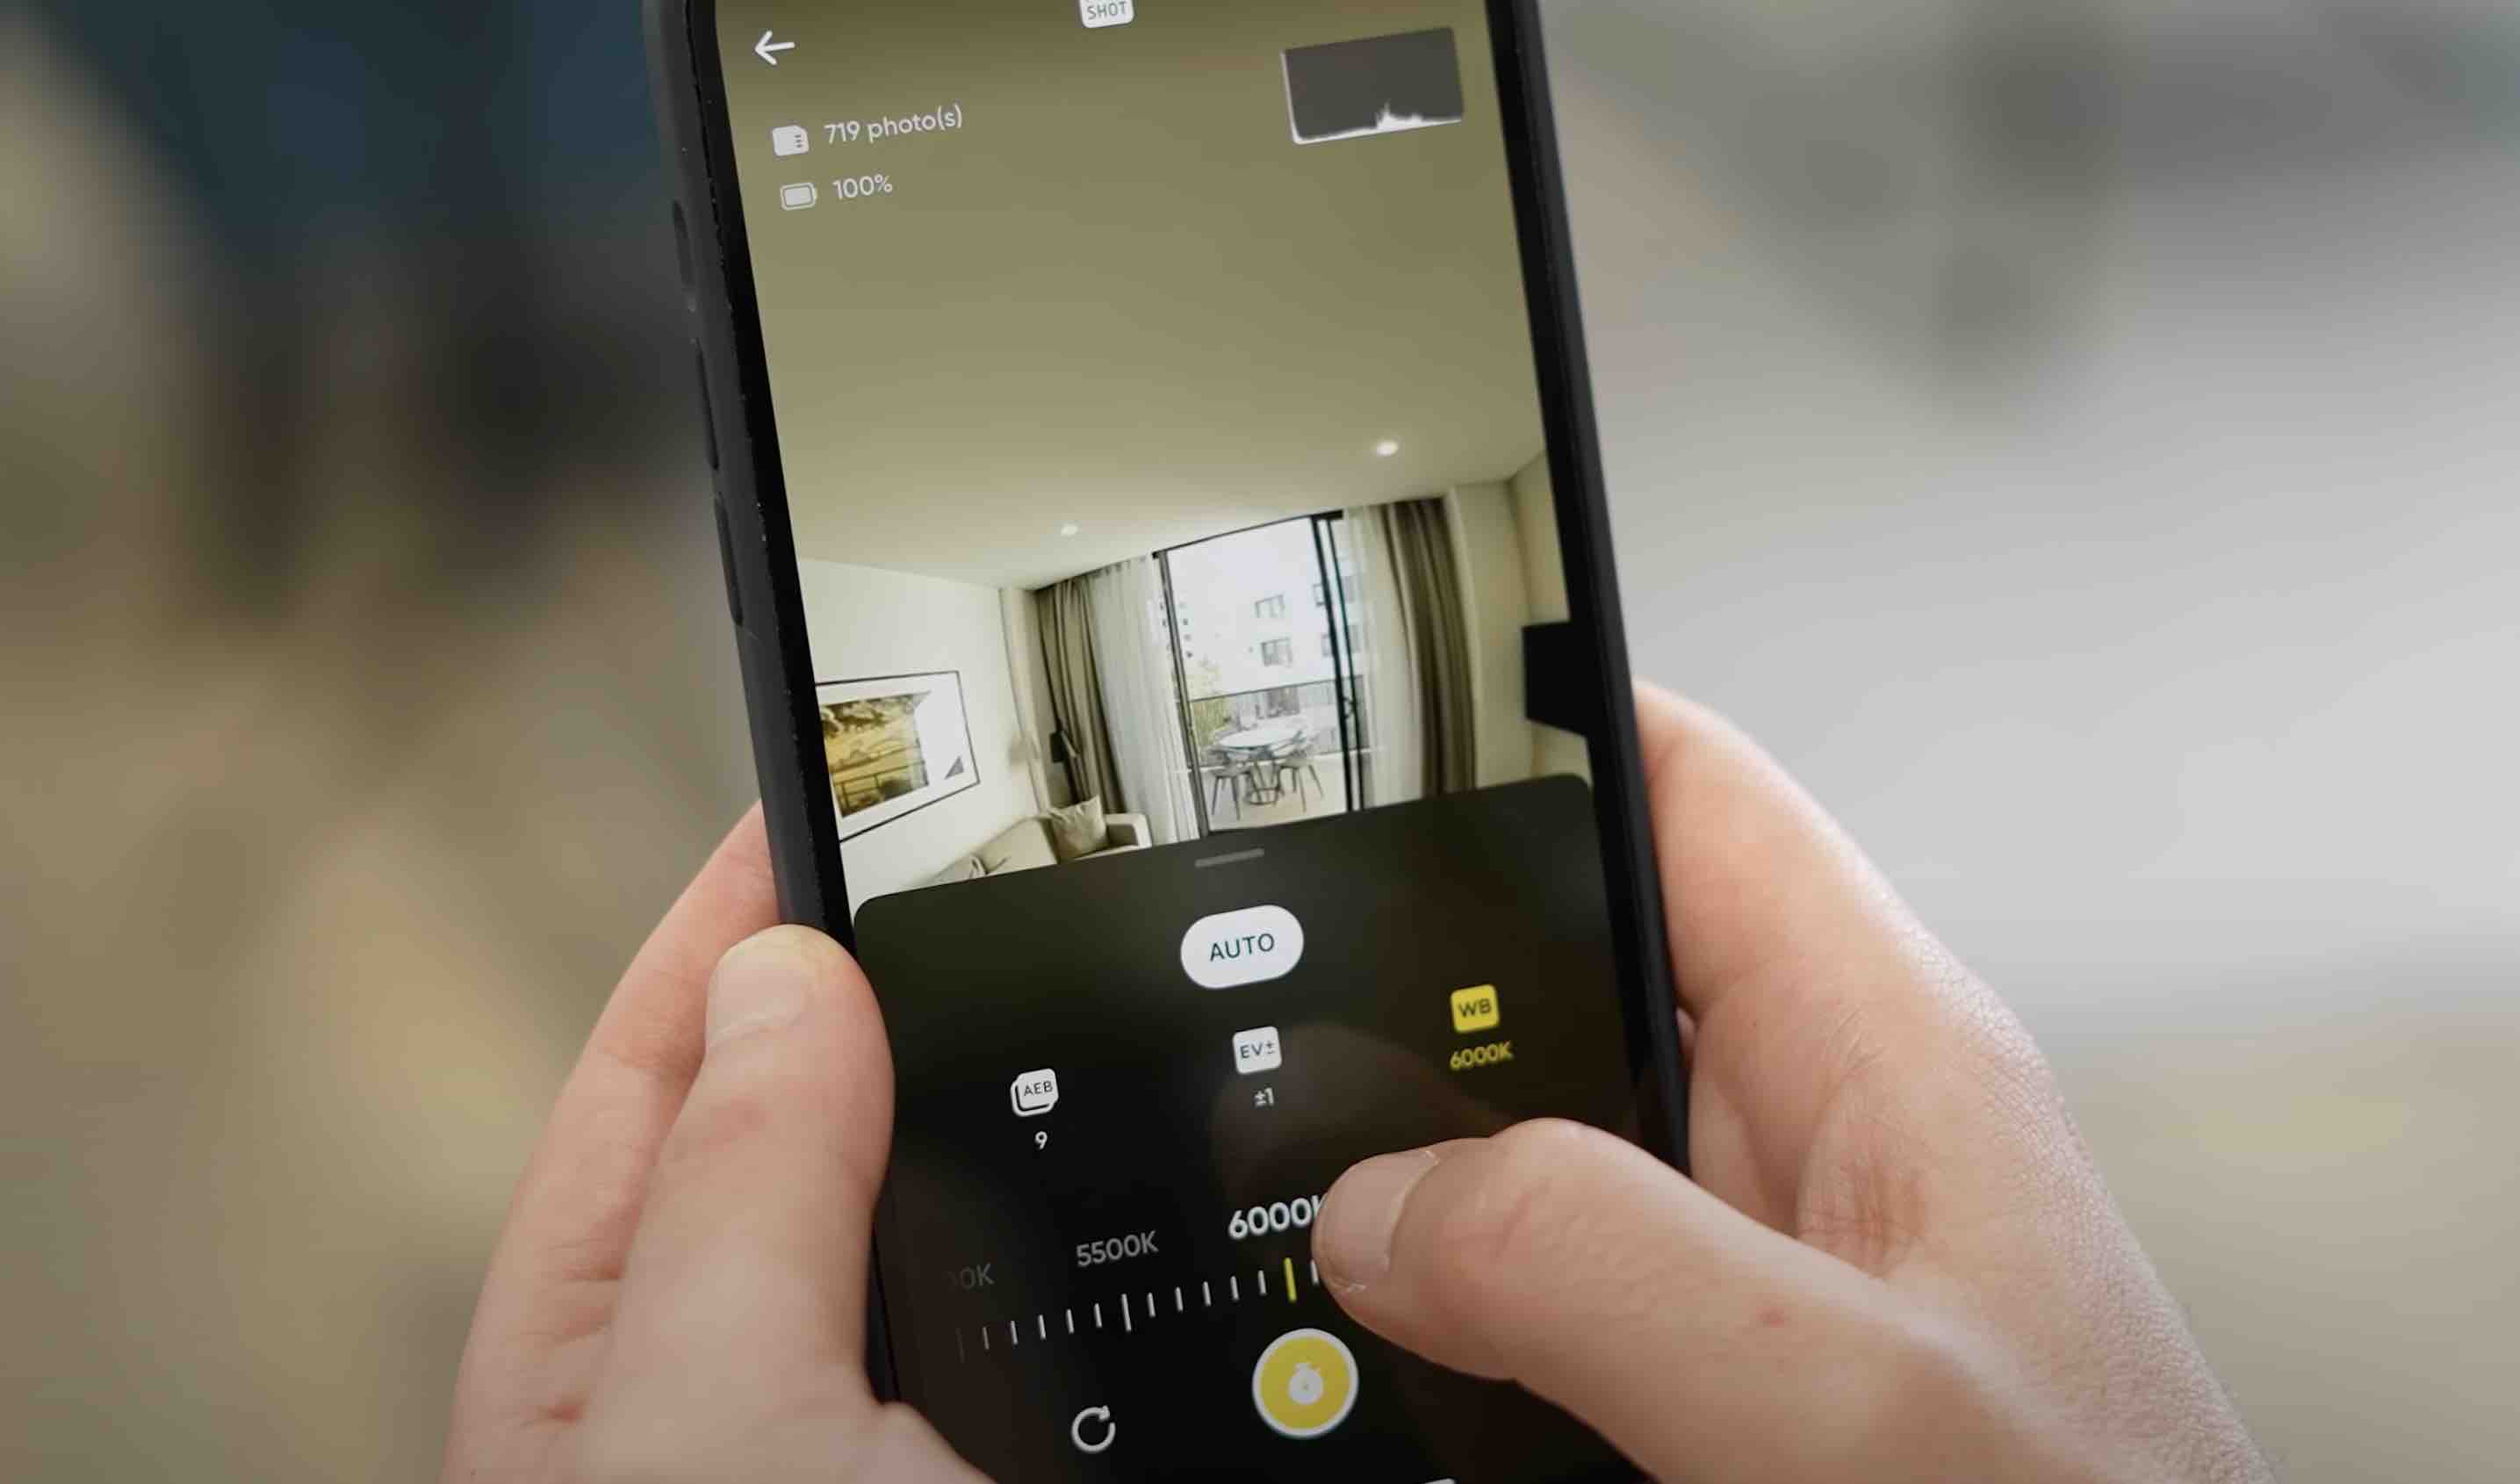
👉 Before you start shooting you'll want to set your white balance manually to avoid shots looking too yellow or too blue going from room to room. Lighting conditions within a big location can change significantly. Set your white balance by eye to what you think is the right balance of warm to cool.
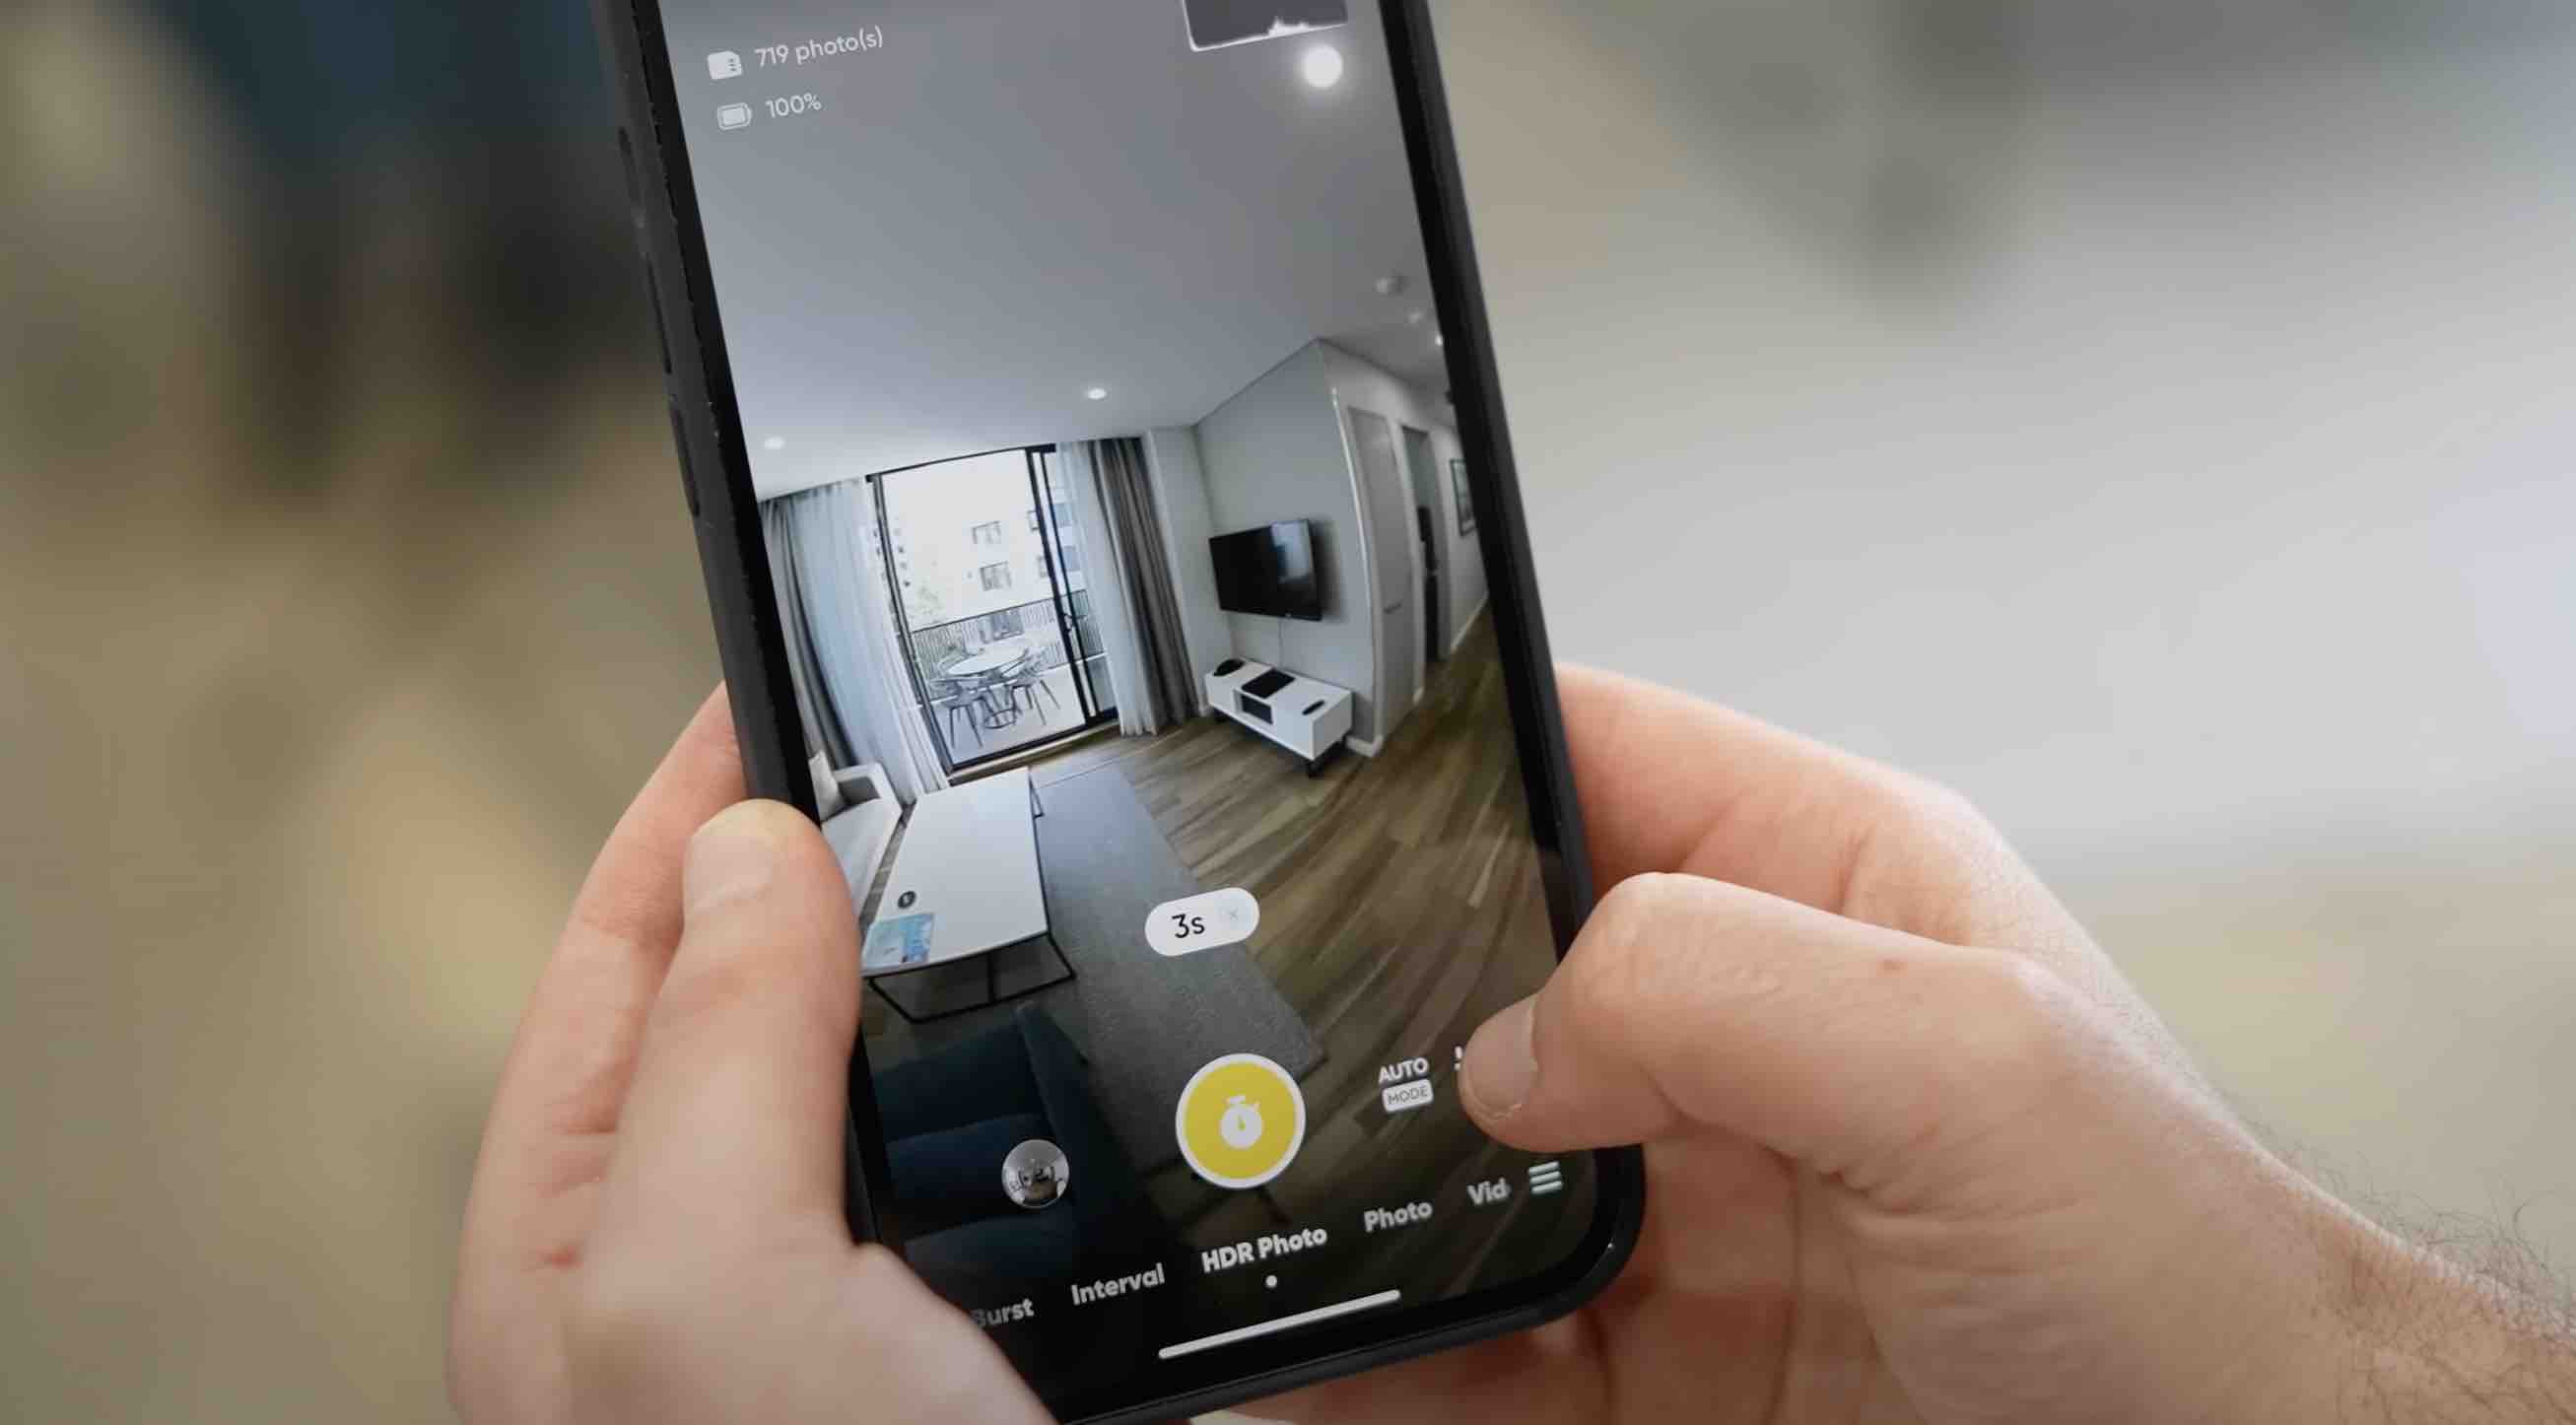
👉 Next, you want to set a self-timer, this can be anywhere from three seconds to 15. I found three to be the sweet spot because that's just enough time to run and hide.
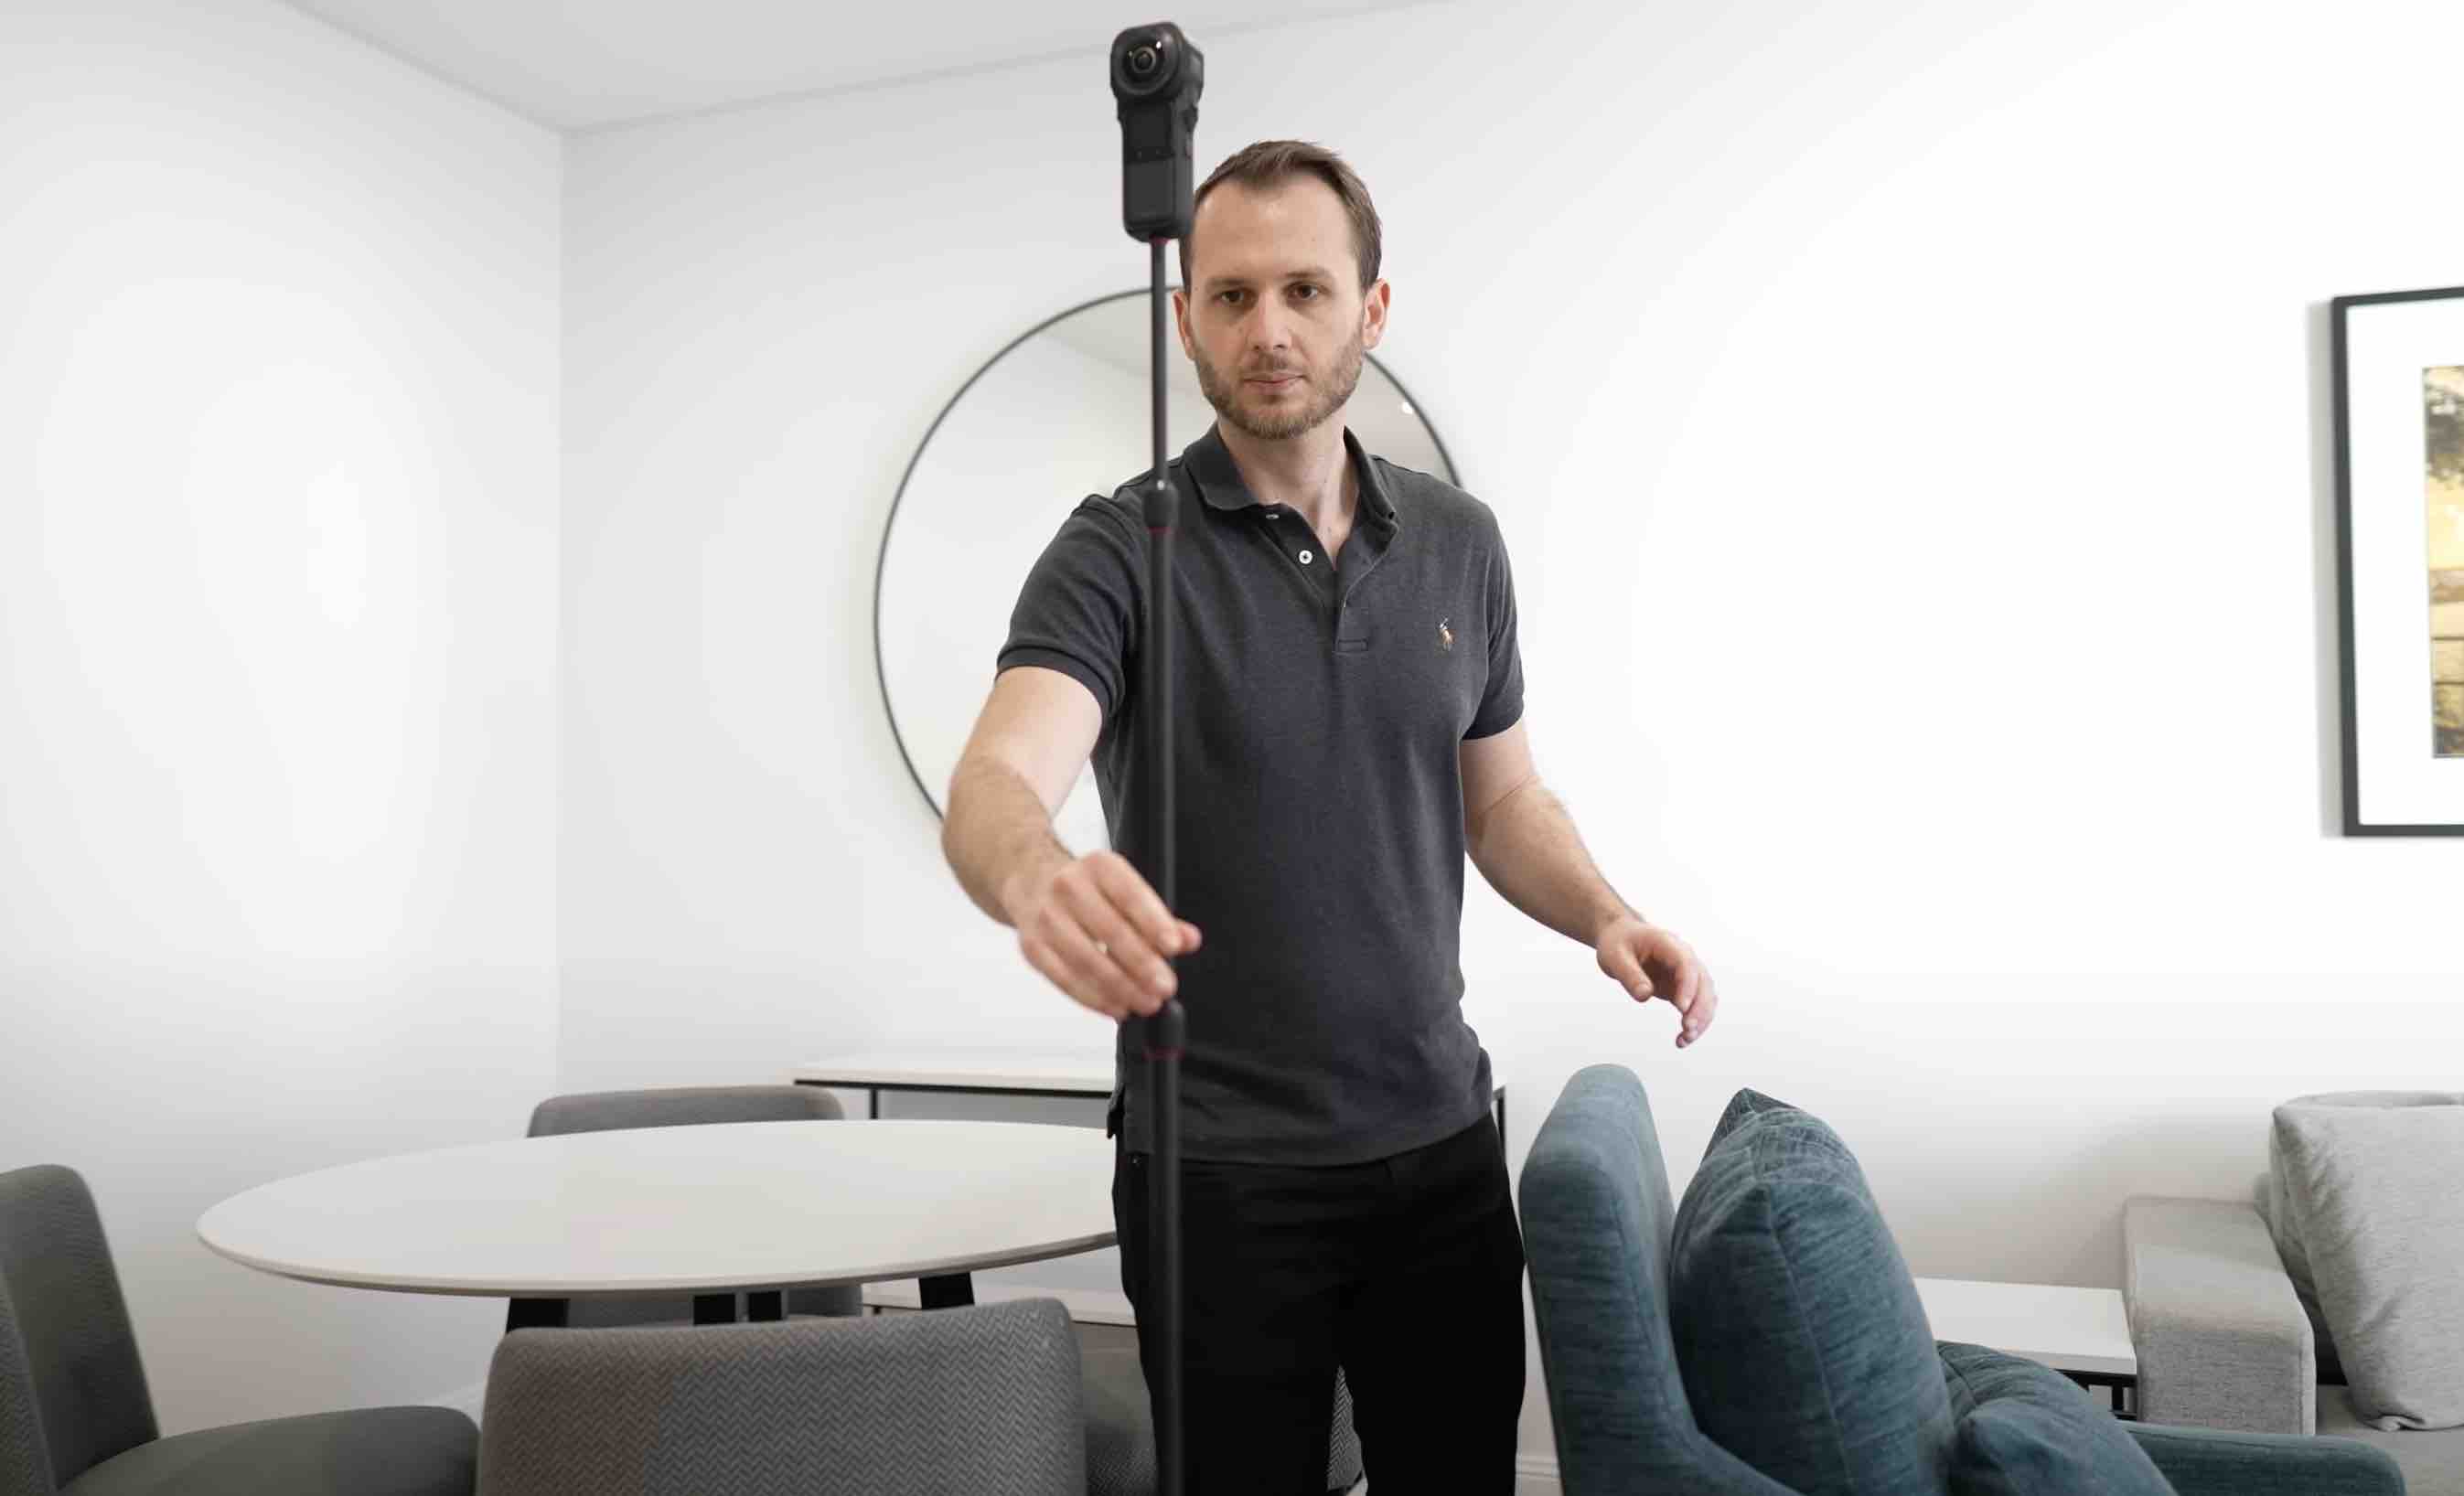
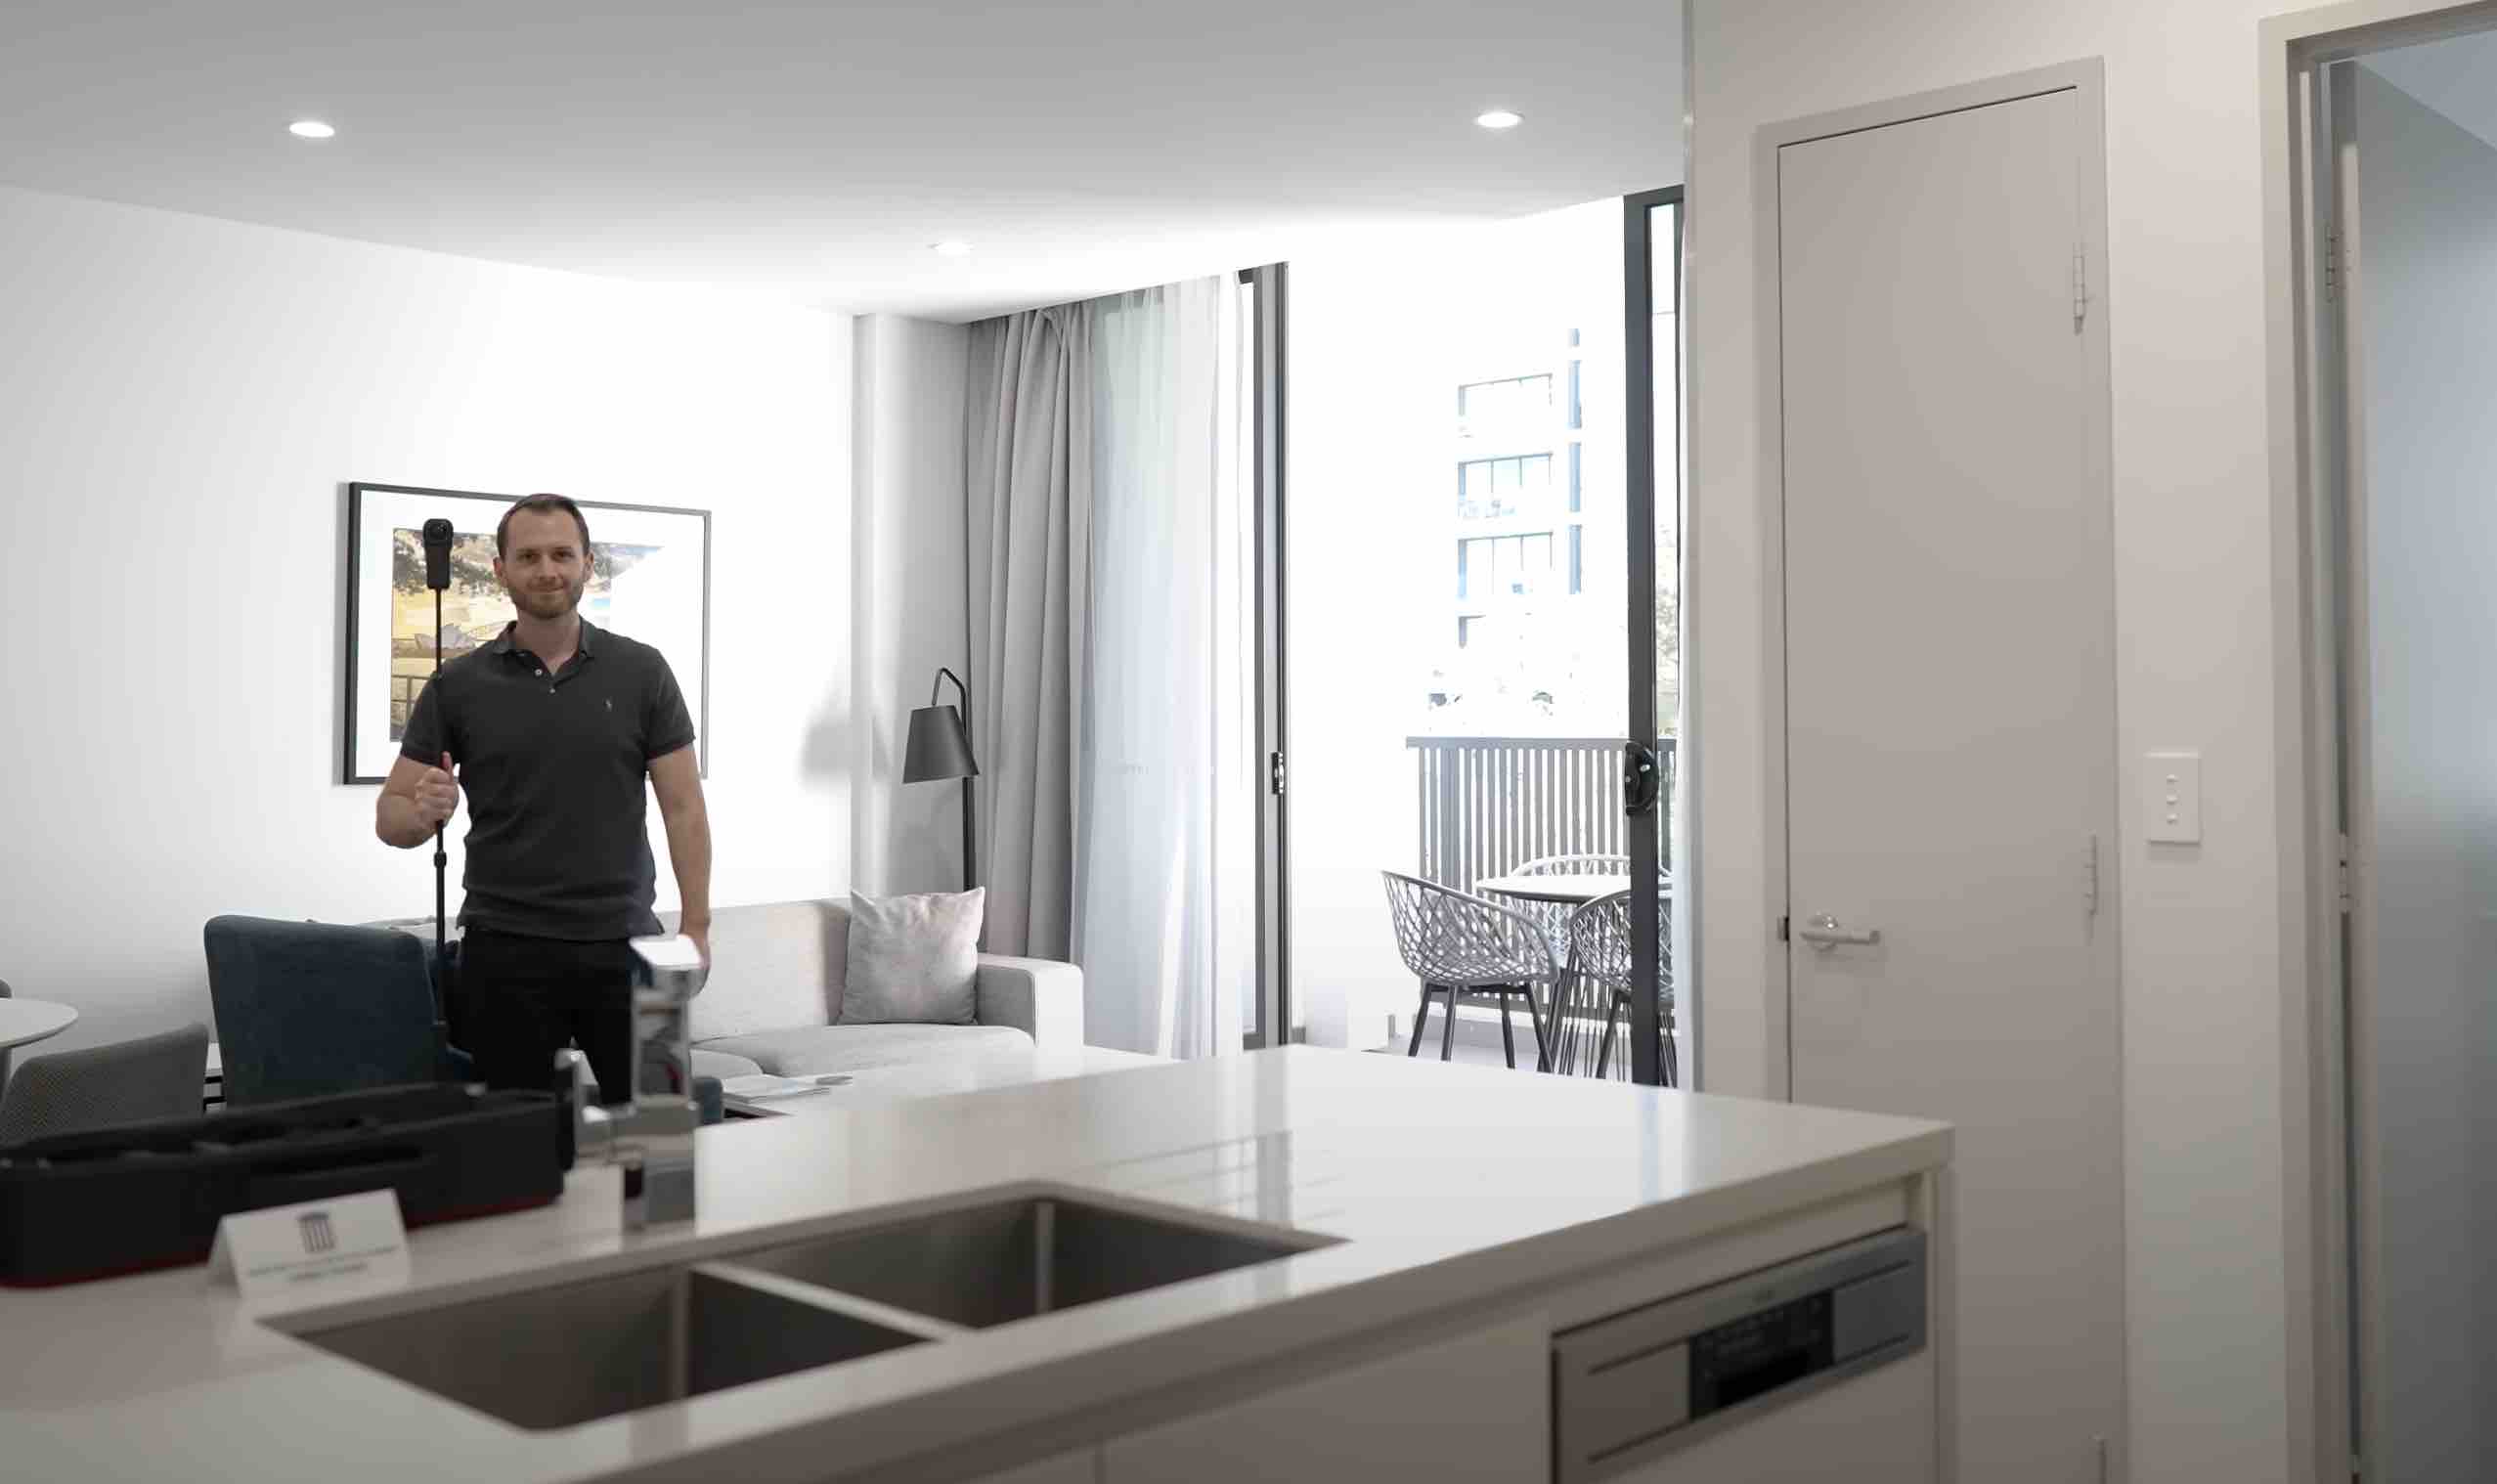
Step 7: Camera Placement 📷

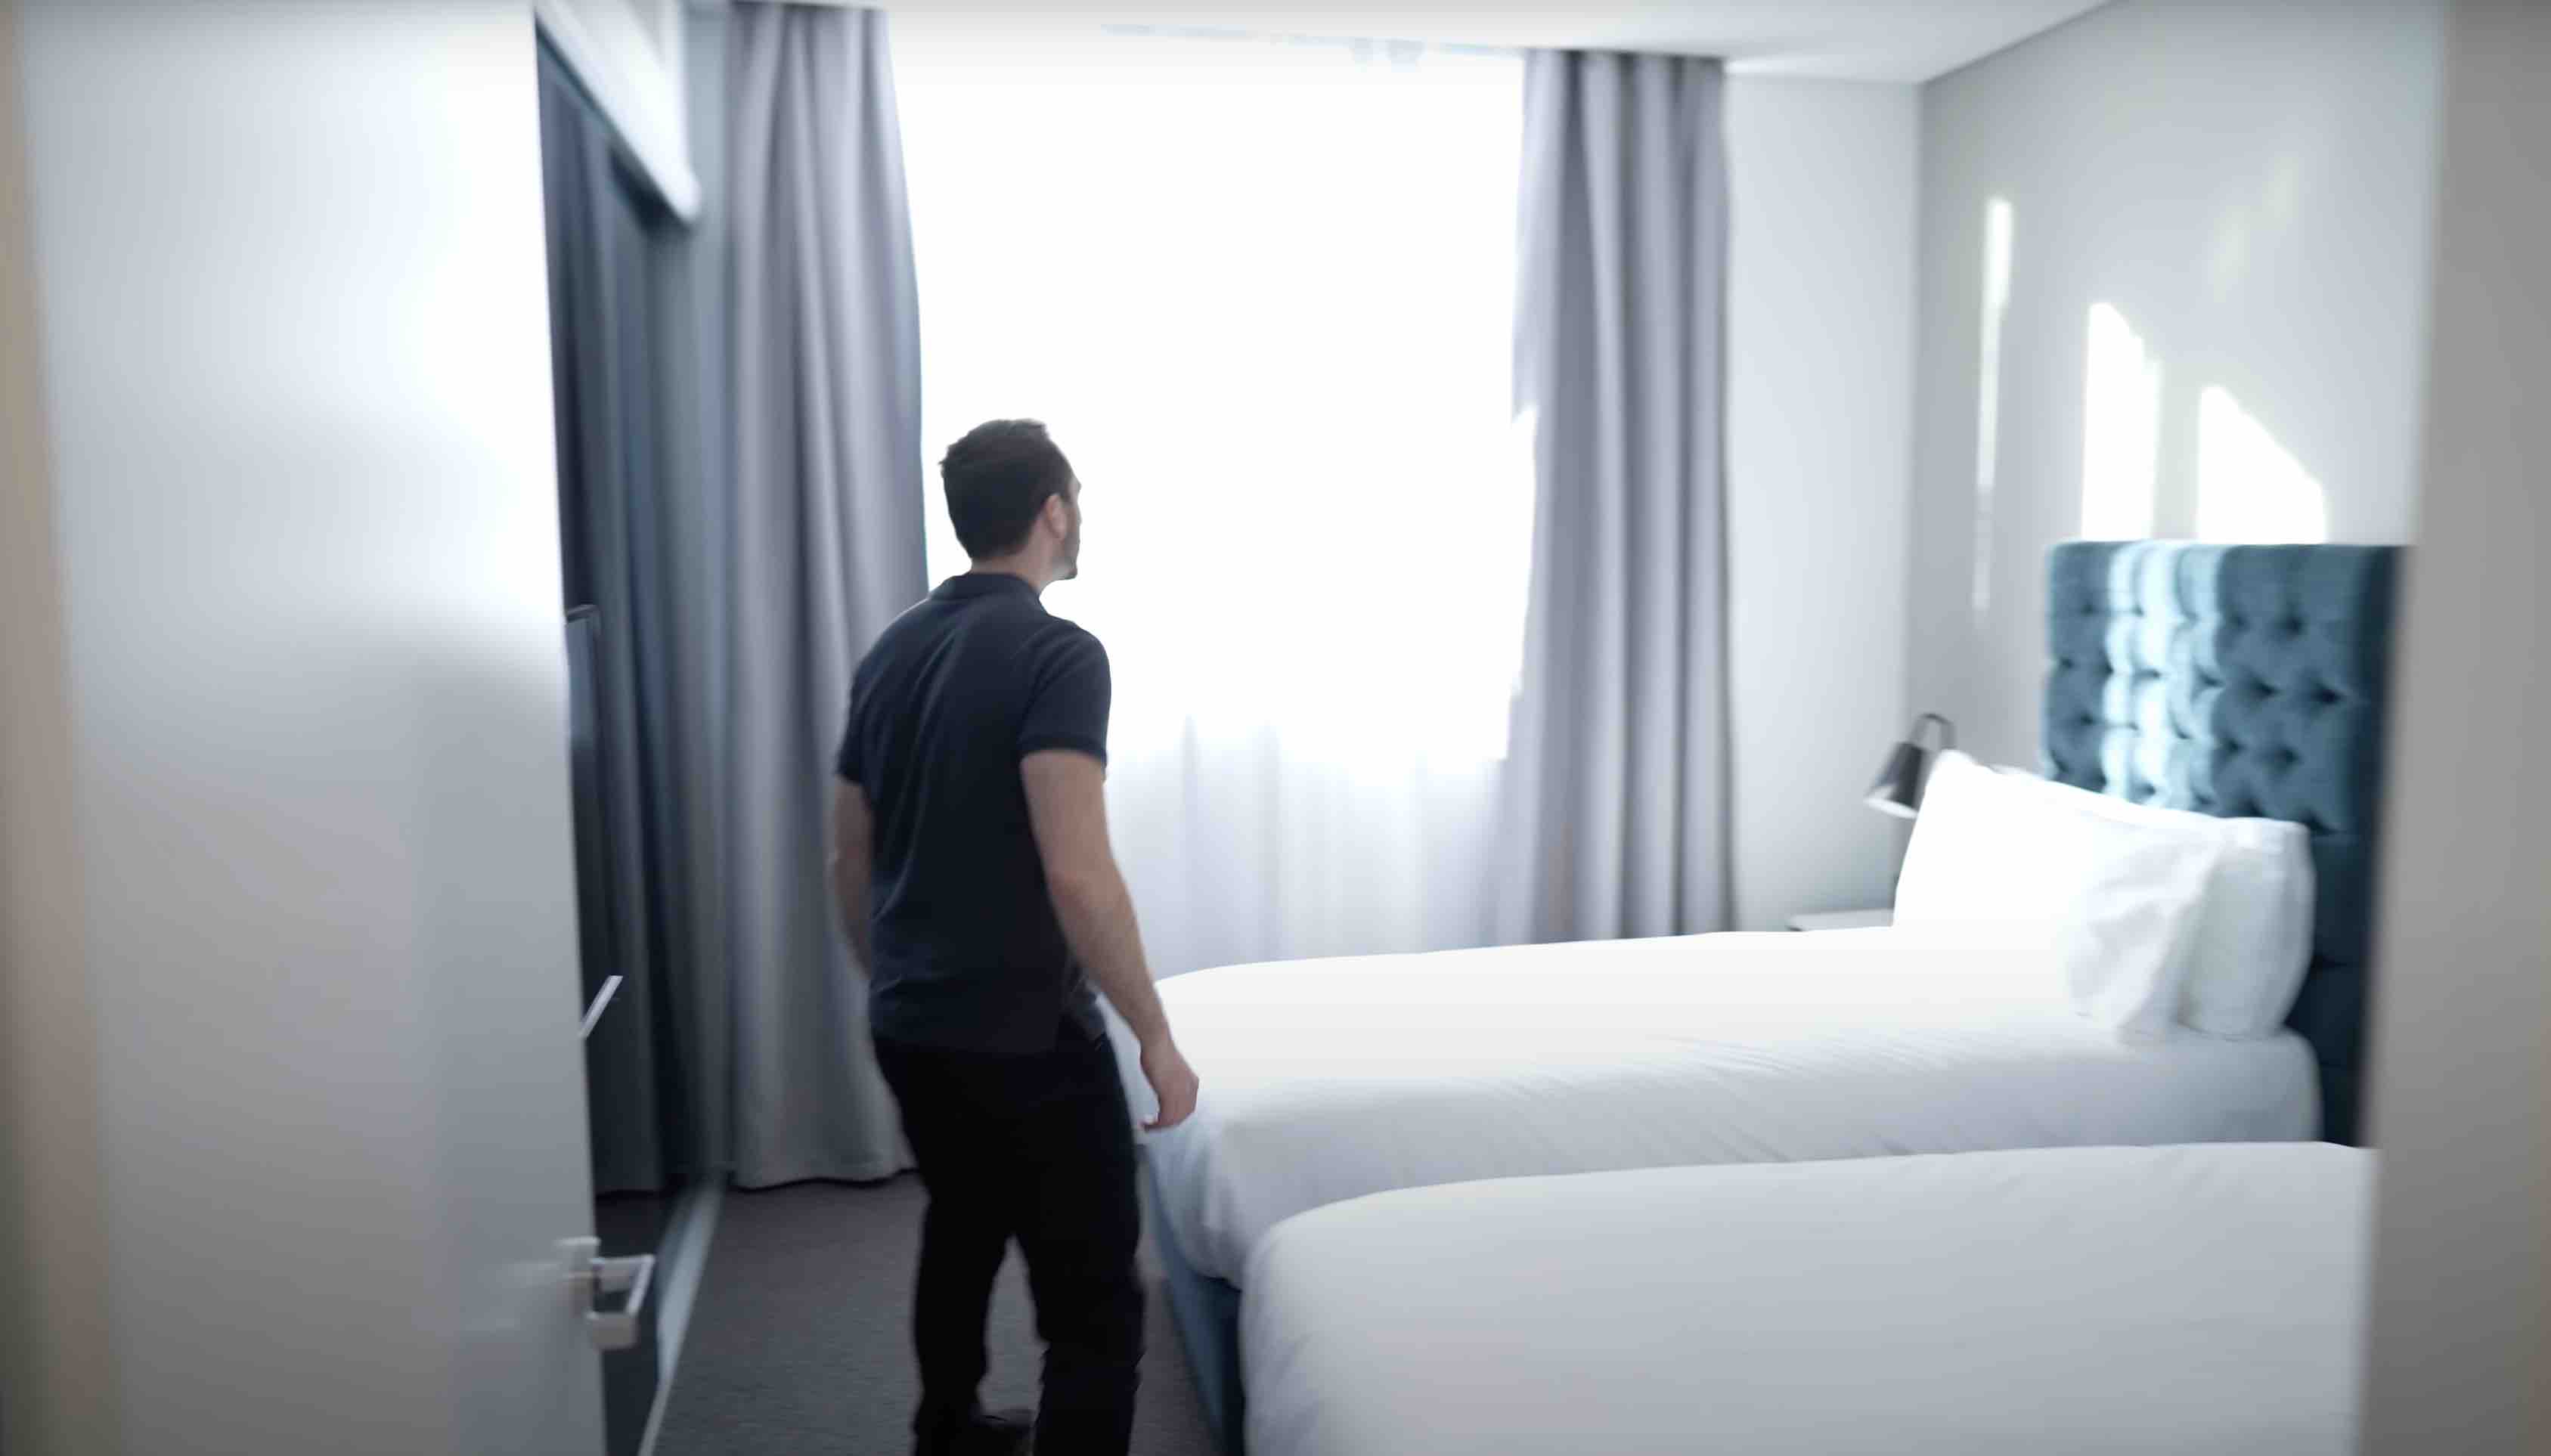
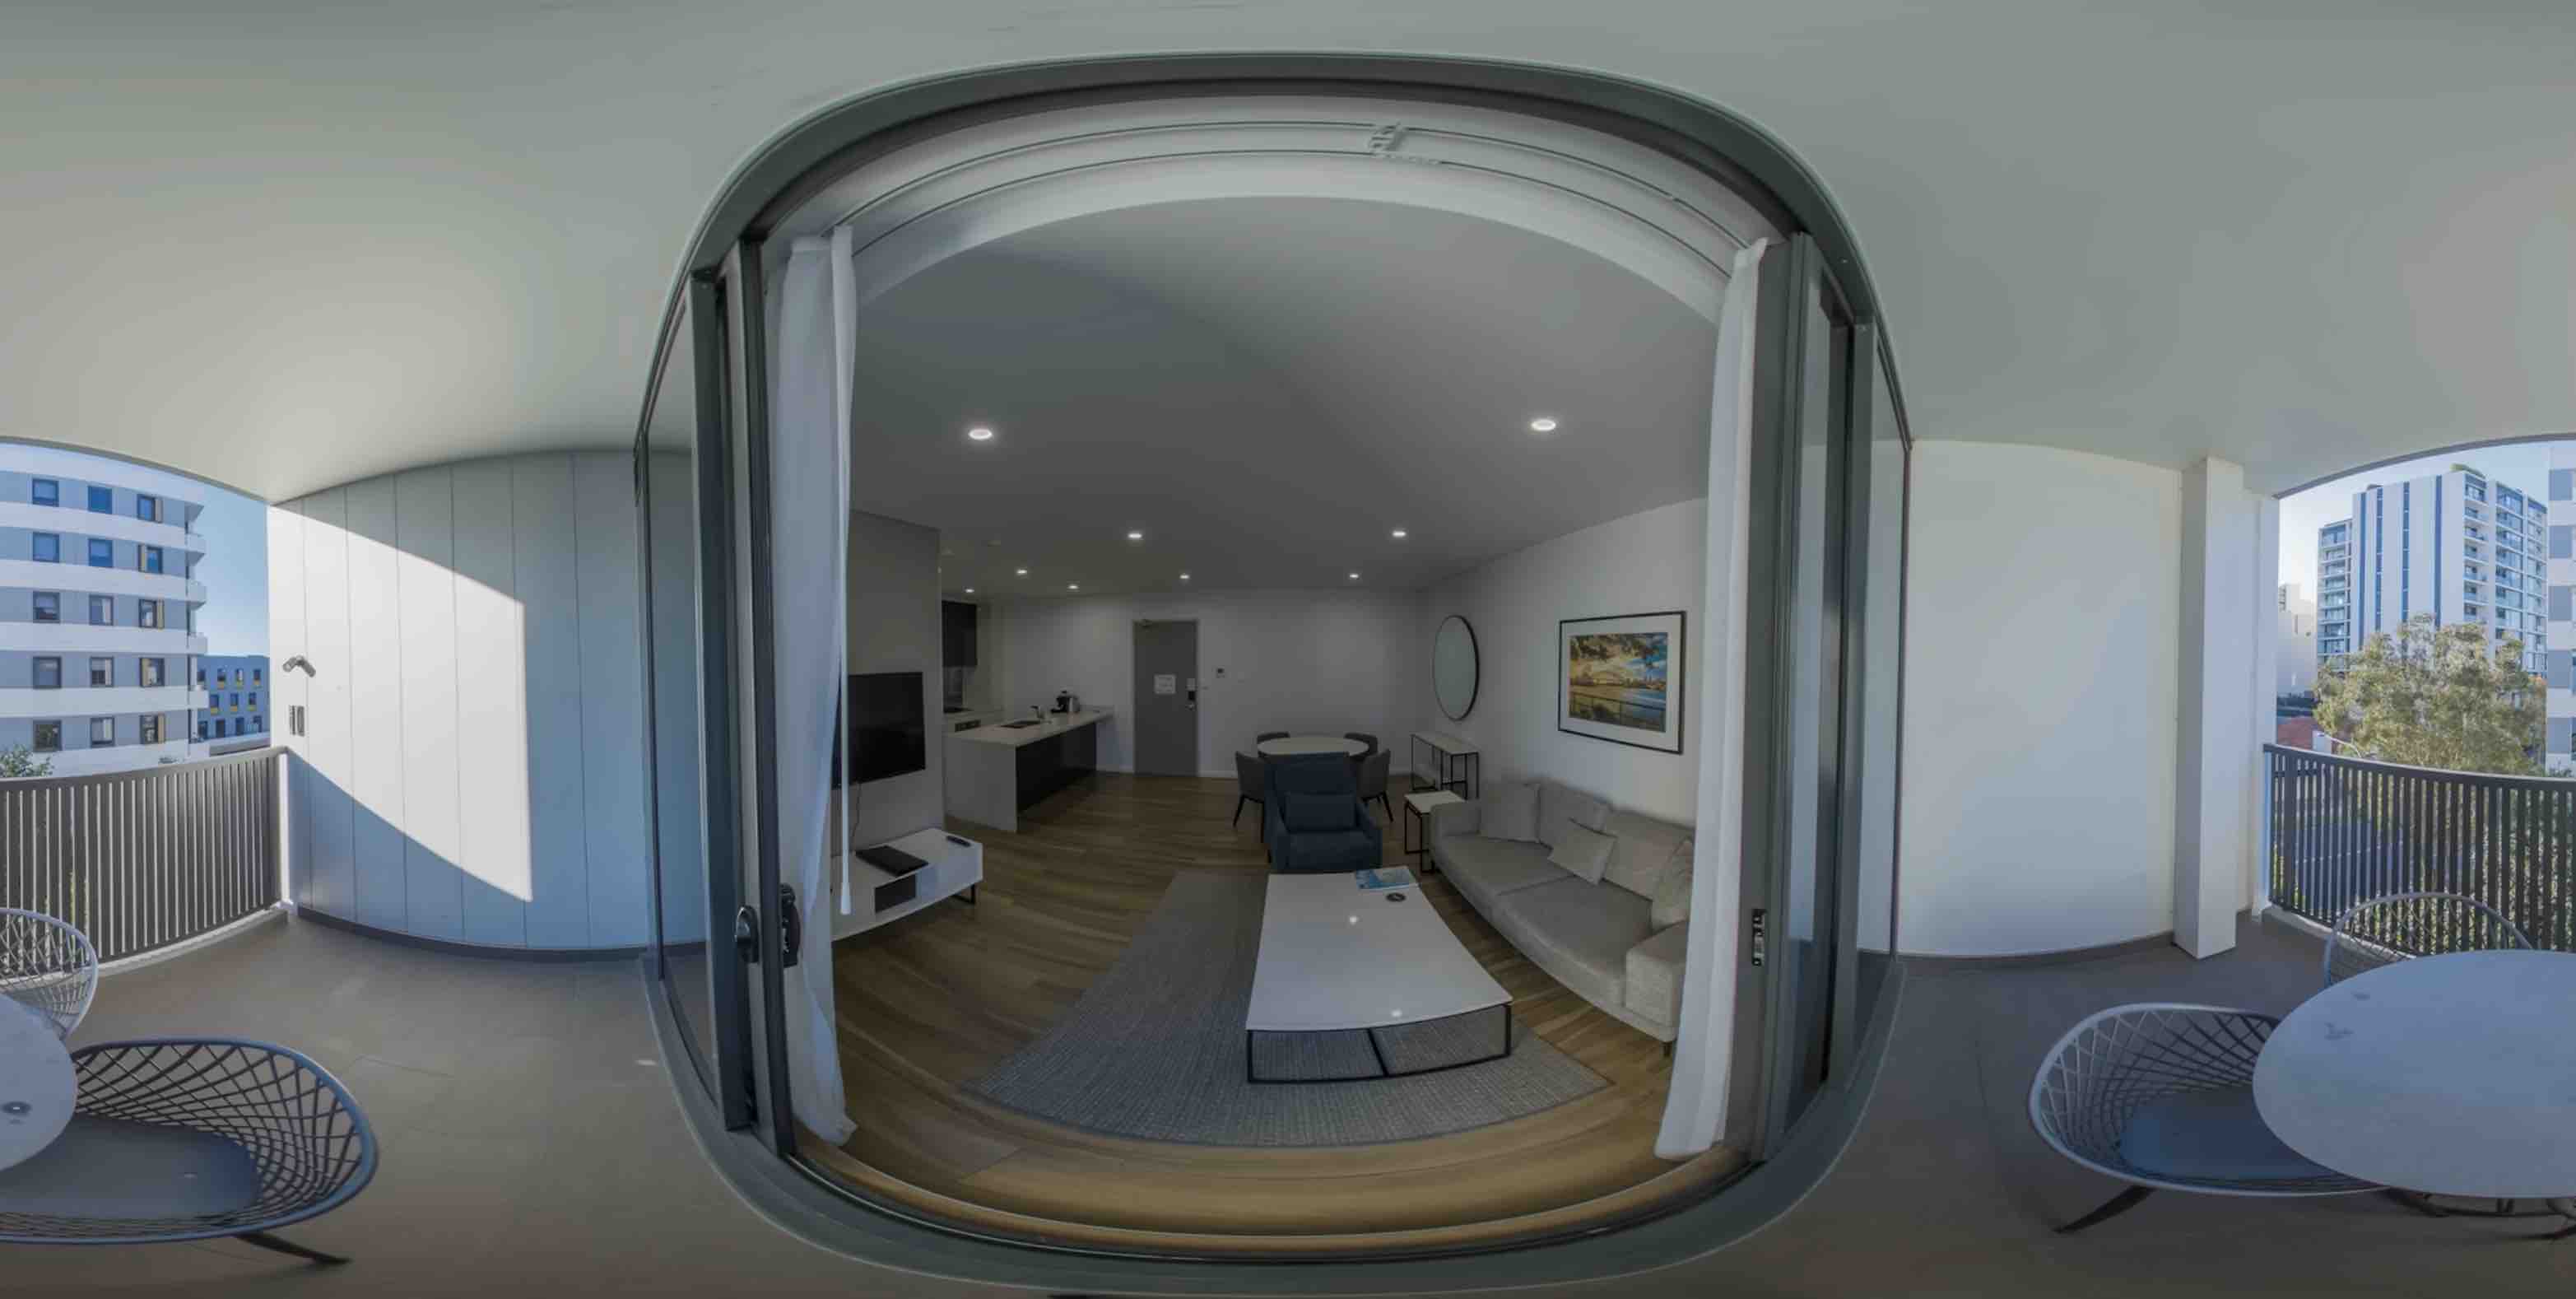
👉 Now that the camera is fully set it's time to choose the best position for it and this should be pretty obvious, you want to showcase the main areas of your location, so make sure your camera has a clear central view of everything.
👉 You will want to avoid your camera getting too close to objects in the room because this can cause stitching errors in extreme cases. As long as the lens of the camera is two plus feet away from anything and yes, that includes objects below like couches and tables, you should find that stitching isn't an issue.
👉 Find yourself a good hiding spot around the corner. Always be sure to check for reflections because sometimes you think you're hidden but you're not, a lot of Interiors have mirrors and reflective surfaces.
Step 8: Capture The Shot 📸

👉 To take a shot press the capture button on the camera or your phone. From this point the shoot is going to go super fast. All you need to do is move the camera around the room roughly six feet apart making sure there's a clear line of sight from shot to shot.

👉 If you're shooting an exterior you're going to be a bit more prone to error because of the sun potentially causing lens flares or washing out your shot. I would advise taking multiple shots if you're not quite sure what the best camera placement is.
👉 Sometimes it's best with the seam line facing the sun, sometimes that's not an issue but since the outdoor area is likely to have higher overall contrast you'll want to try multiple shots and be sure to download and preview your shots before you move on to make sure you there's no errors either with the exposure or the stitching.
👉 Now go ahead and capture the rest of your location, again making sure there's a clear line inside from shot to shot.
👉 It is always better to overshoot a location then undershoot it. So if you're not quite confident how everything's going to link together later, then make sure you get plenty of shots in the common areas like hallways and big open rooms with multiple door frames in different areas.
👉 And that's a wrap, it's time to edit.
Step 9: Stitching Your Shots 👨💻

👉 The first step of the editing workflow after backing up your files is stitching your shots. This is a really straightforward process and can be done quickly and easily inside the free software Insta360 Studio.
👉 I would strongly advise doing this on desktop as opposed to mobile because you're going to get far superior quality with this workflow.
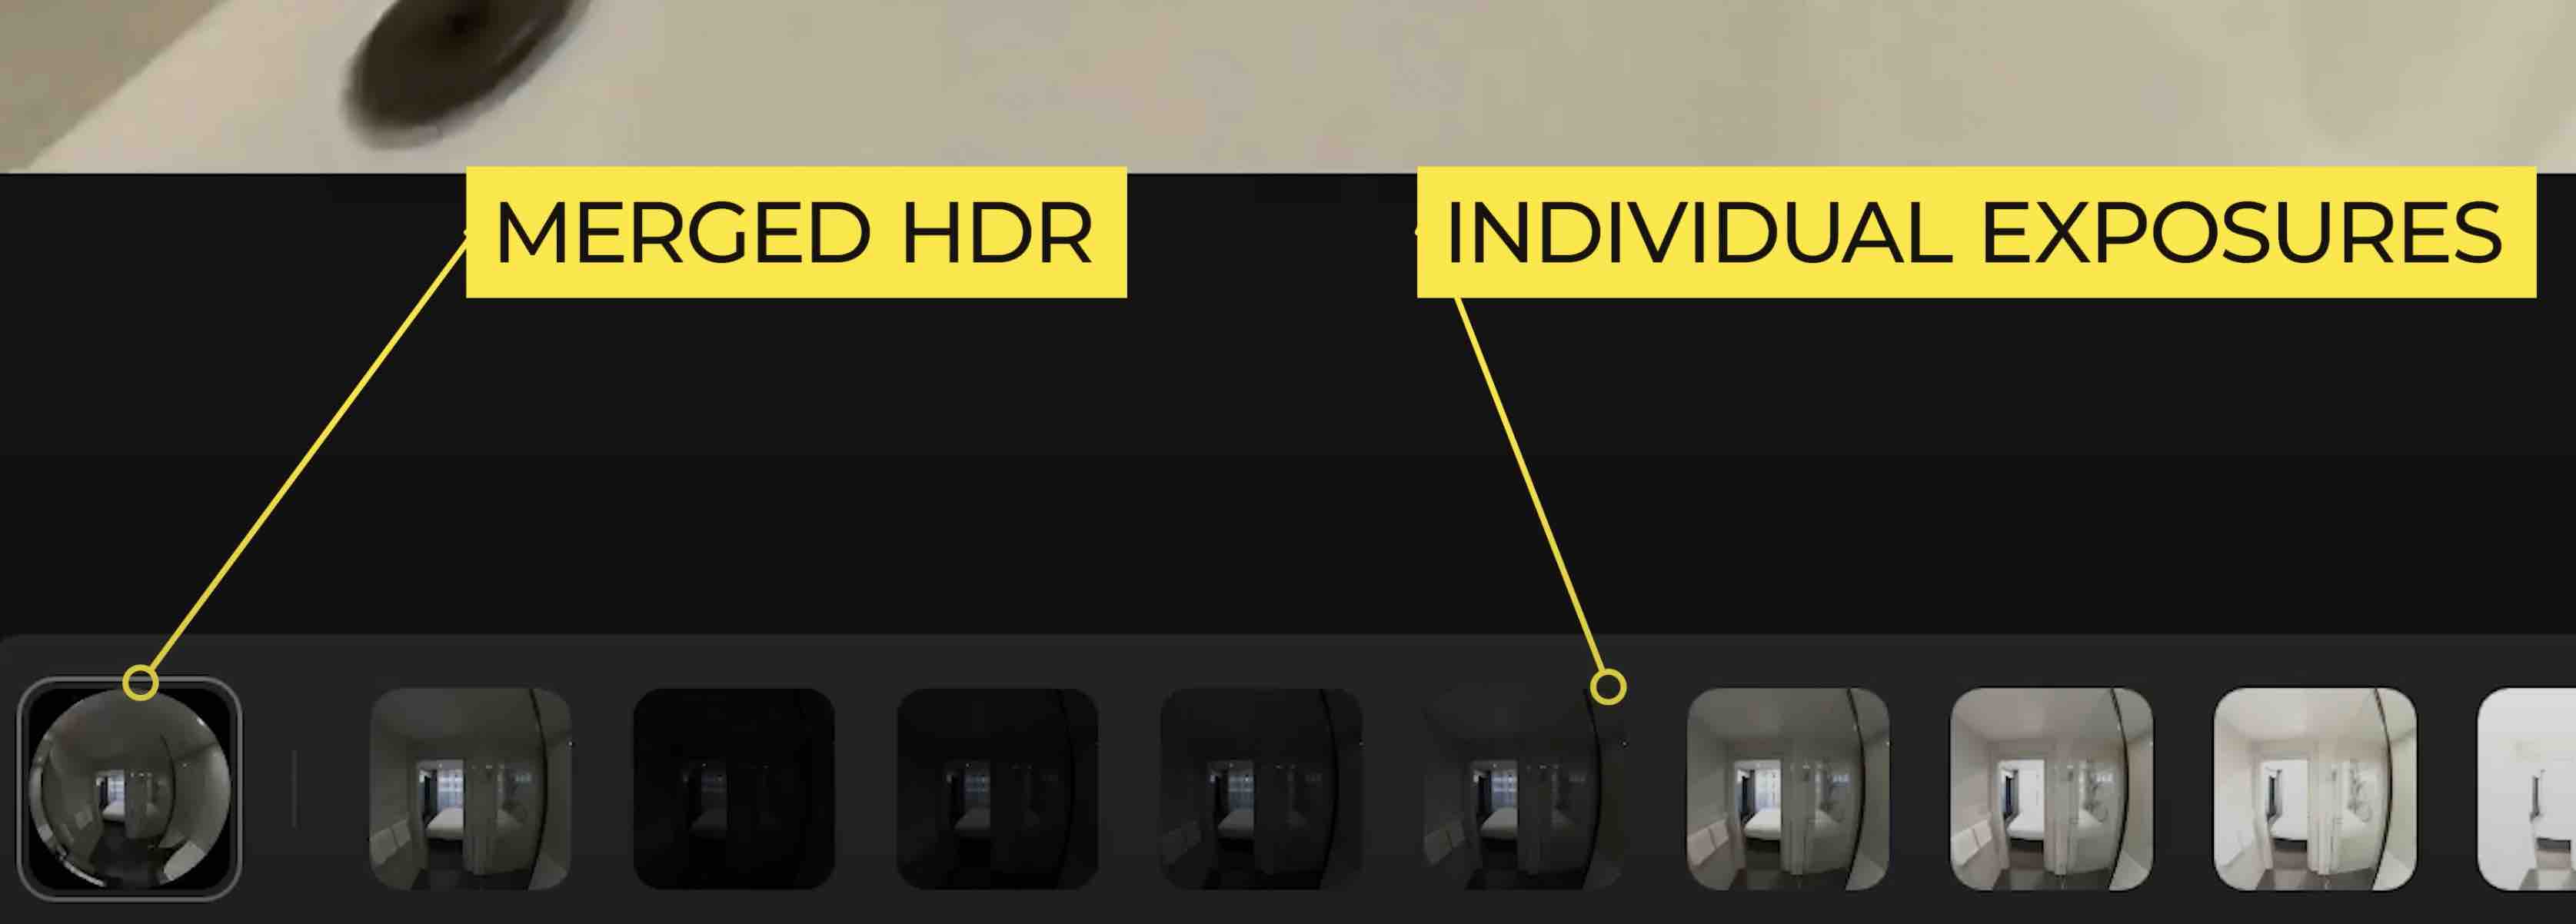
👉 While stitching, Insta360 Studio is automatically going to merge all of your shots so you don't have to and I'm just going to repeat this, you do not need to merge your HDR shots manually in Photoshop Lightroom or Affinity photo because it's done right here in Insta360 Studio.
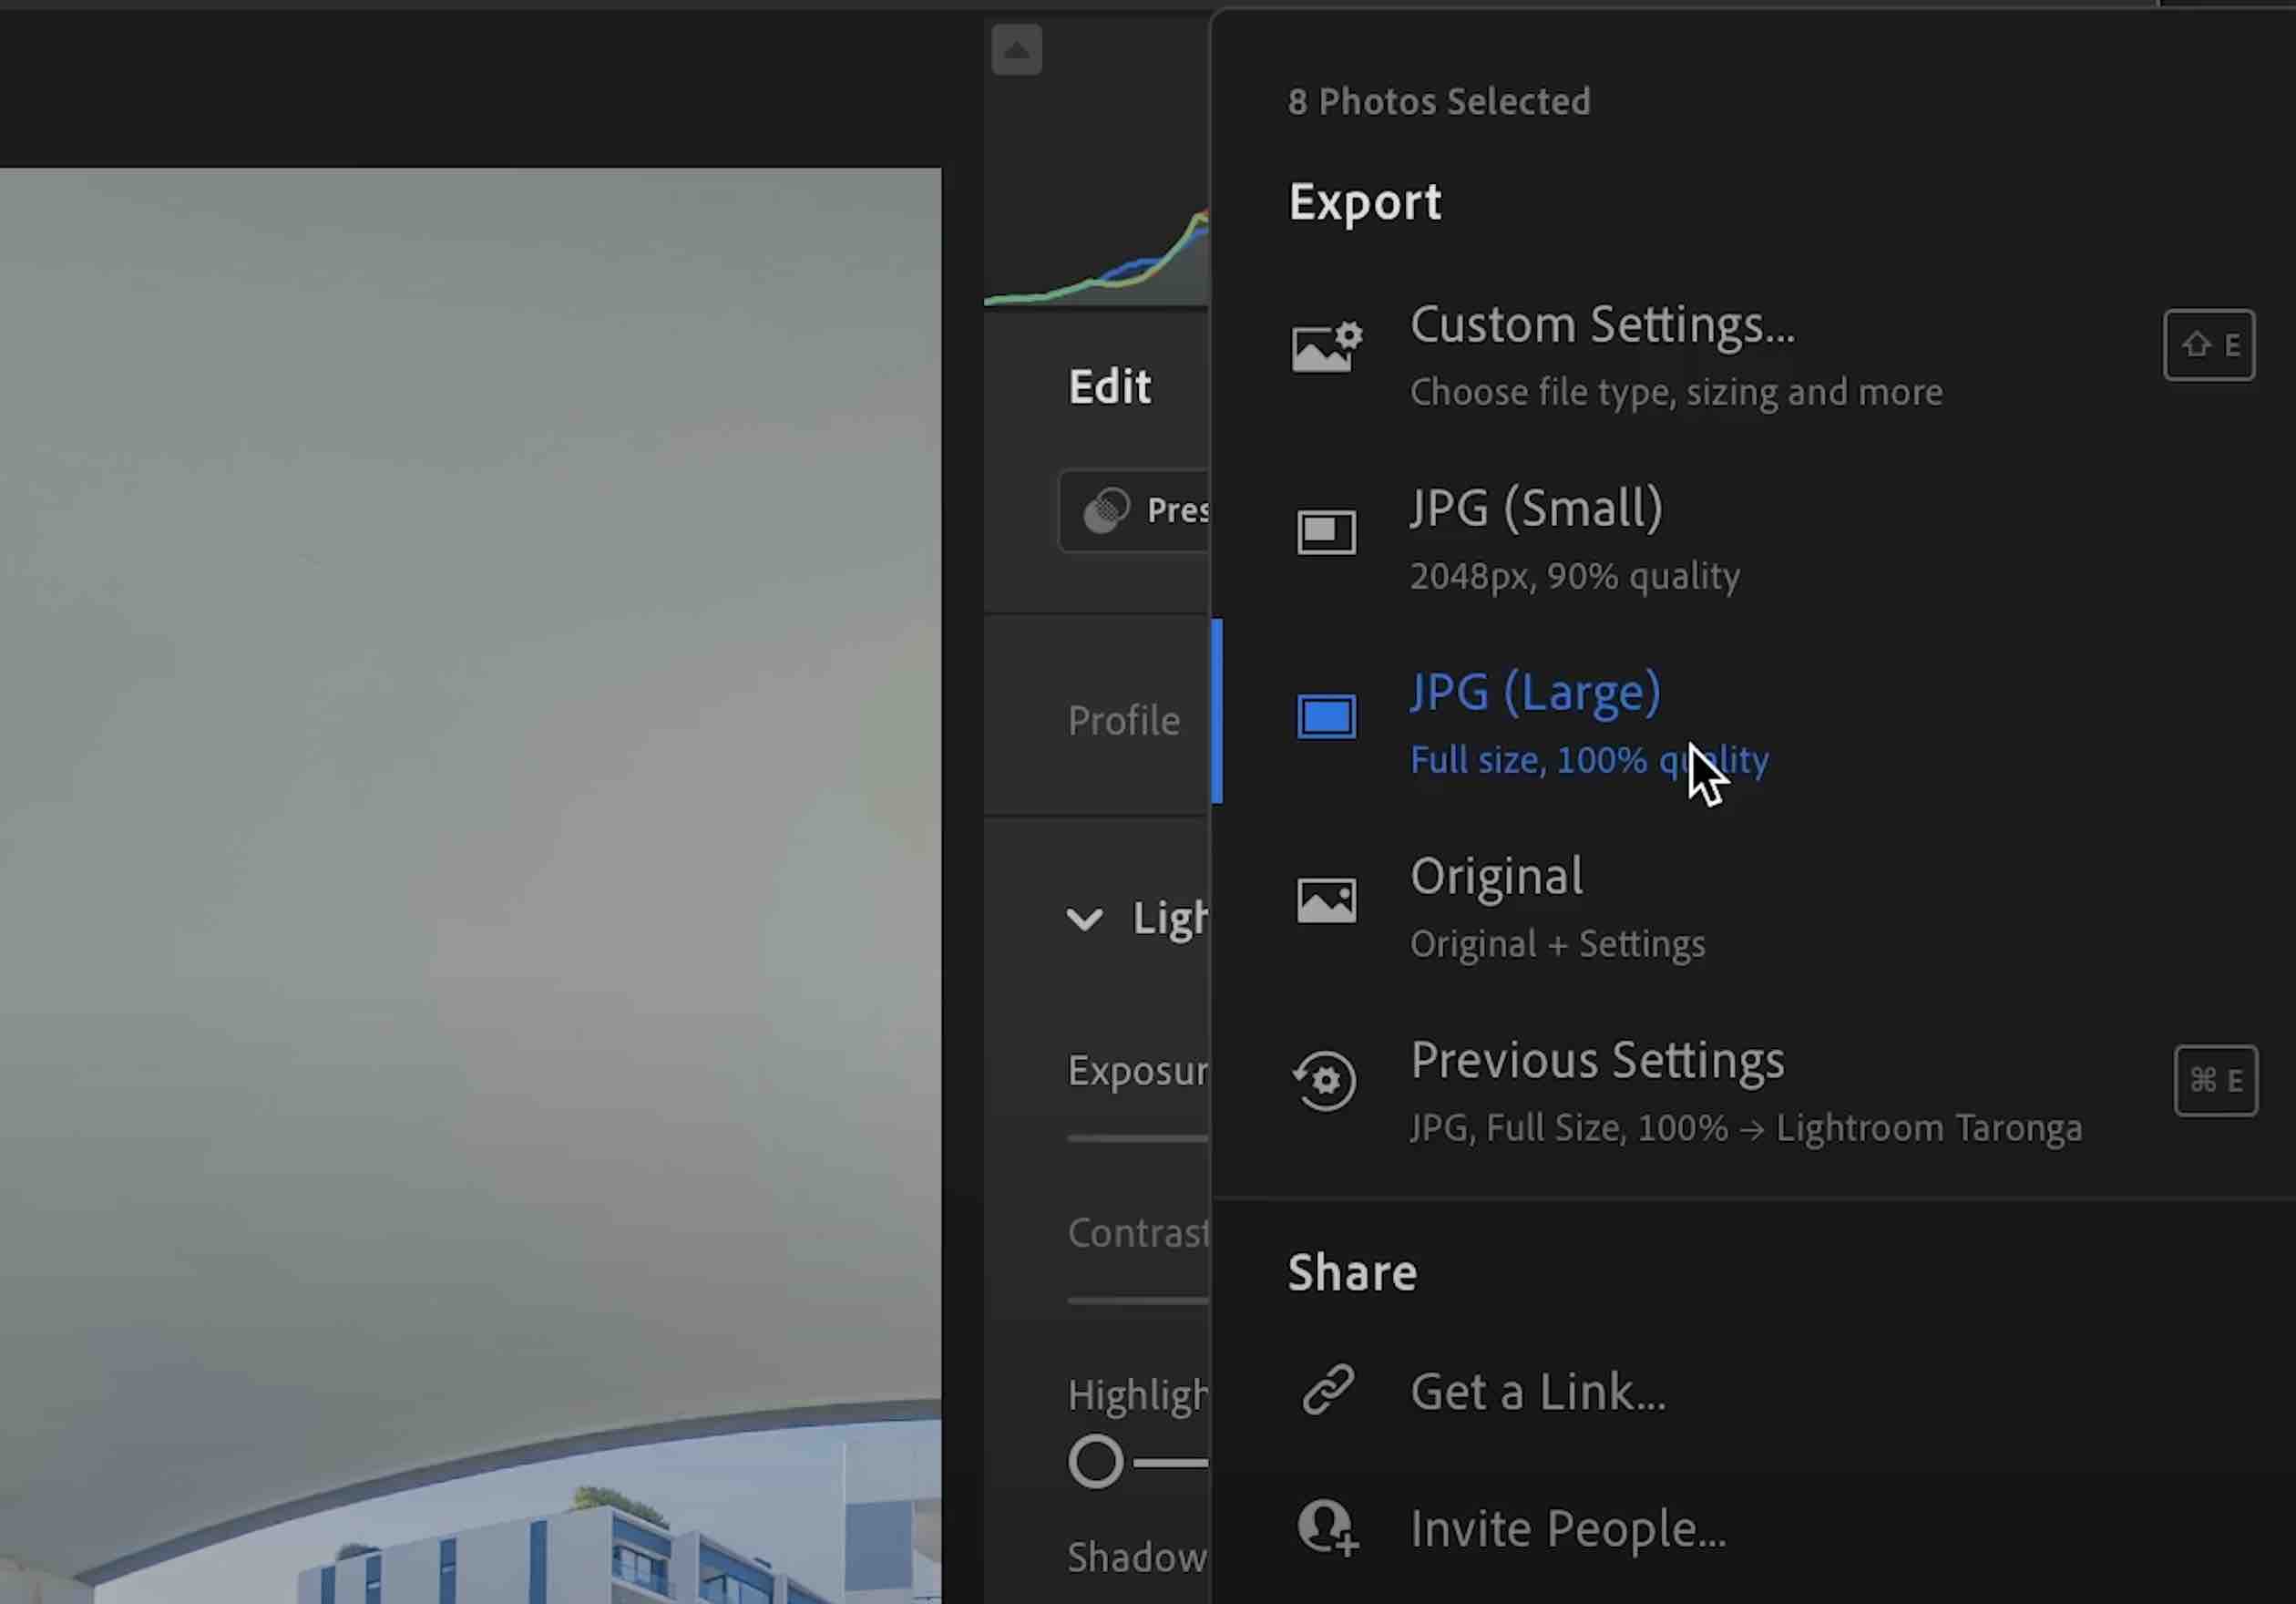
Step 10: Exporting Your Shots 💻
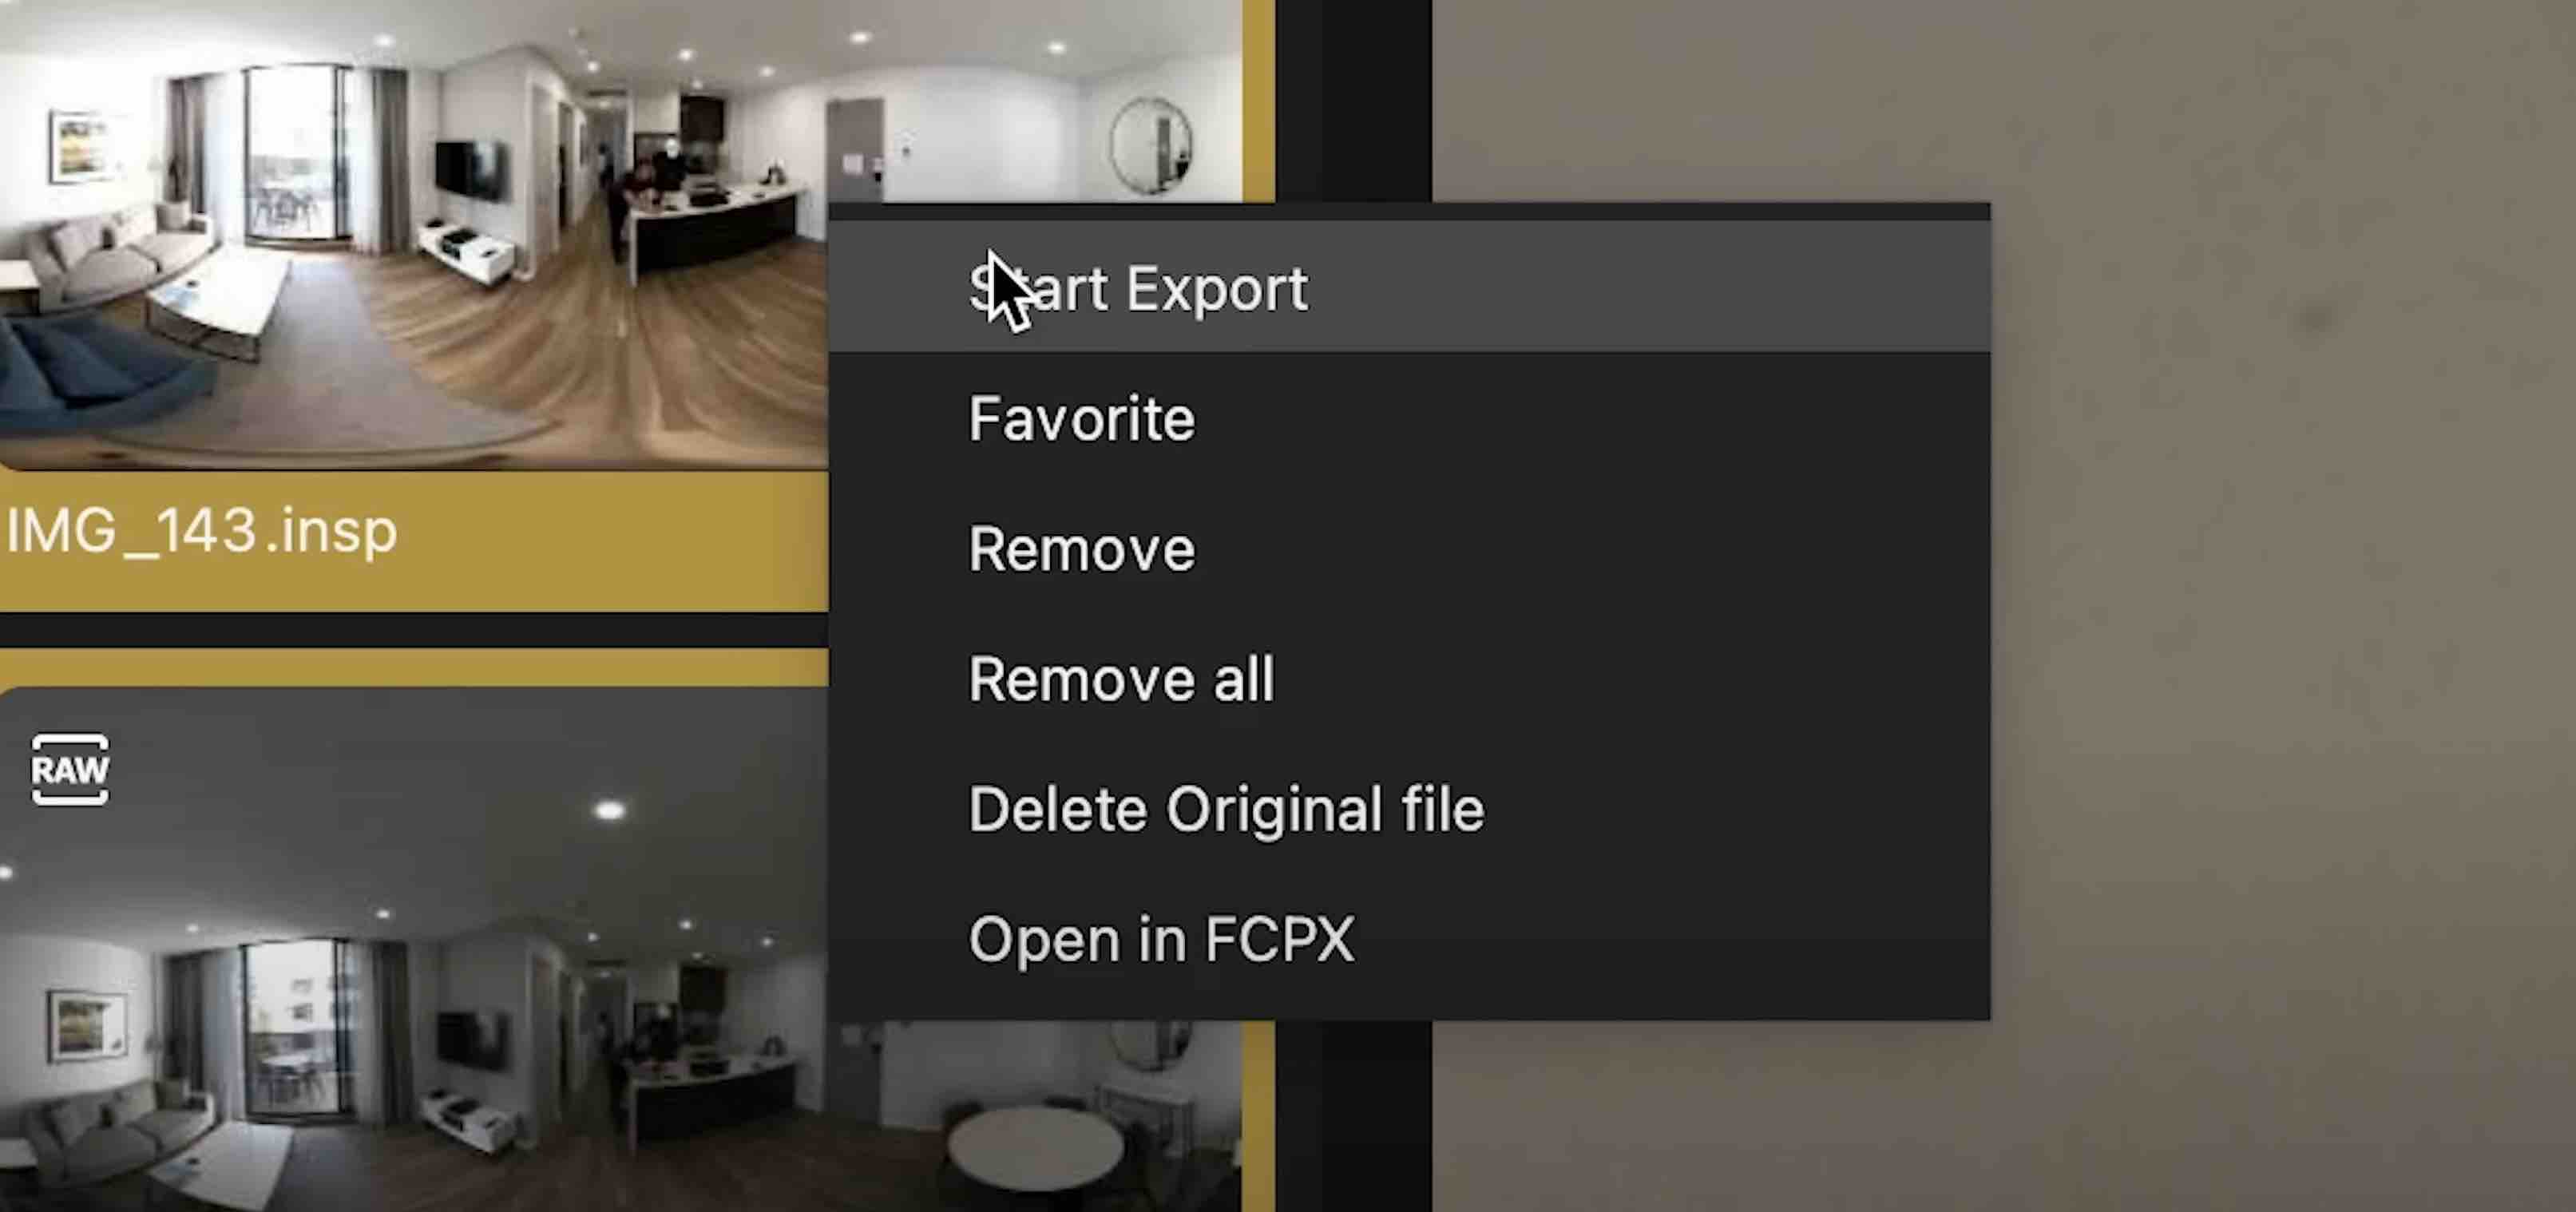
👉 To export your shots select all, then right click and choose start export. Choose your save location.
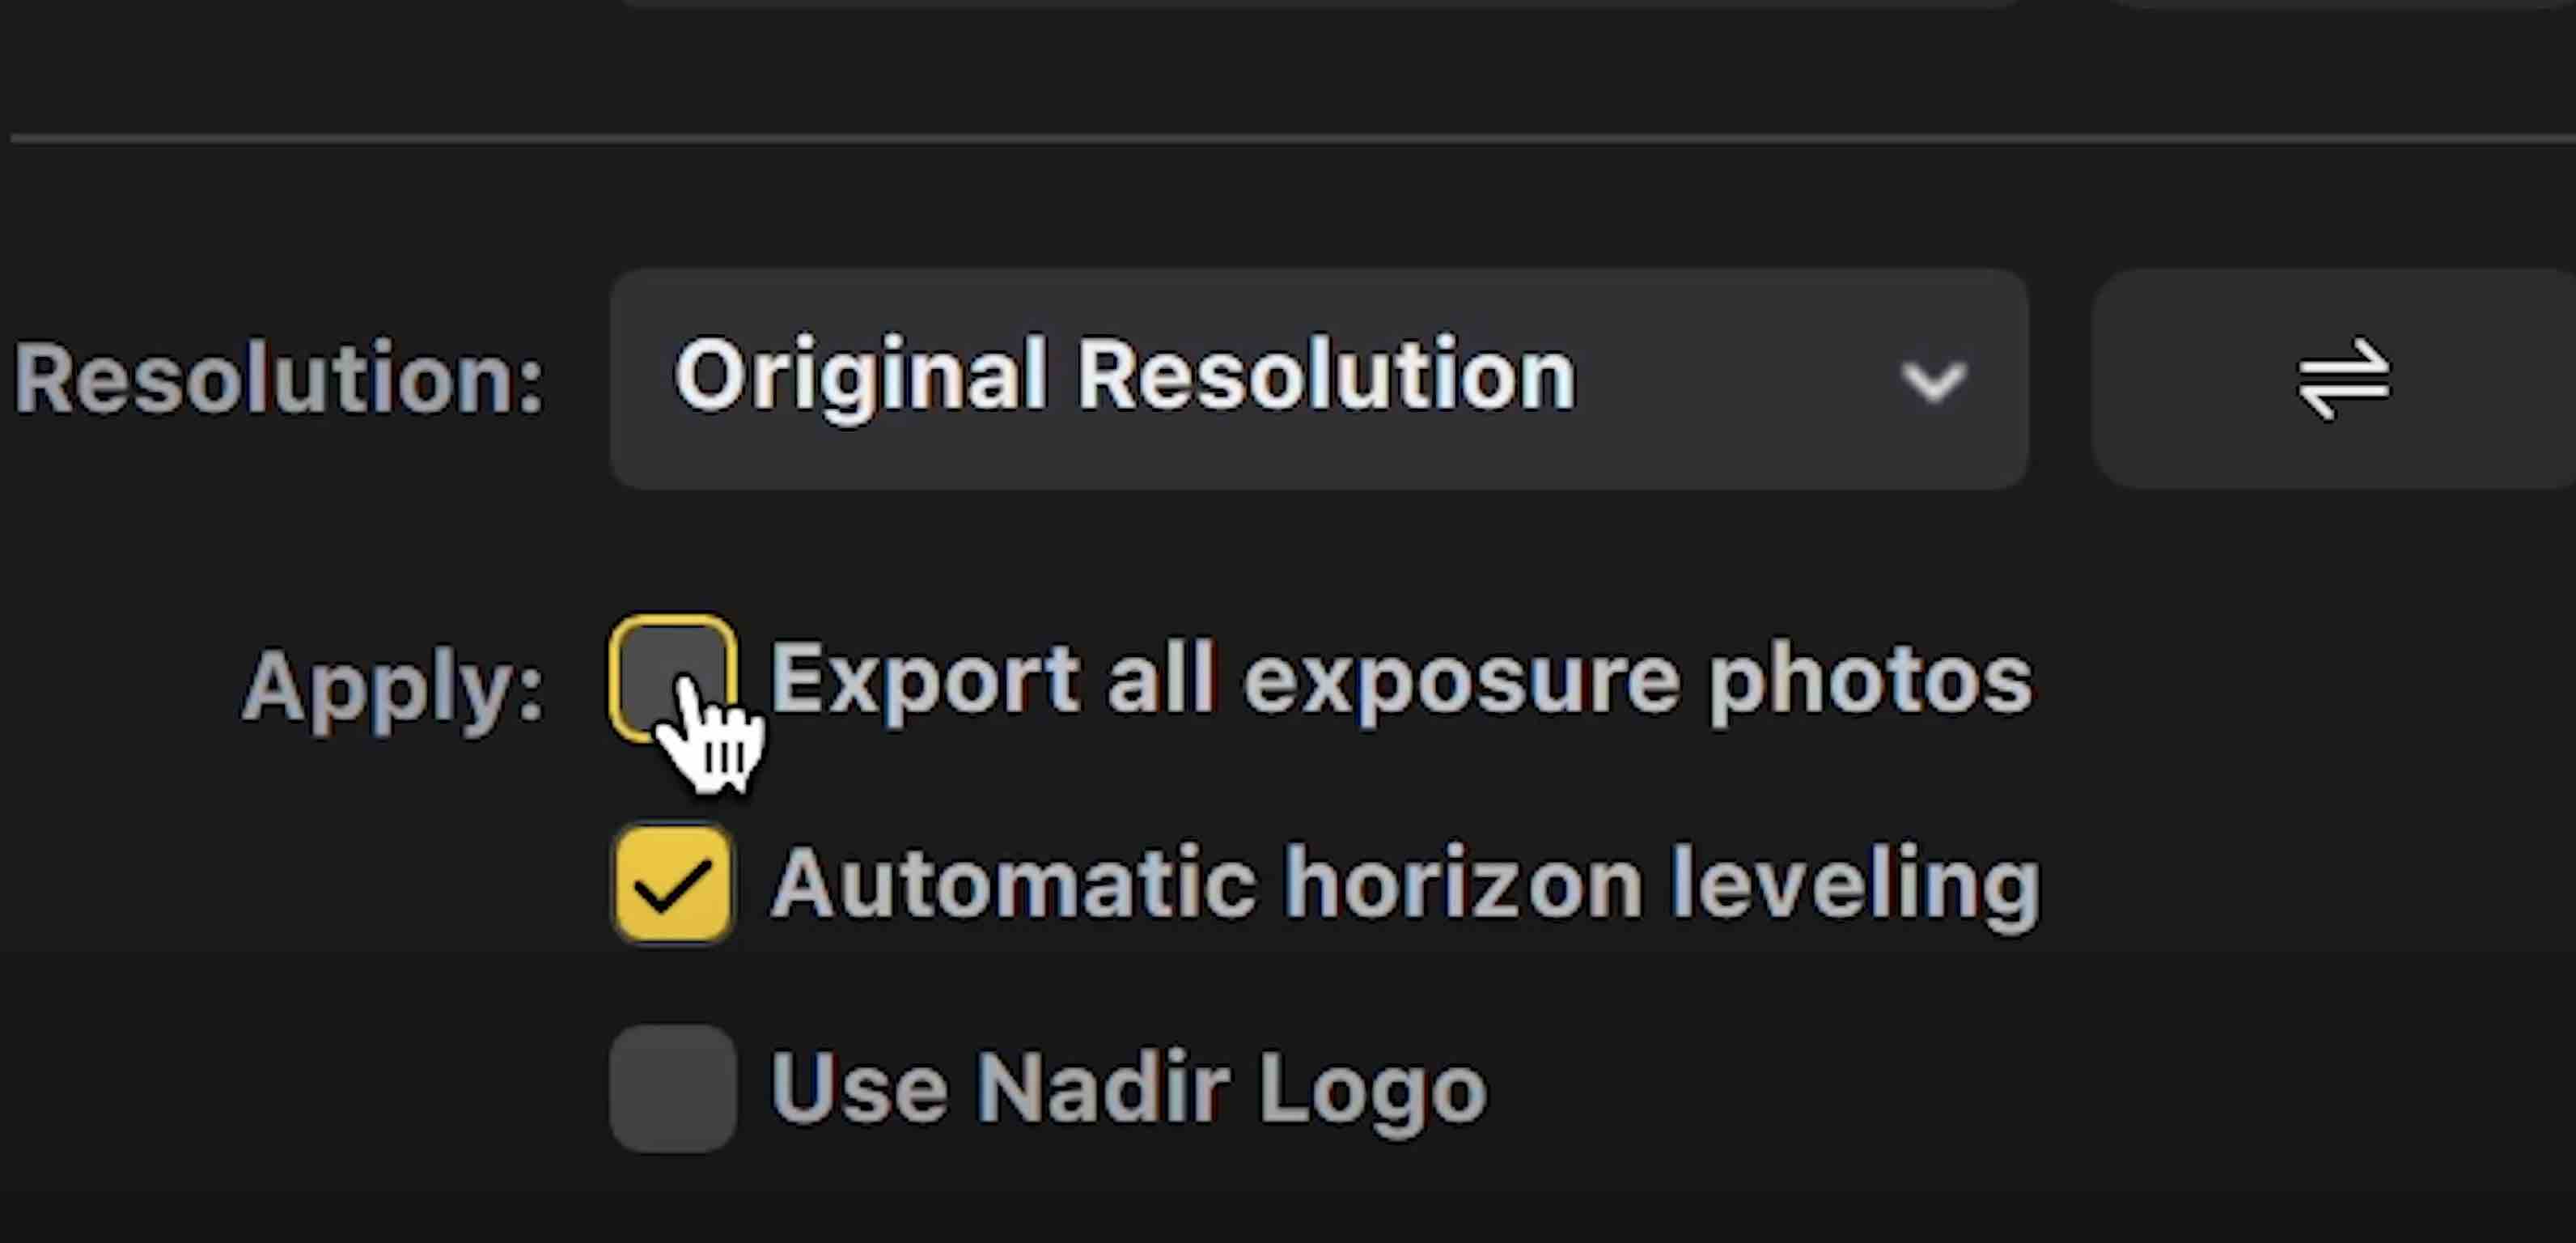
👉 Don't select "Export all exposure photos" unless you want every single individual exposure.
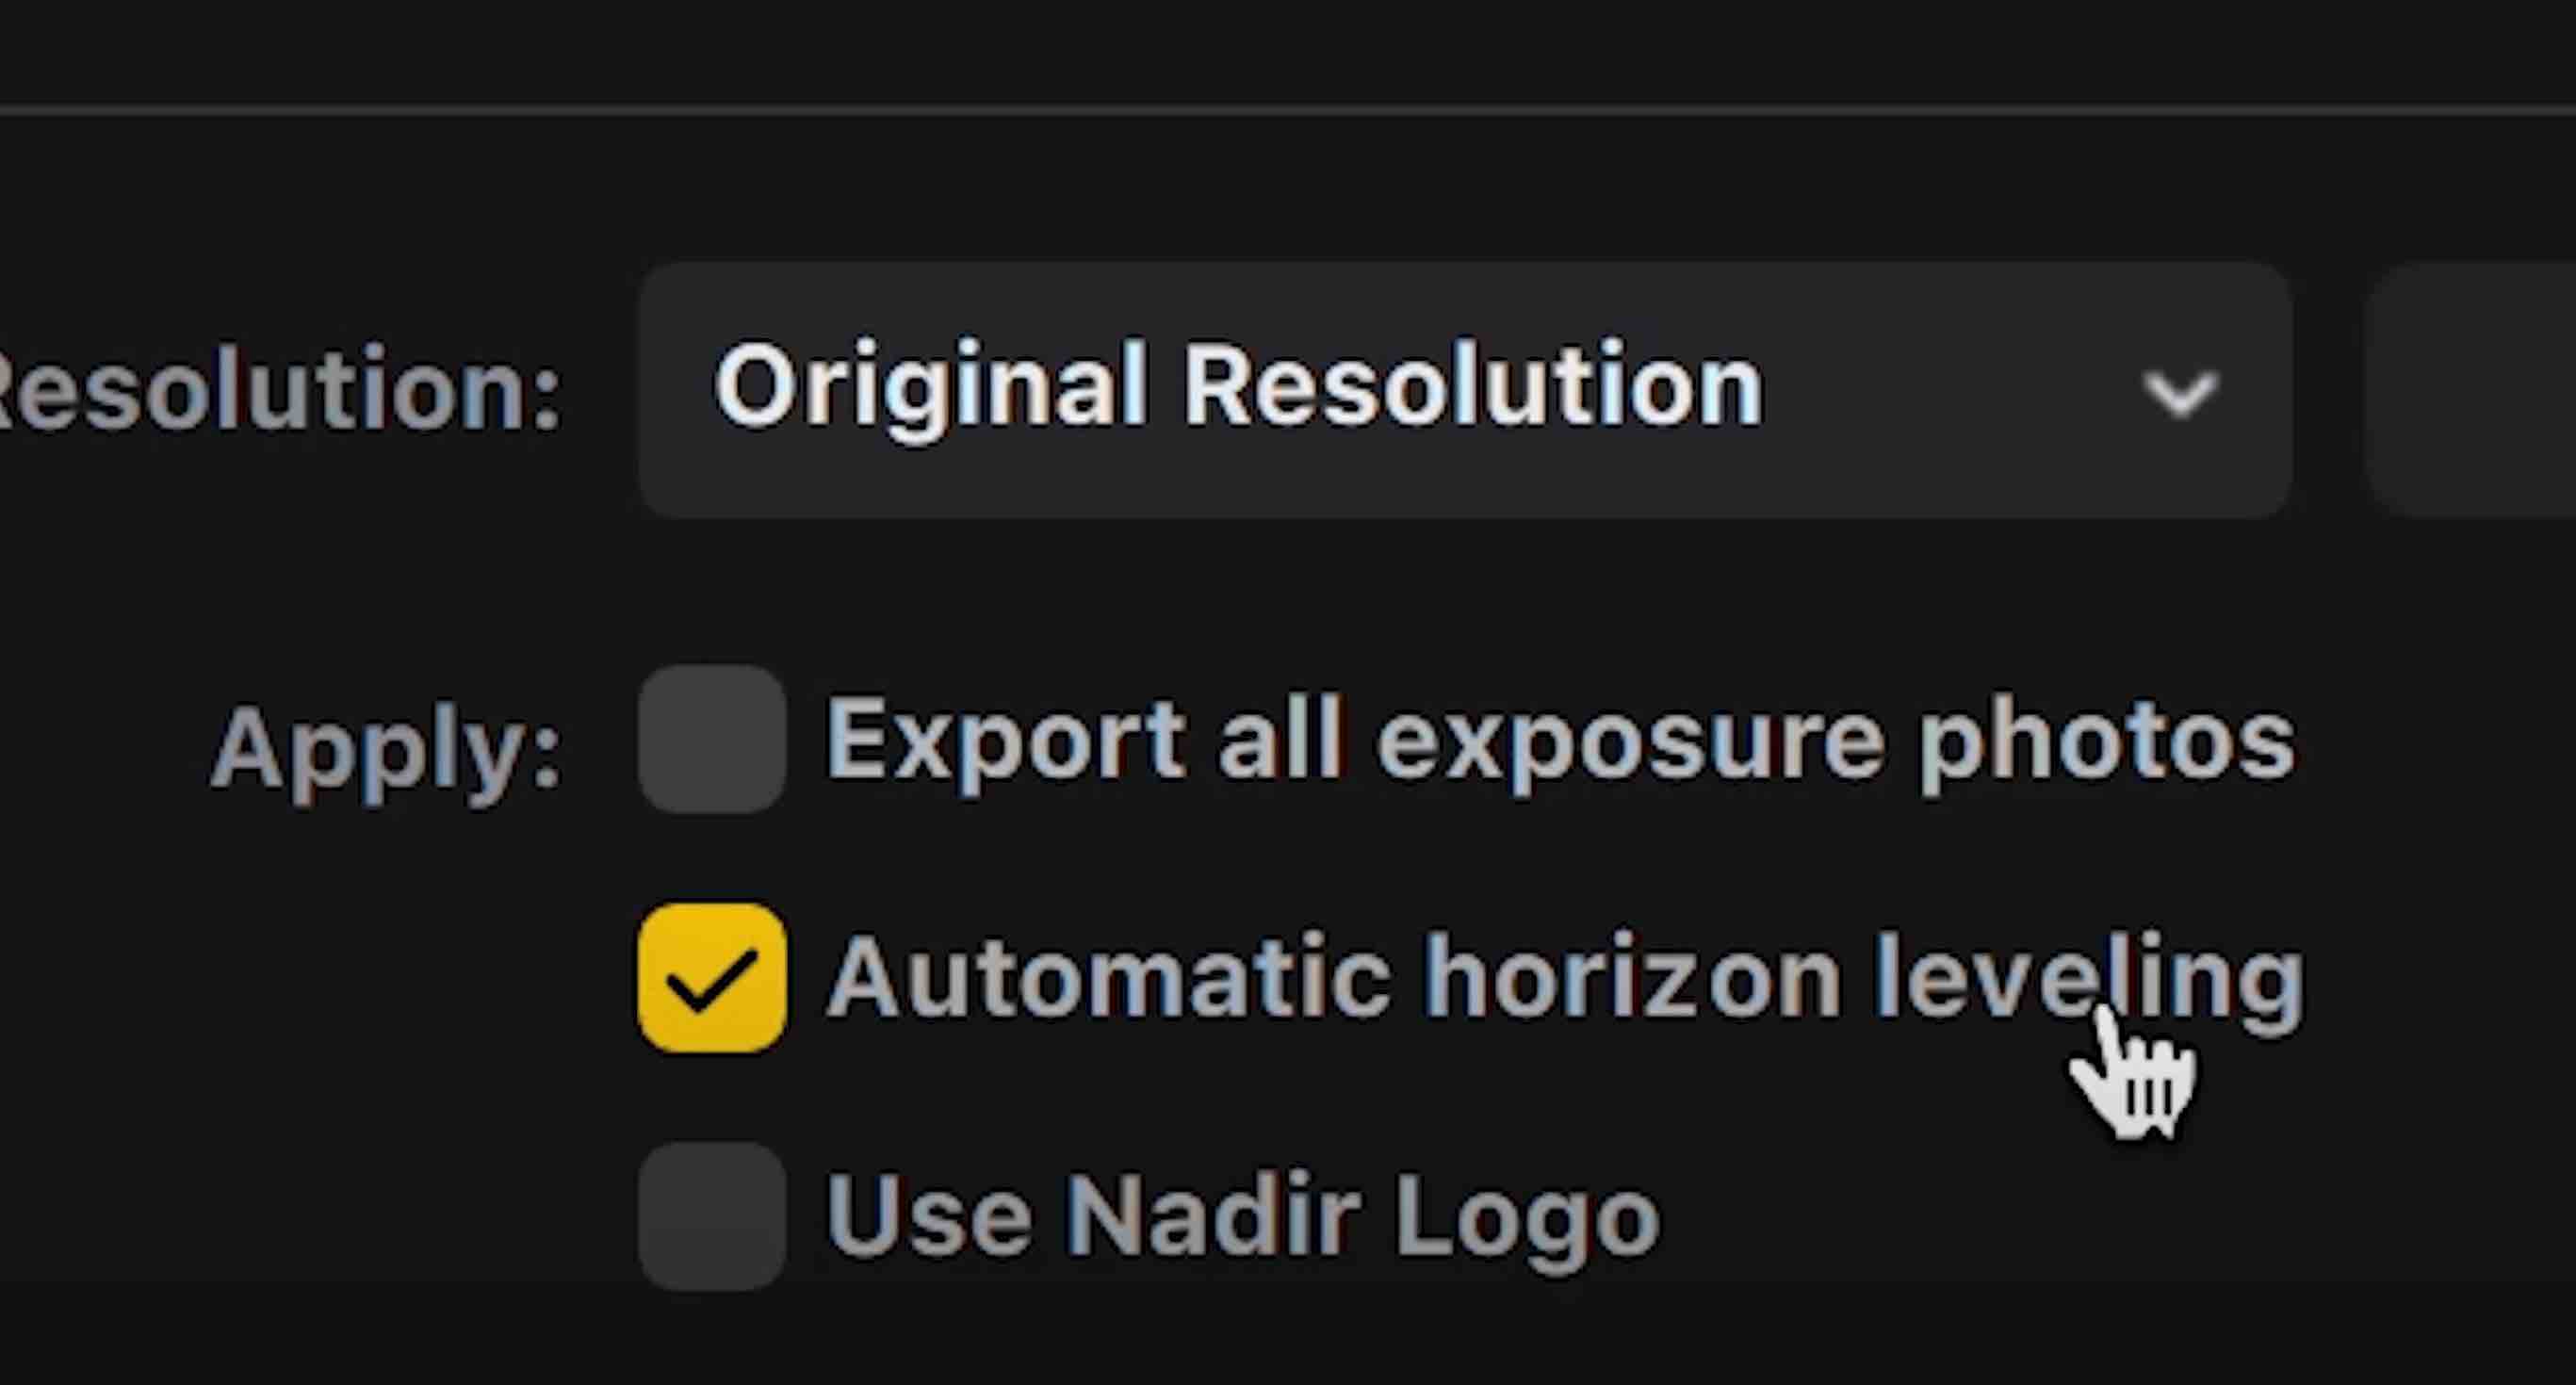
👉 Keep horizon levelling on and start export. Now that's it, we've stitched our shots.
👉 If you want to download my shots to play with yourself as we move on to the next stage, which is color correction, I'm have made all of the shots from this shoot available to you completely free by going to virtualtourpro.com/1inch.
Step 11: Color Correction 🎨
👉 Color correction is optional depending on how much effort you want to put into getting your photos as perfect as they can be. If you're someone that wants to shoot a lot of volume and you don't care so much about color correction, you can completely skip this step because after stitching, Insta360 Studio will generate a semi-color corrected PureShot photo that is good enough to post as is.

👉 Insta360 Studio will export two versions of your photos, the first one will be the HDR shot with the color correction applied, the second will be an uncolor corrected version that also has the dng file.

👉 Within the dng file there's going to be a lot more for us to go and color correct if we want to produce an even better result than the automatic color correction.
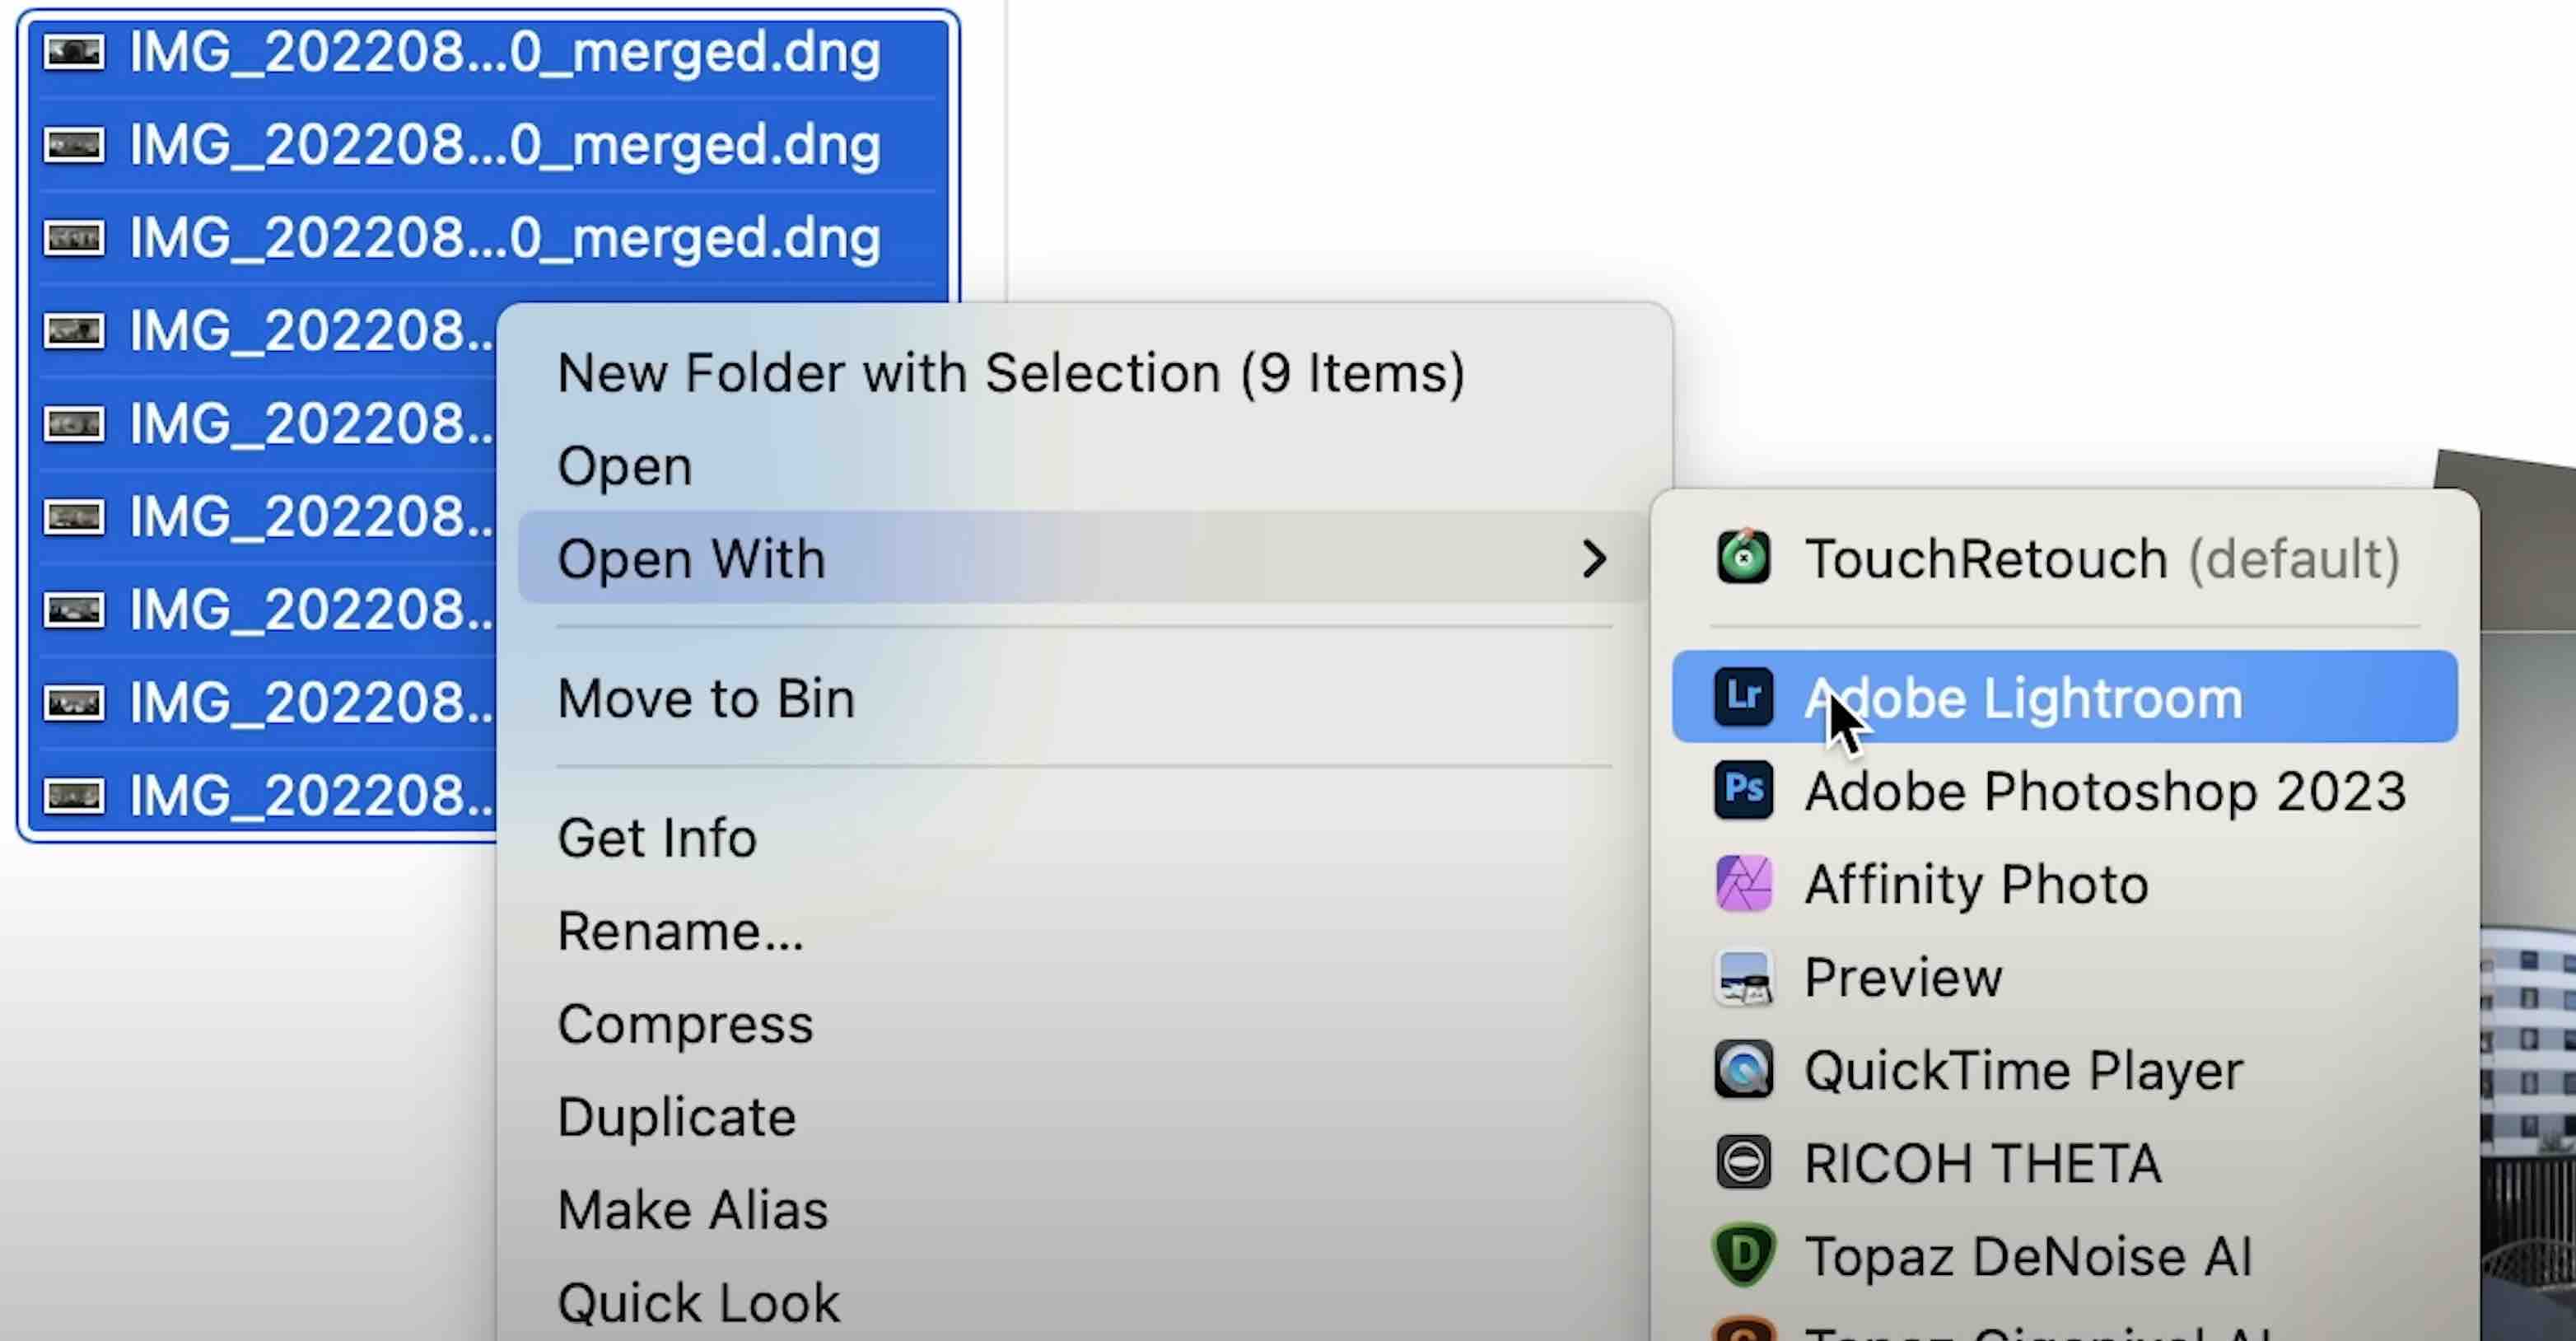
👉 Copy and paste the dng files from your shoot into one folder to make things easy, then I right click all of them and color correct them inside my favourite color correction software which is Adobe Lightroom.
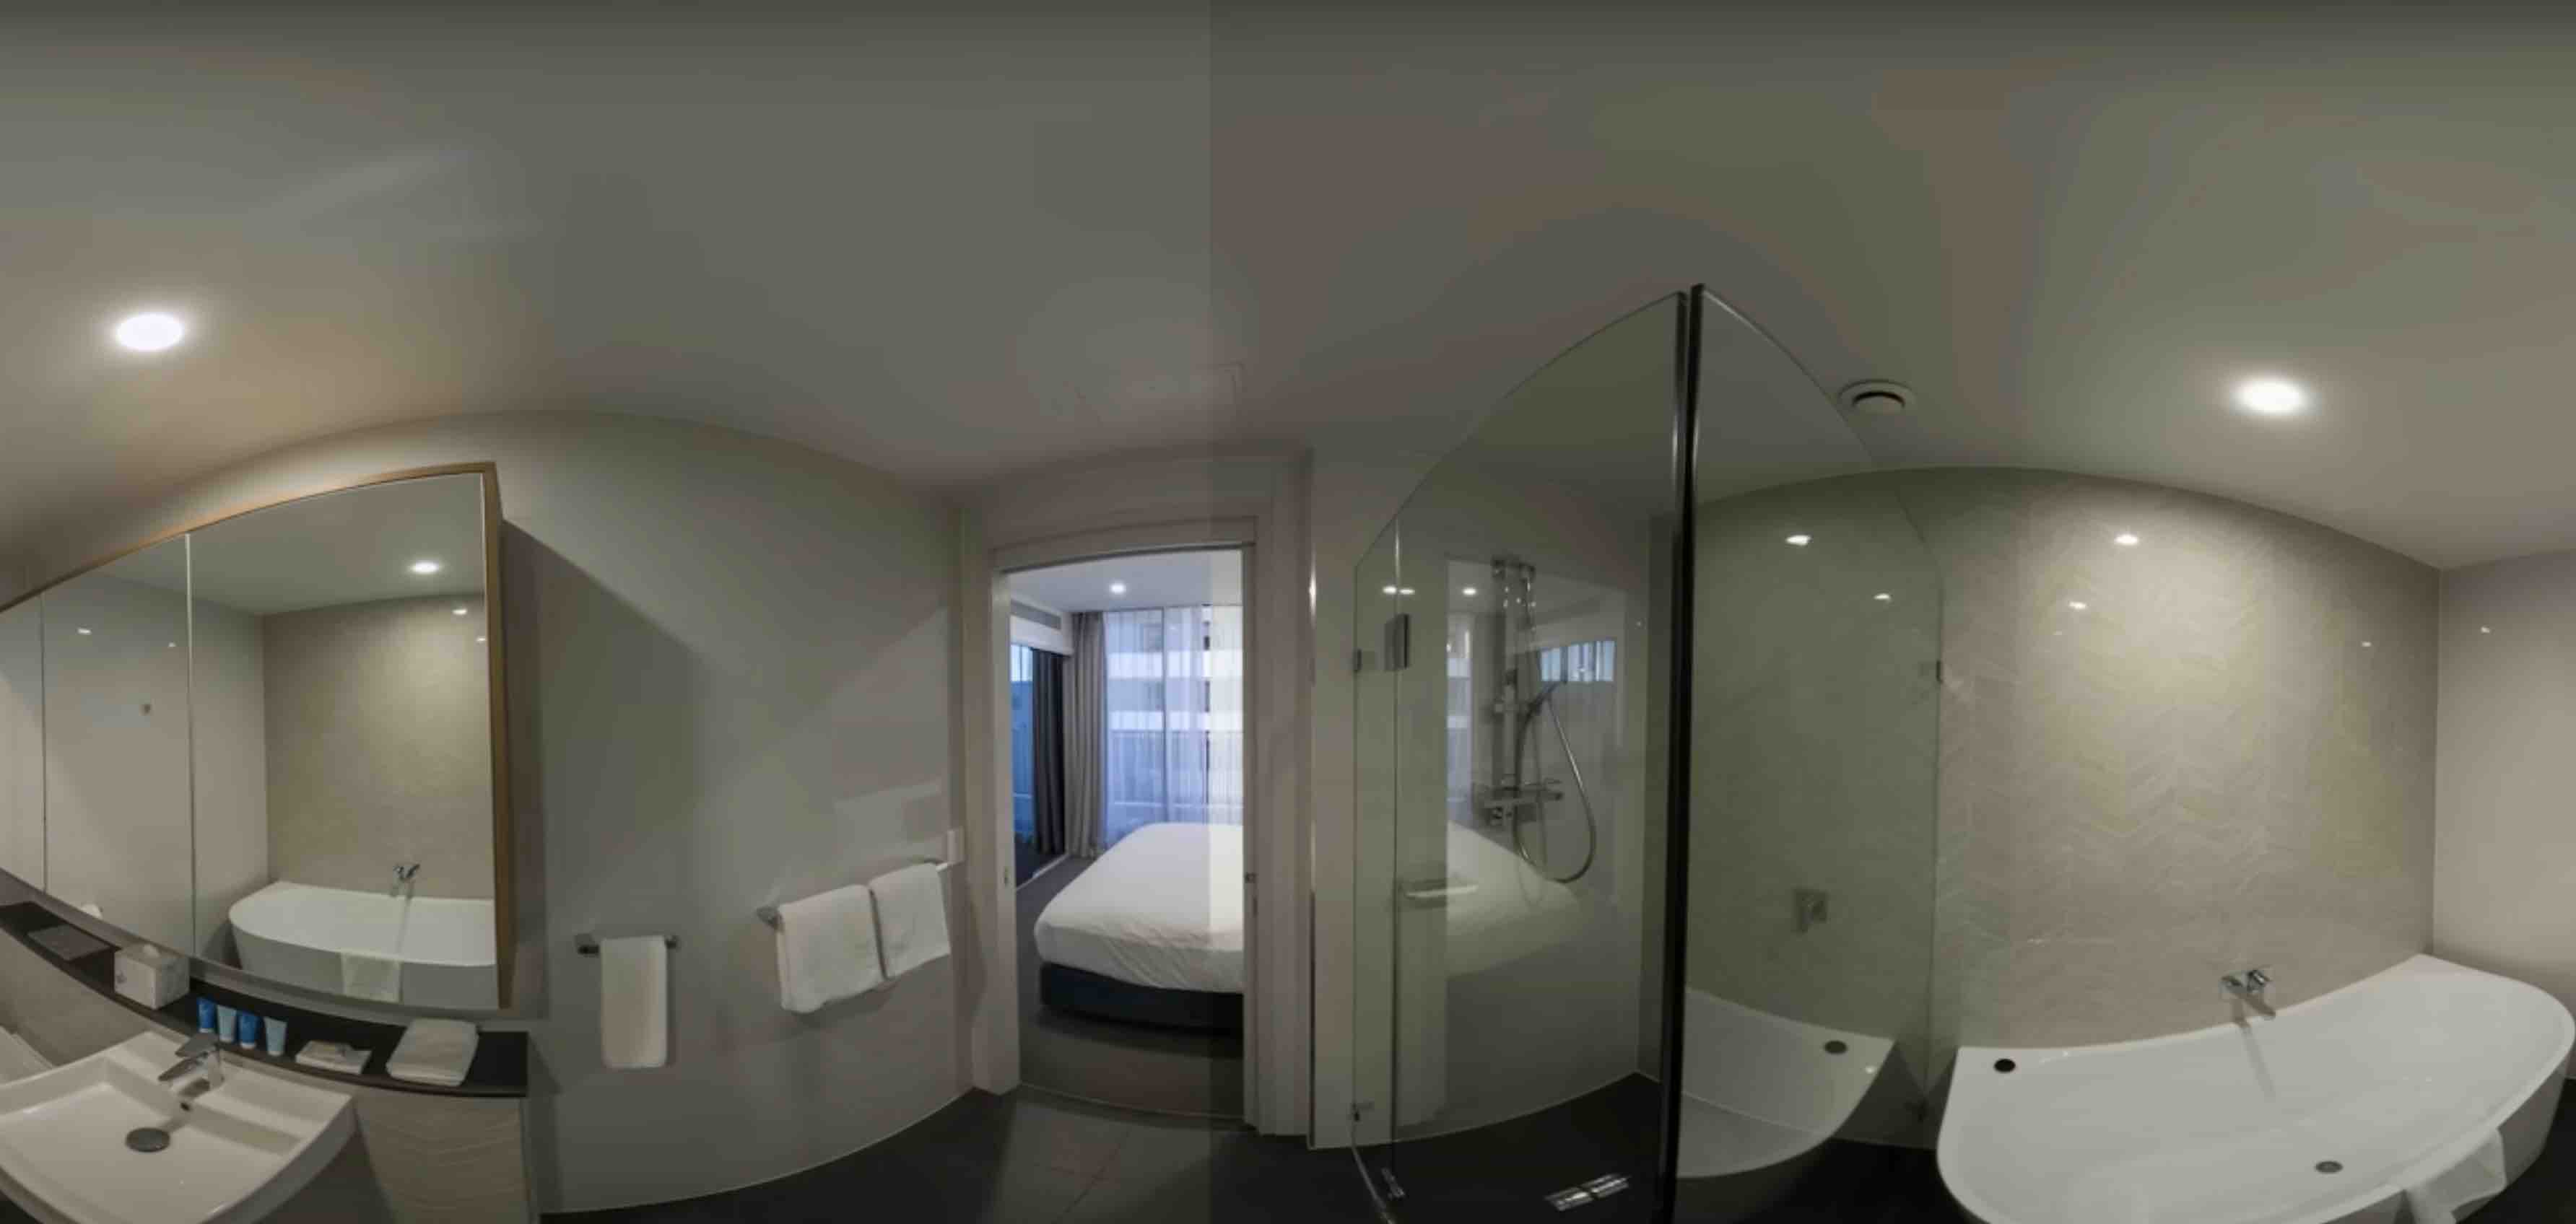
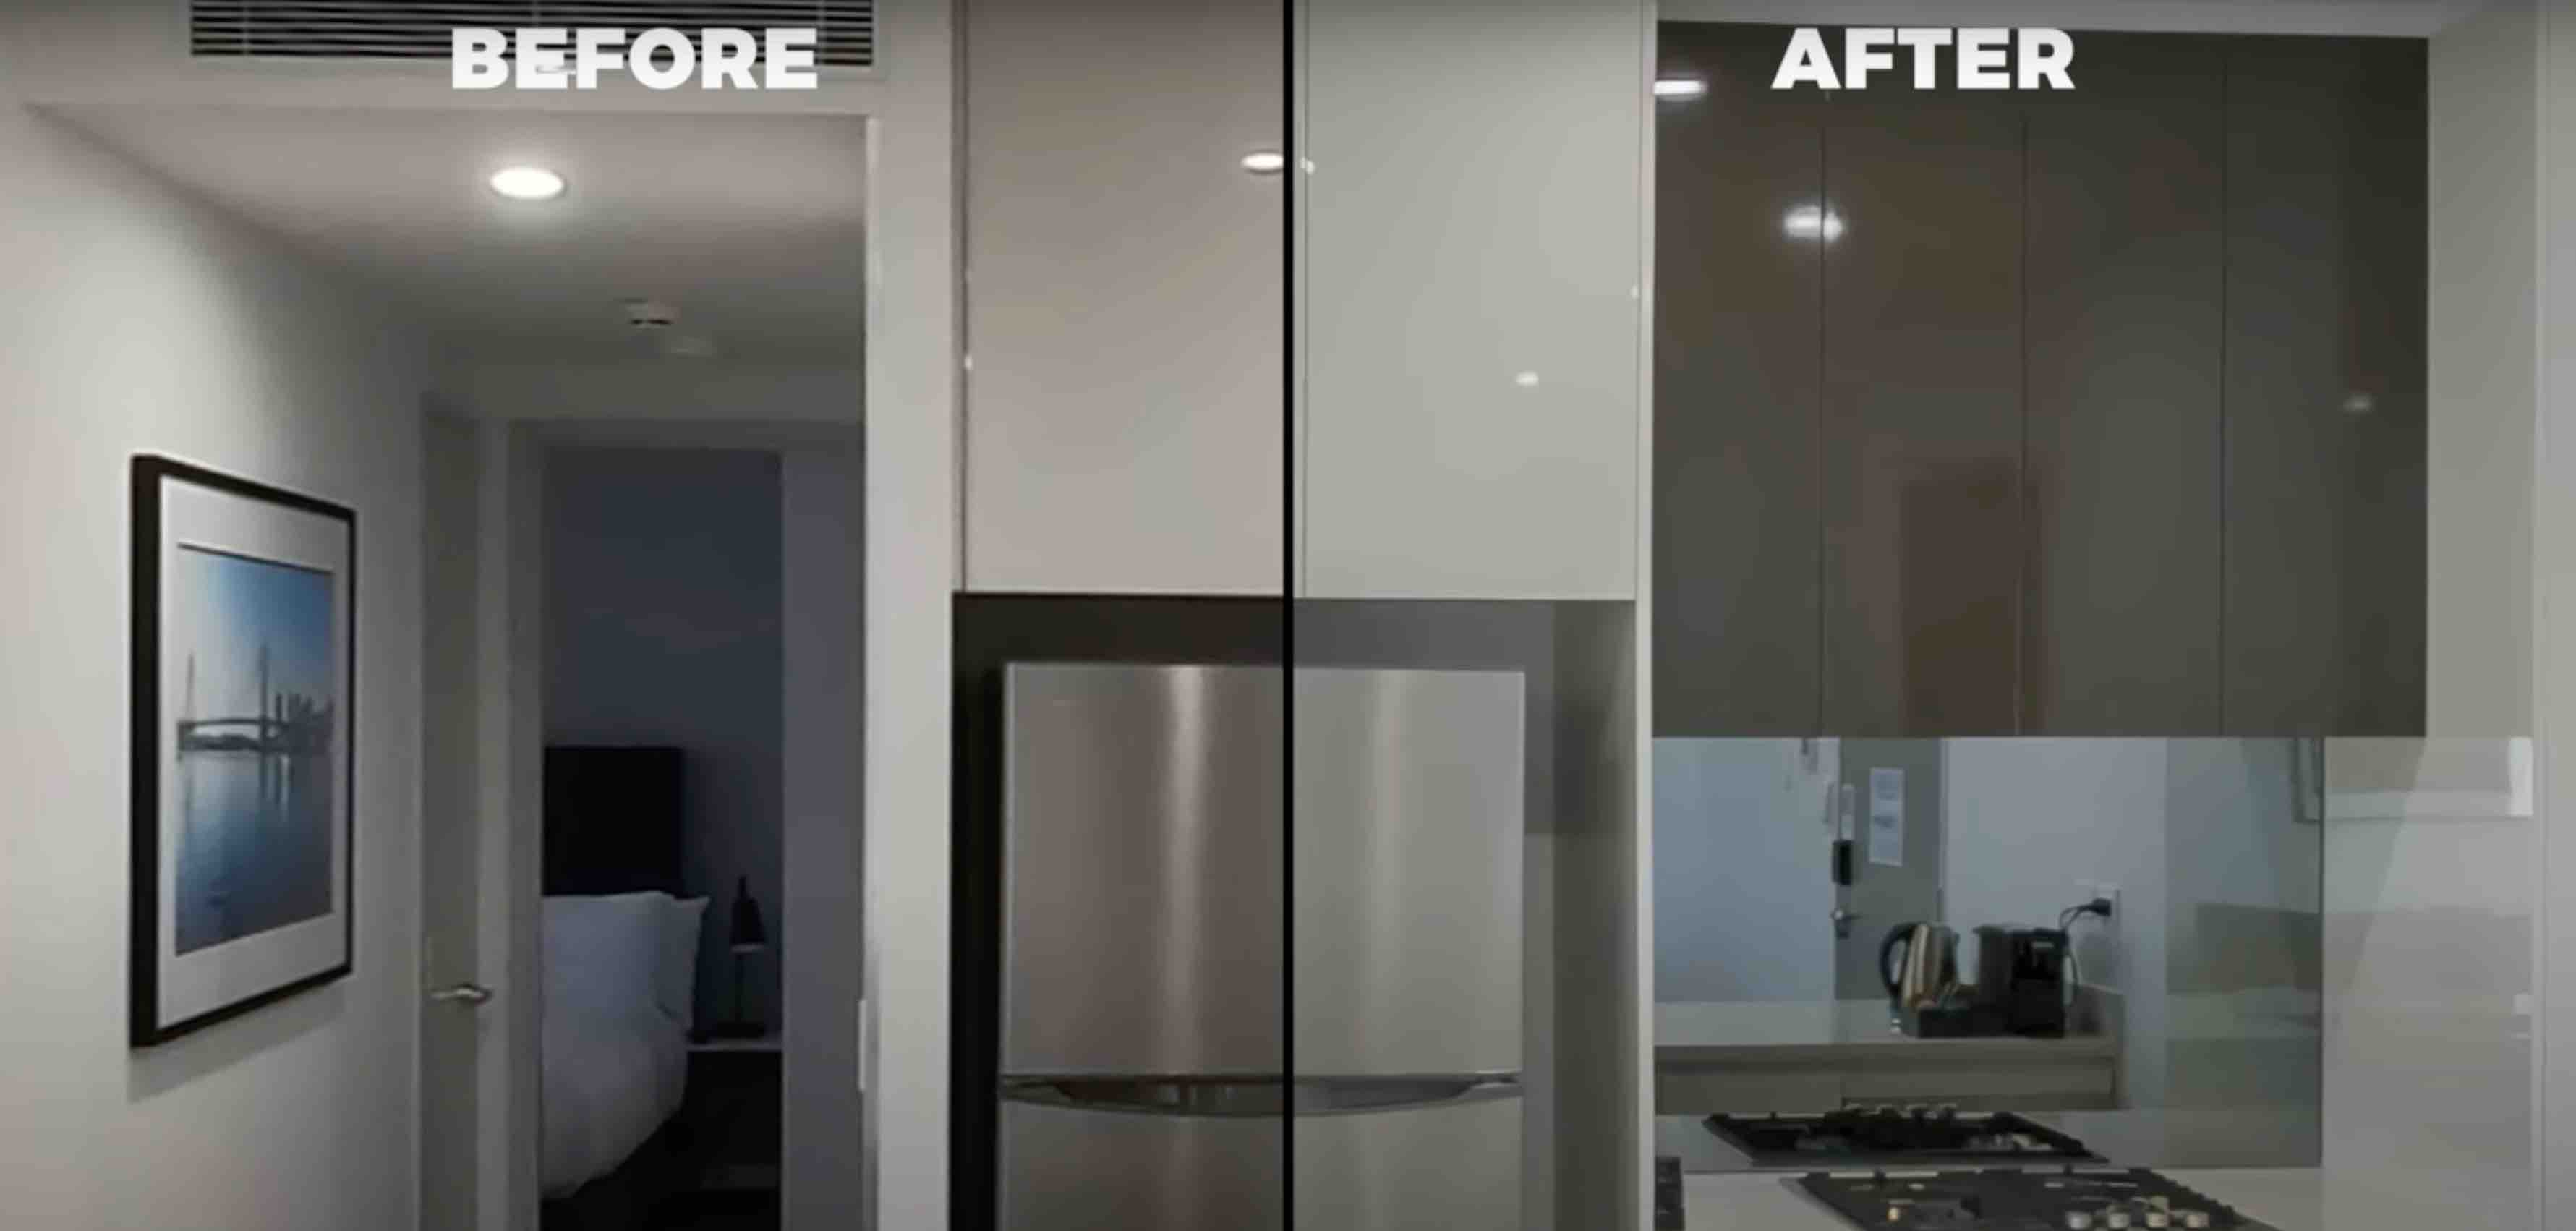
👉 I brought down the highlights on the dng file, in the video you will see the window area, by bringing down the highlights here it brought back a lot of detail. We also had some shadowy areas under the sink and elsewhere in the image, so I brought the shadow slider up as well.
👉 I brought up the vibrant slider to bring some color back into the room and now it is starting to look really accurate to how the lighting and colors actually looked when I was there, just with those three sliders alone.
👉 Now you can copy the edit over to the other photos so it applies similar highlight recovery, shadow reduction and vibrance.
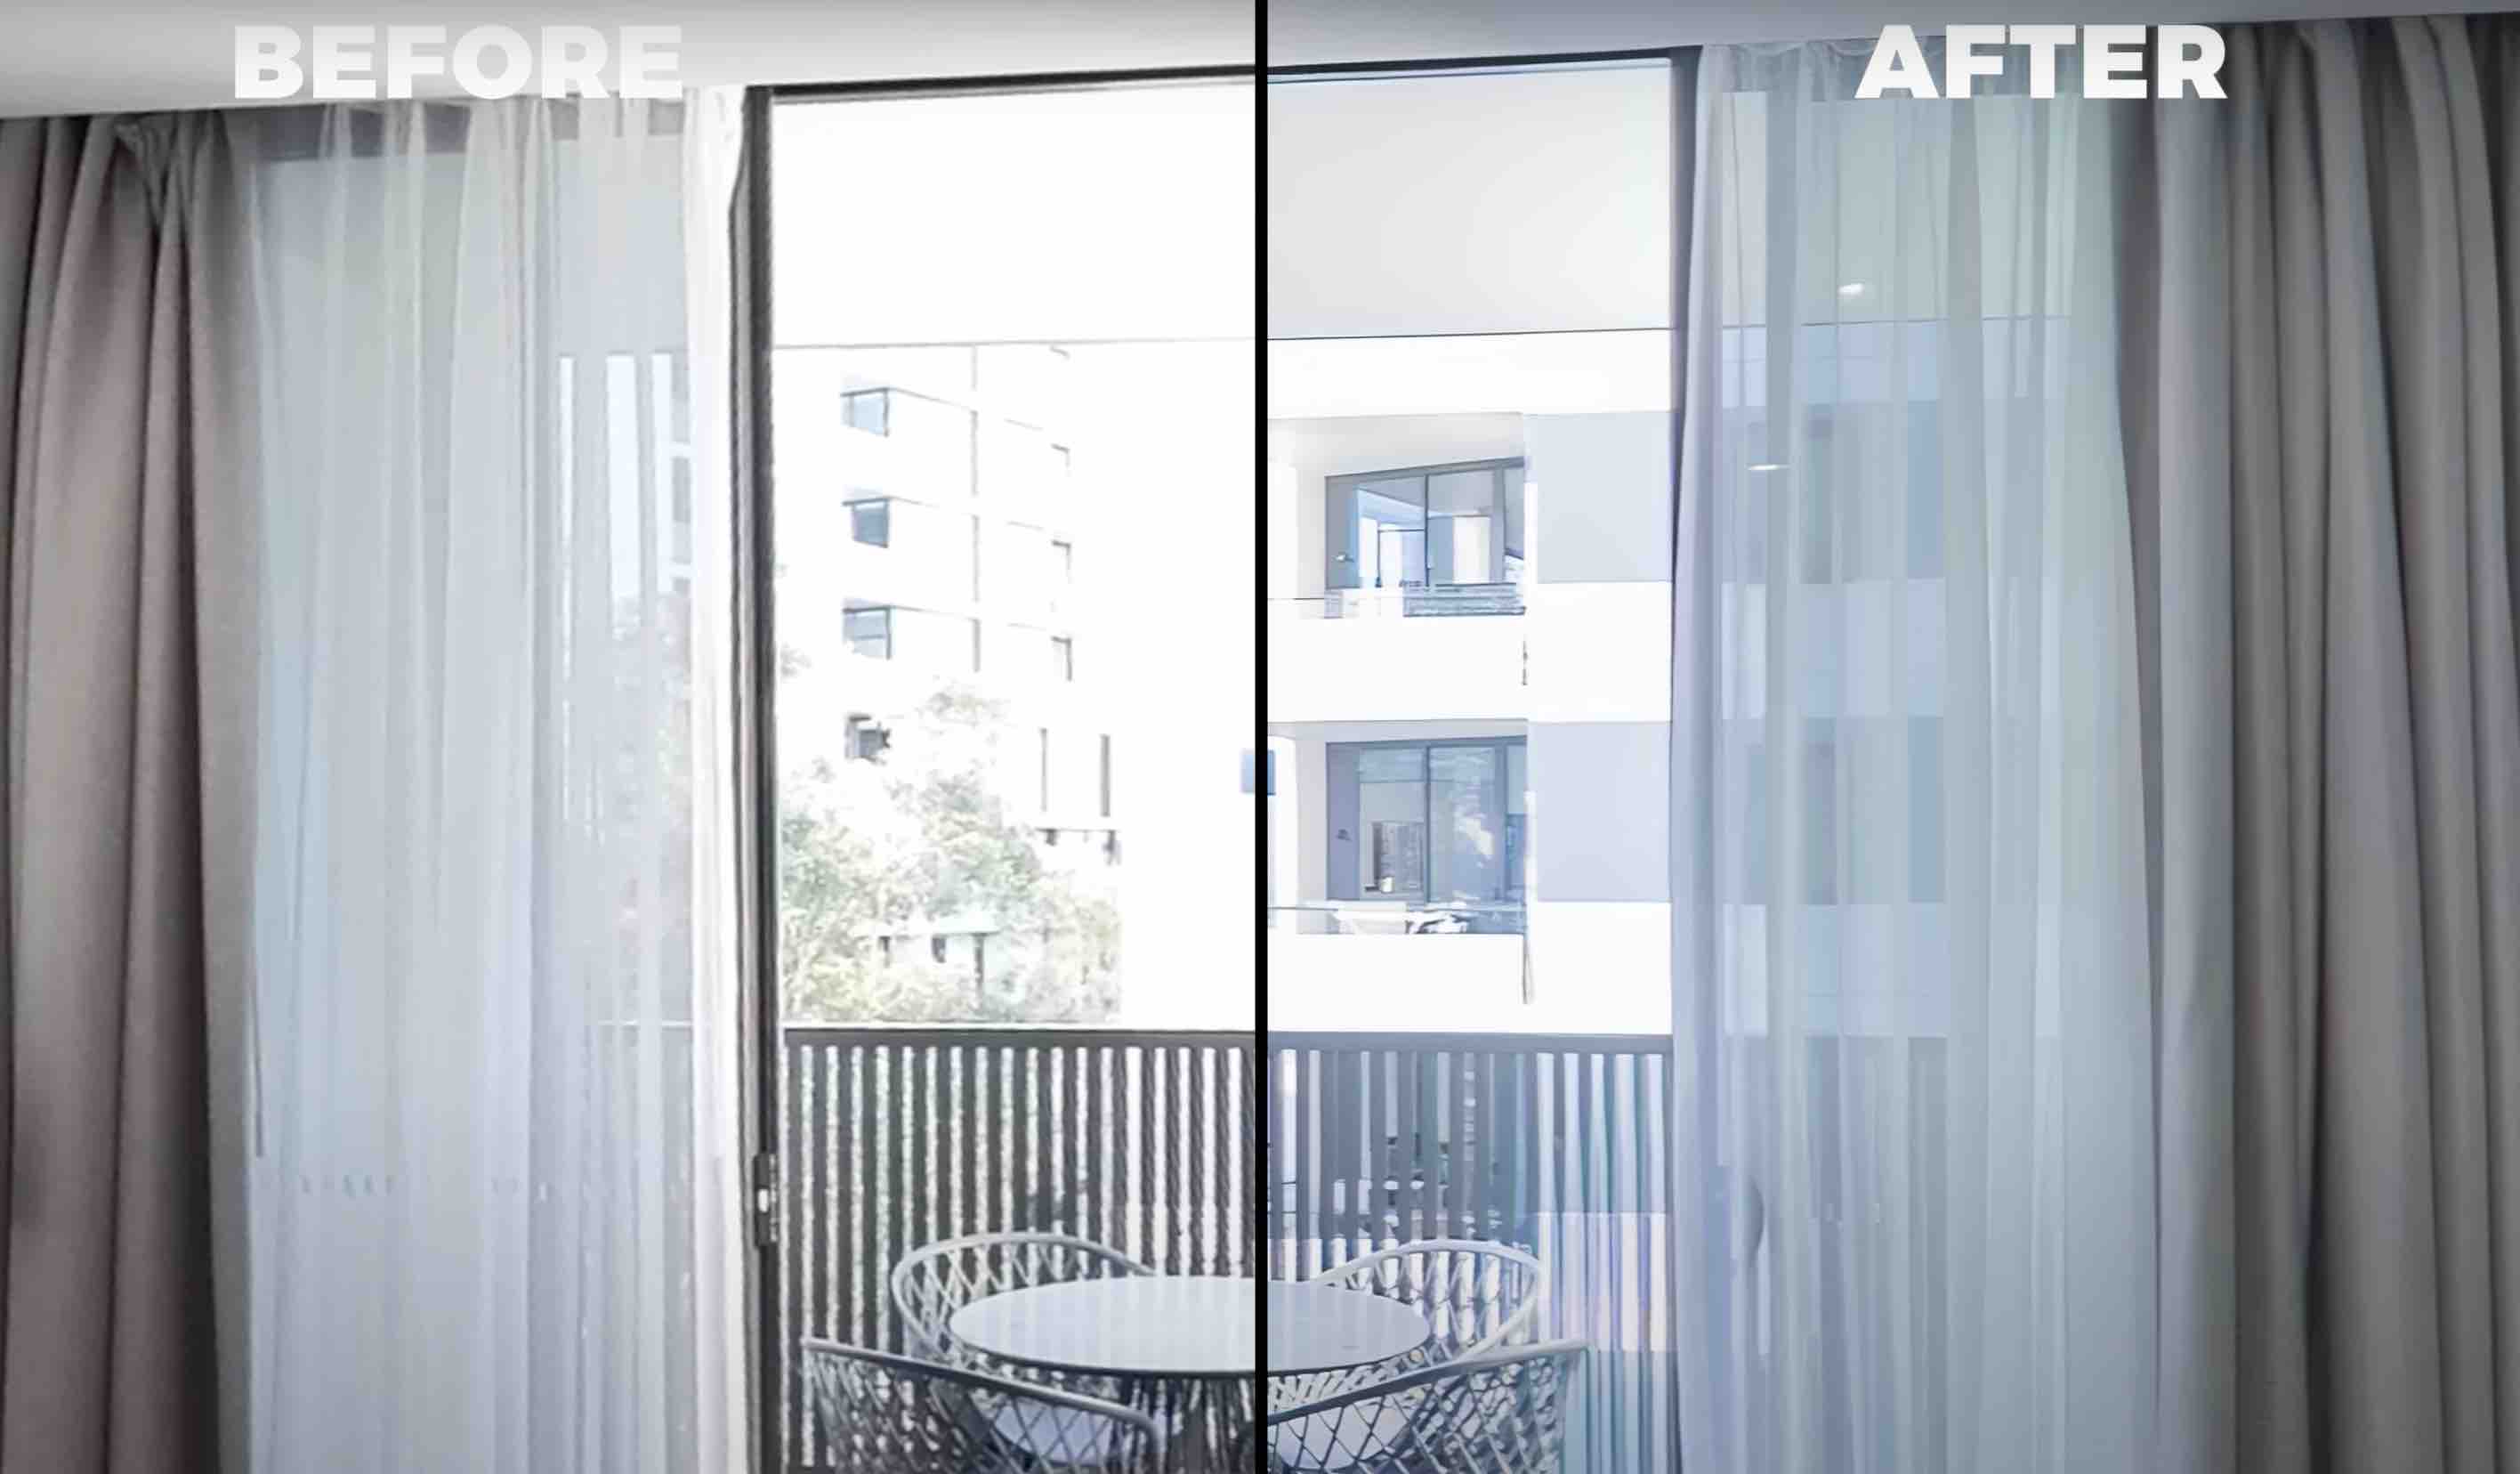
👉 The copy paste method works with similar rooms, so a lot of the interiors it works well, however with a balcony or exterior, the interior may still be a bit dark so you have to bring up the shadows all the way, as well as the exposure and compensate in the highlights by bringing the whites down.
Here's the before and after:
👉 That is so much better. 🙌
👉 From here, export the shots from Lightroom as jpegs, since we're now done with the dngs, we got the most out of them so exporting as a large jpeg is fine.
👉 If you want to learn my entire color correction workflow within Adobe Lightroom you can find an entire Lightroom Master Class inside my Virtual Tour Pro Course.
Step 12: Remove The Tripod ✂️
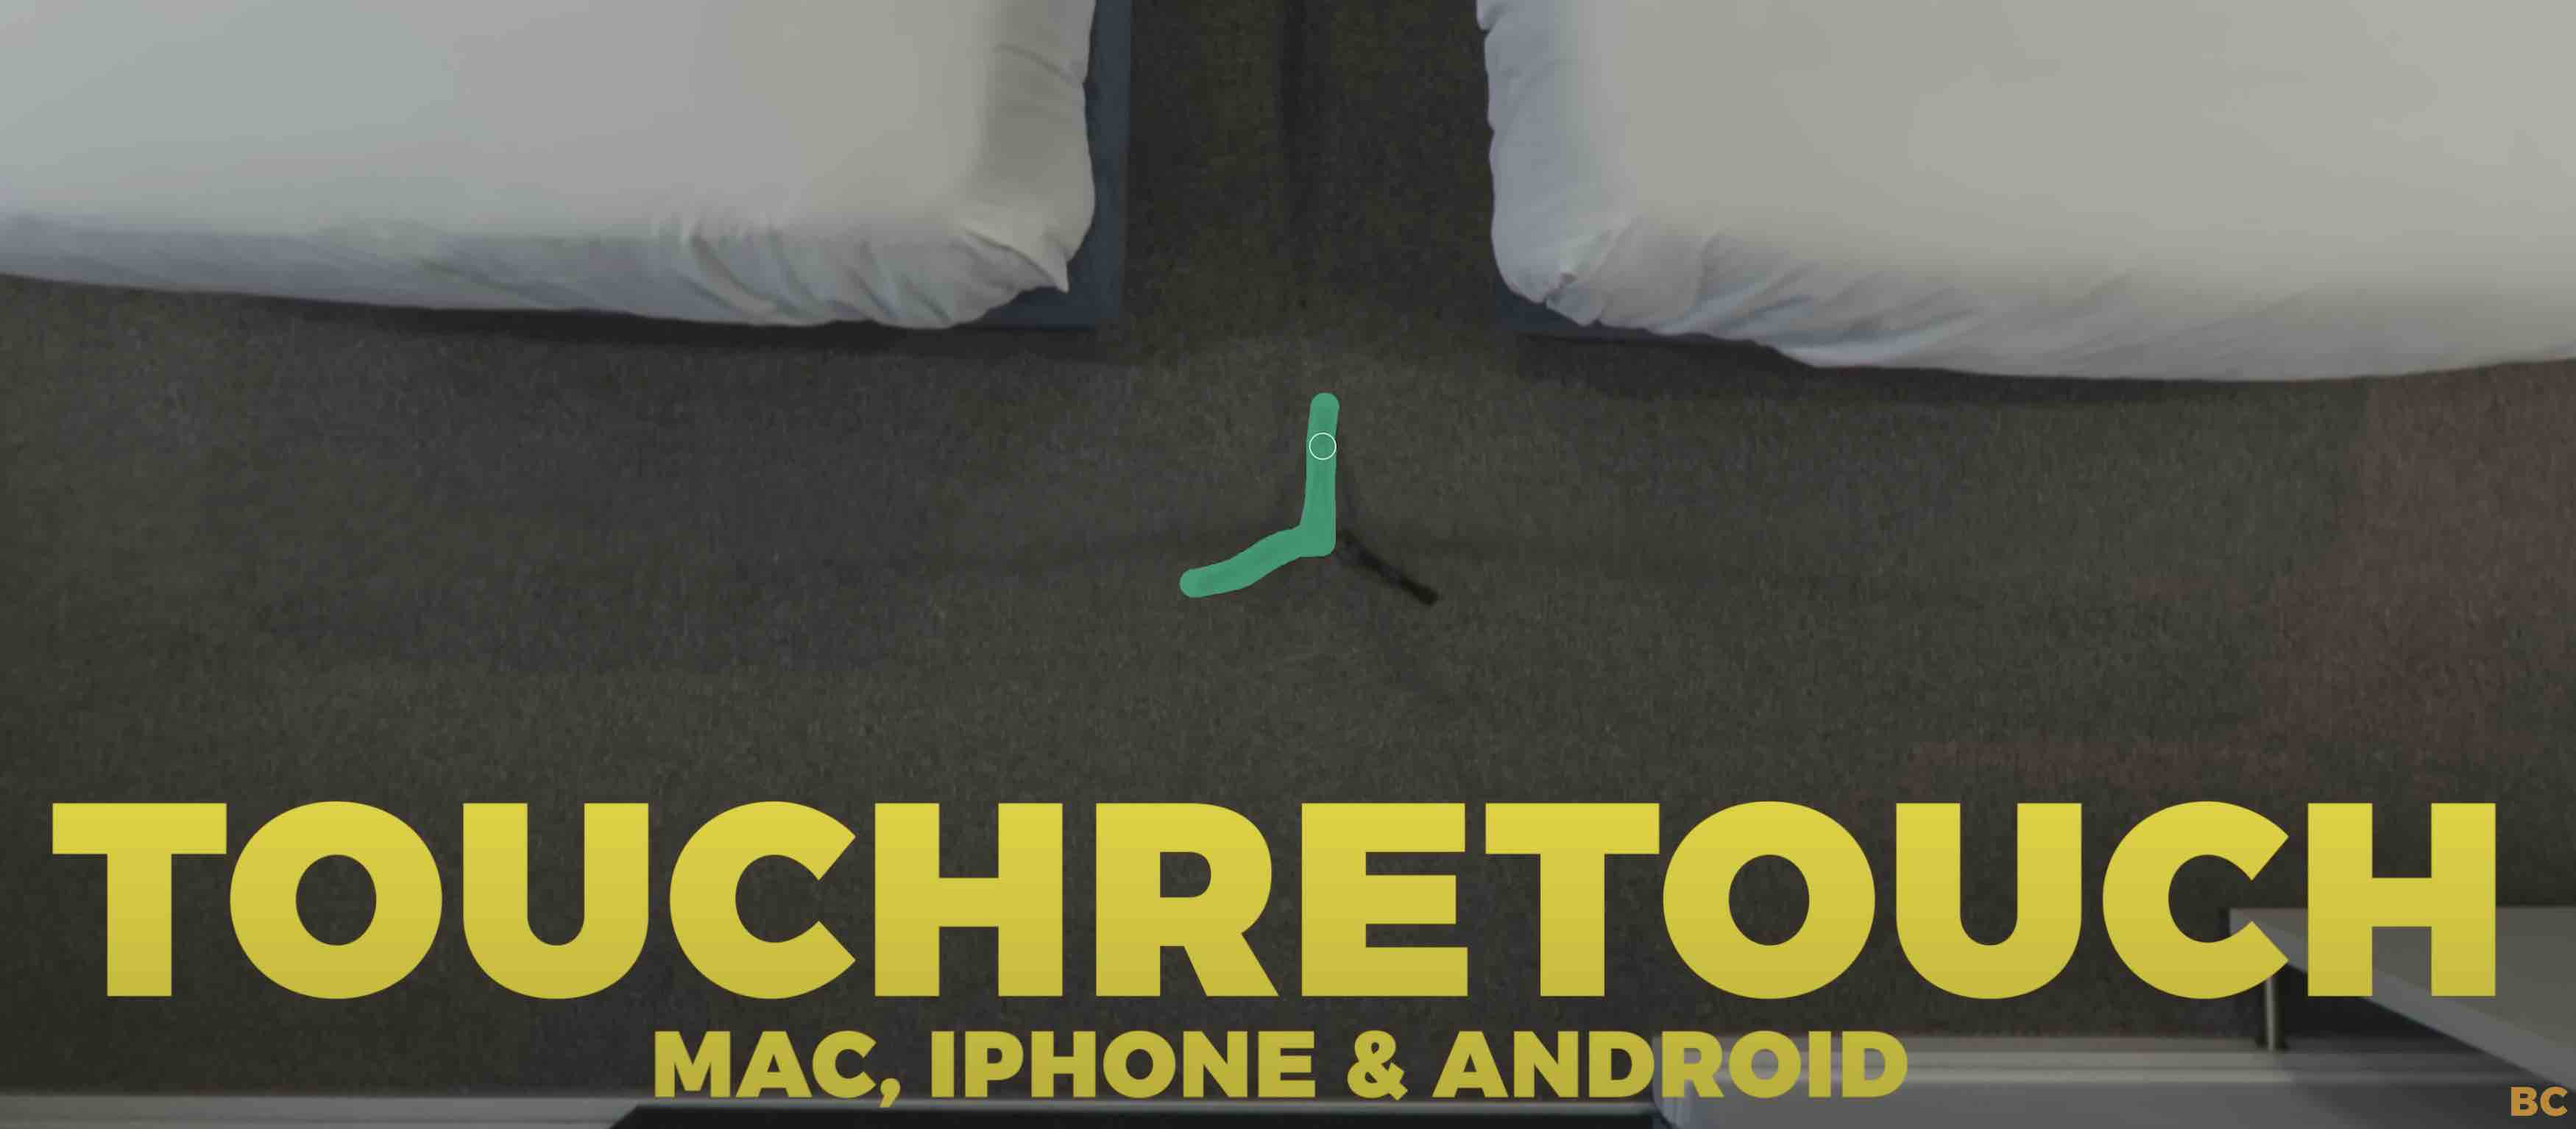
👉 Once you've color corrected the next step is removing the tripod from your shot and don't worry this shouldn't take too long. There are two softwares I recommend for this, the first one is TouchRetouch which is relatively cheap and allows you to navigate around your 360 so you can isolate the tripod without any negative effects on the equirectangular.
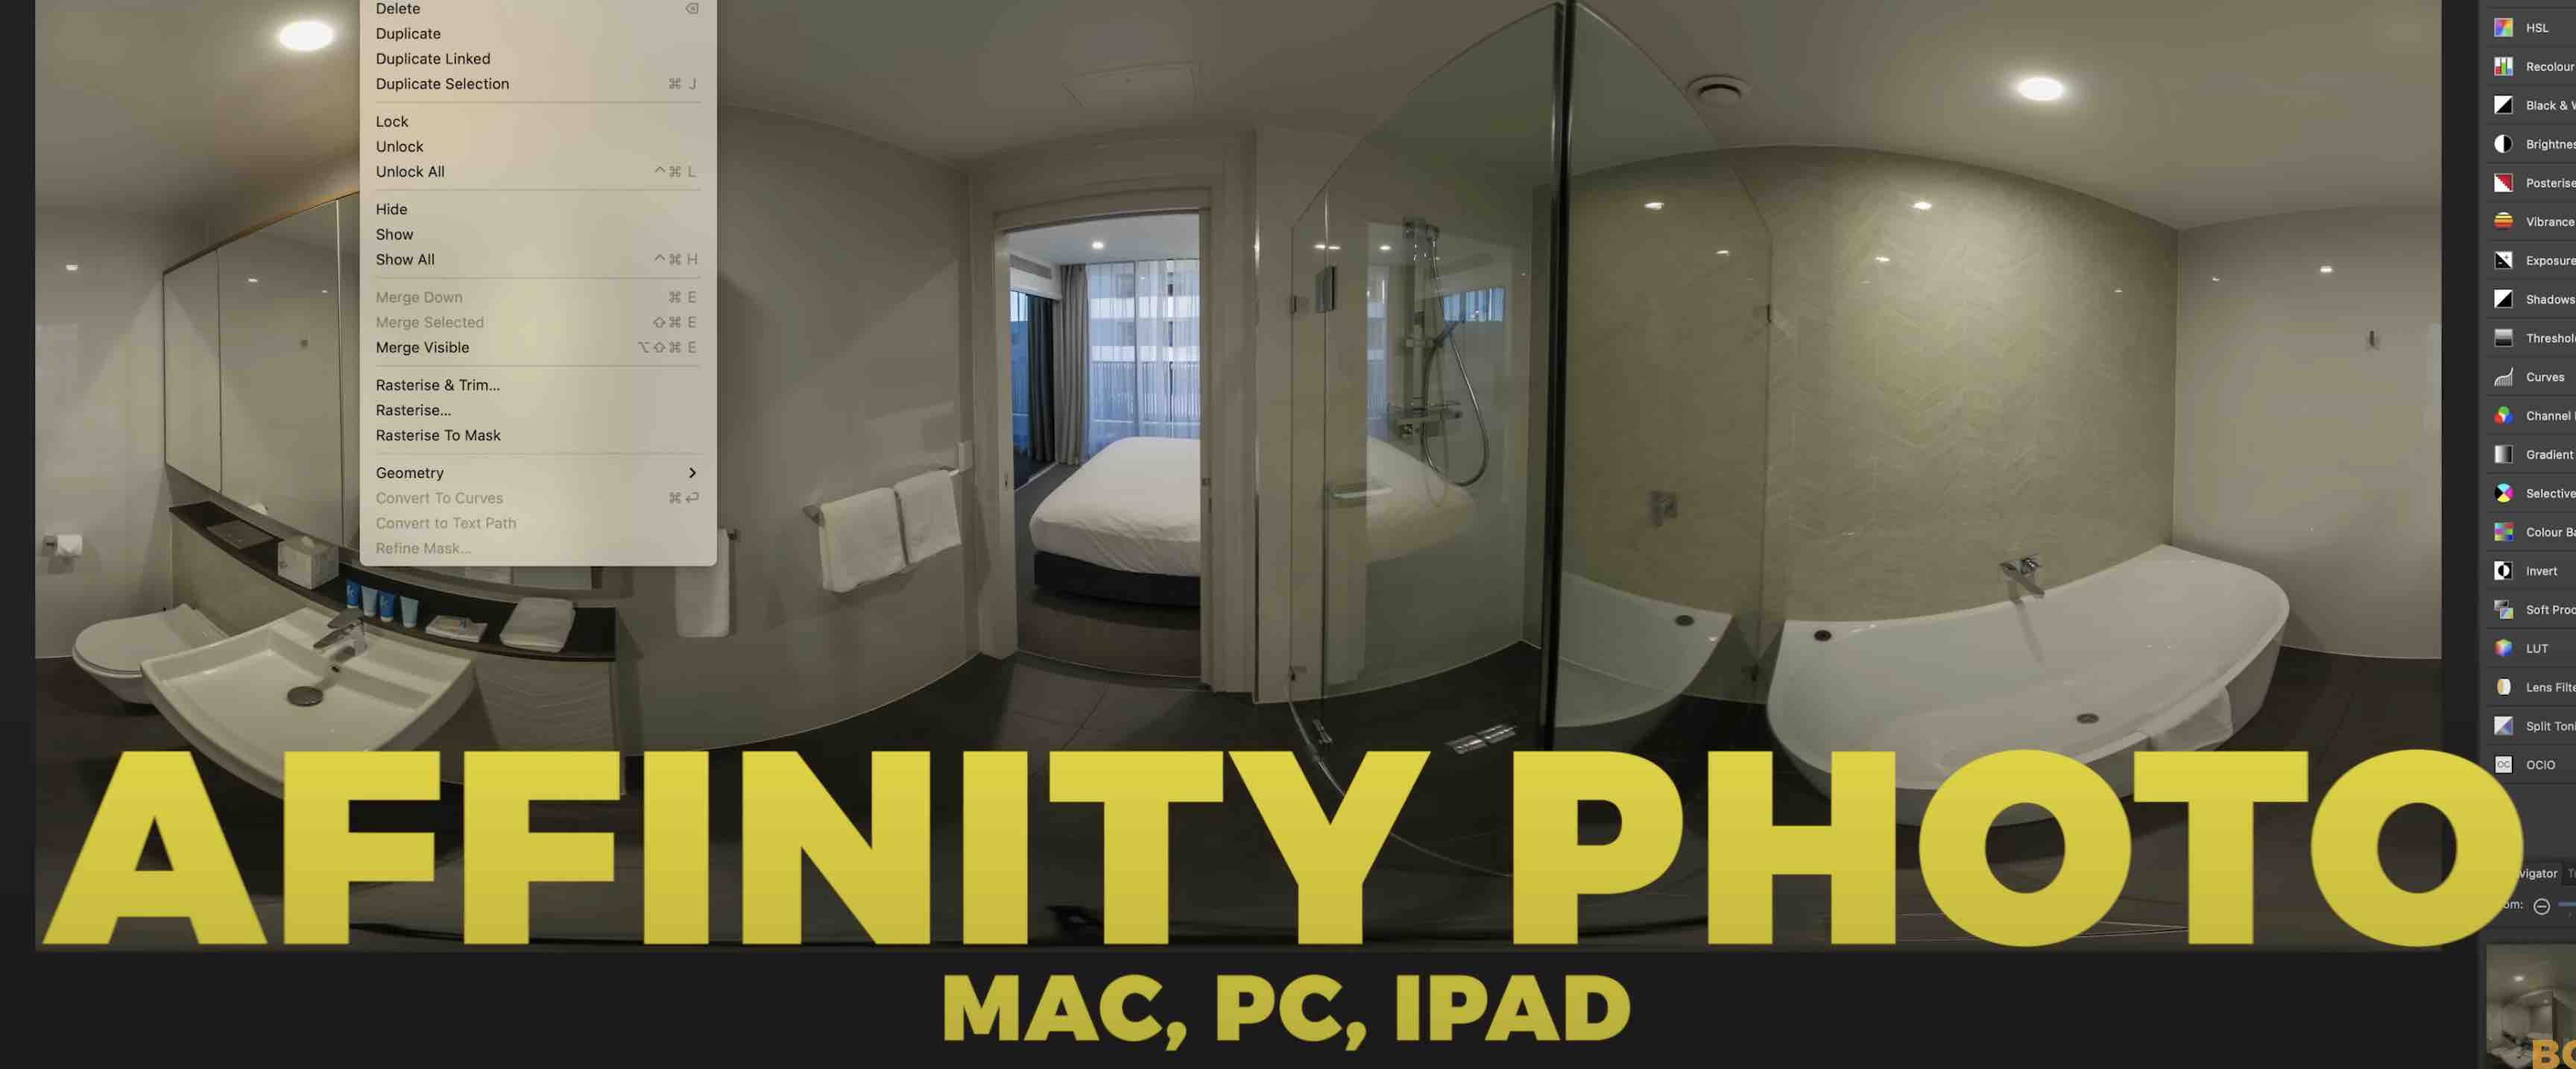
👉 The other one is Affinity Photo which has become the definitive 360 photo editing software for editing in 360. Ever since Photoshop dropped its 360 editing capabilities, Affinity has become the one and only choice for 360 photographers who want to move around the image as they edit while having most of the functionalities that Photoshop has.
Step 13: Topaz Suite 💻
👉 After we've painted the tripod out of our 360s there is an optional step which you're more than welcome to skip, but if you're someone like me that wants to get every last pixel perfect, every speck of noise wiped away and every line as sharp as it can be, you may want to consider picking up the Topaz Suite specifically DeNoise and Gigapixel which will help both remove noise and sharpen and upscale your shards to look twice as sharp as the image you started with. Again though, this is pretty advanced and not necessary in most situations.
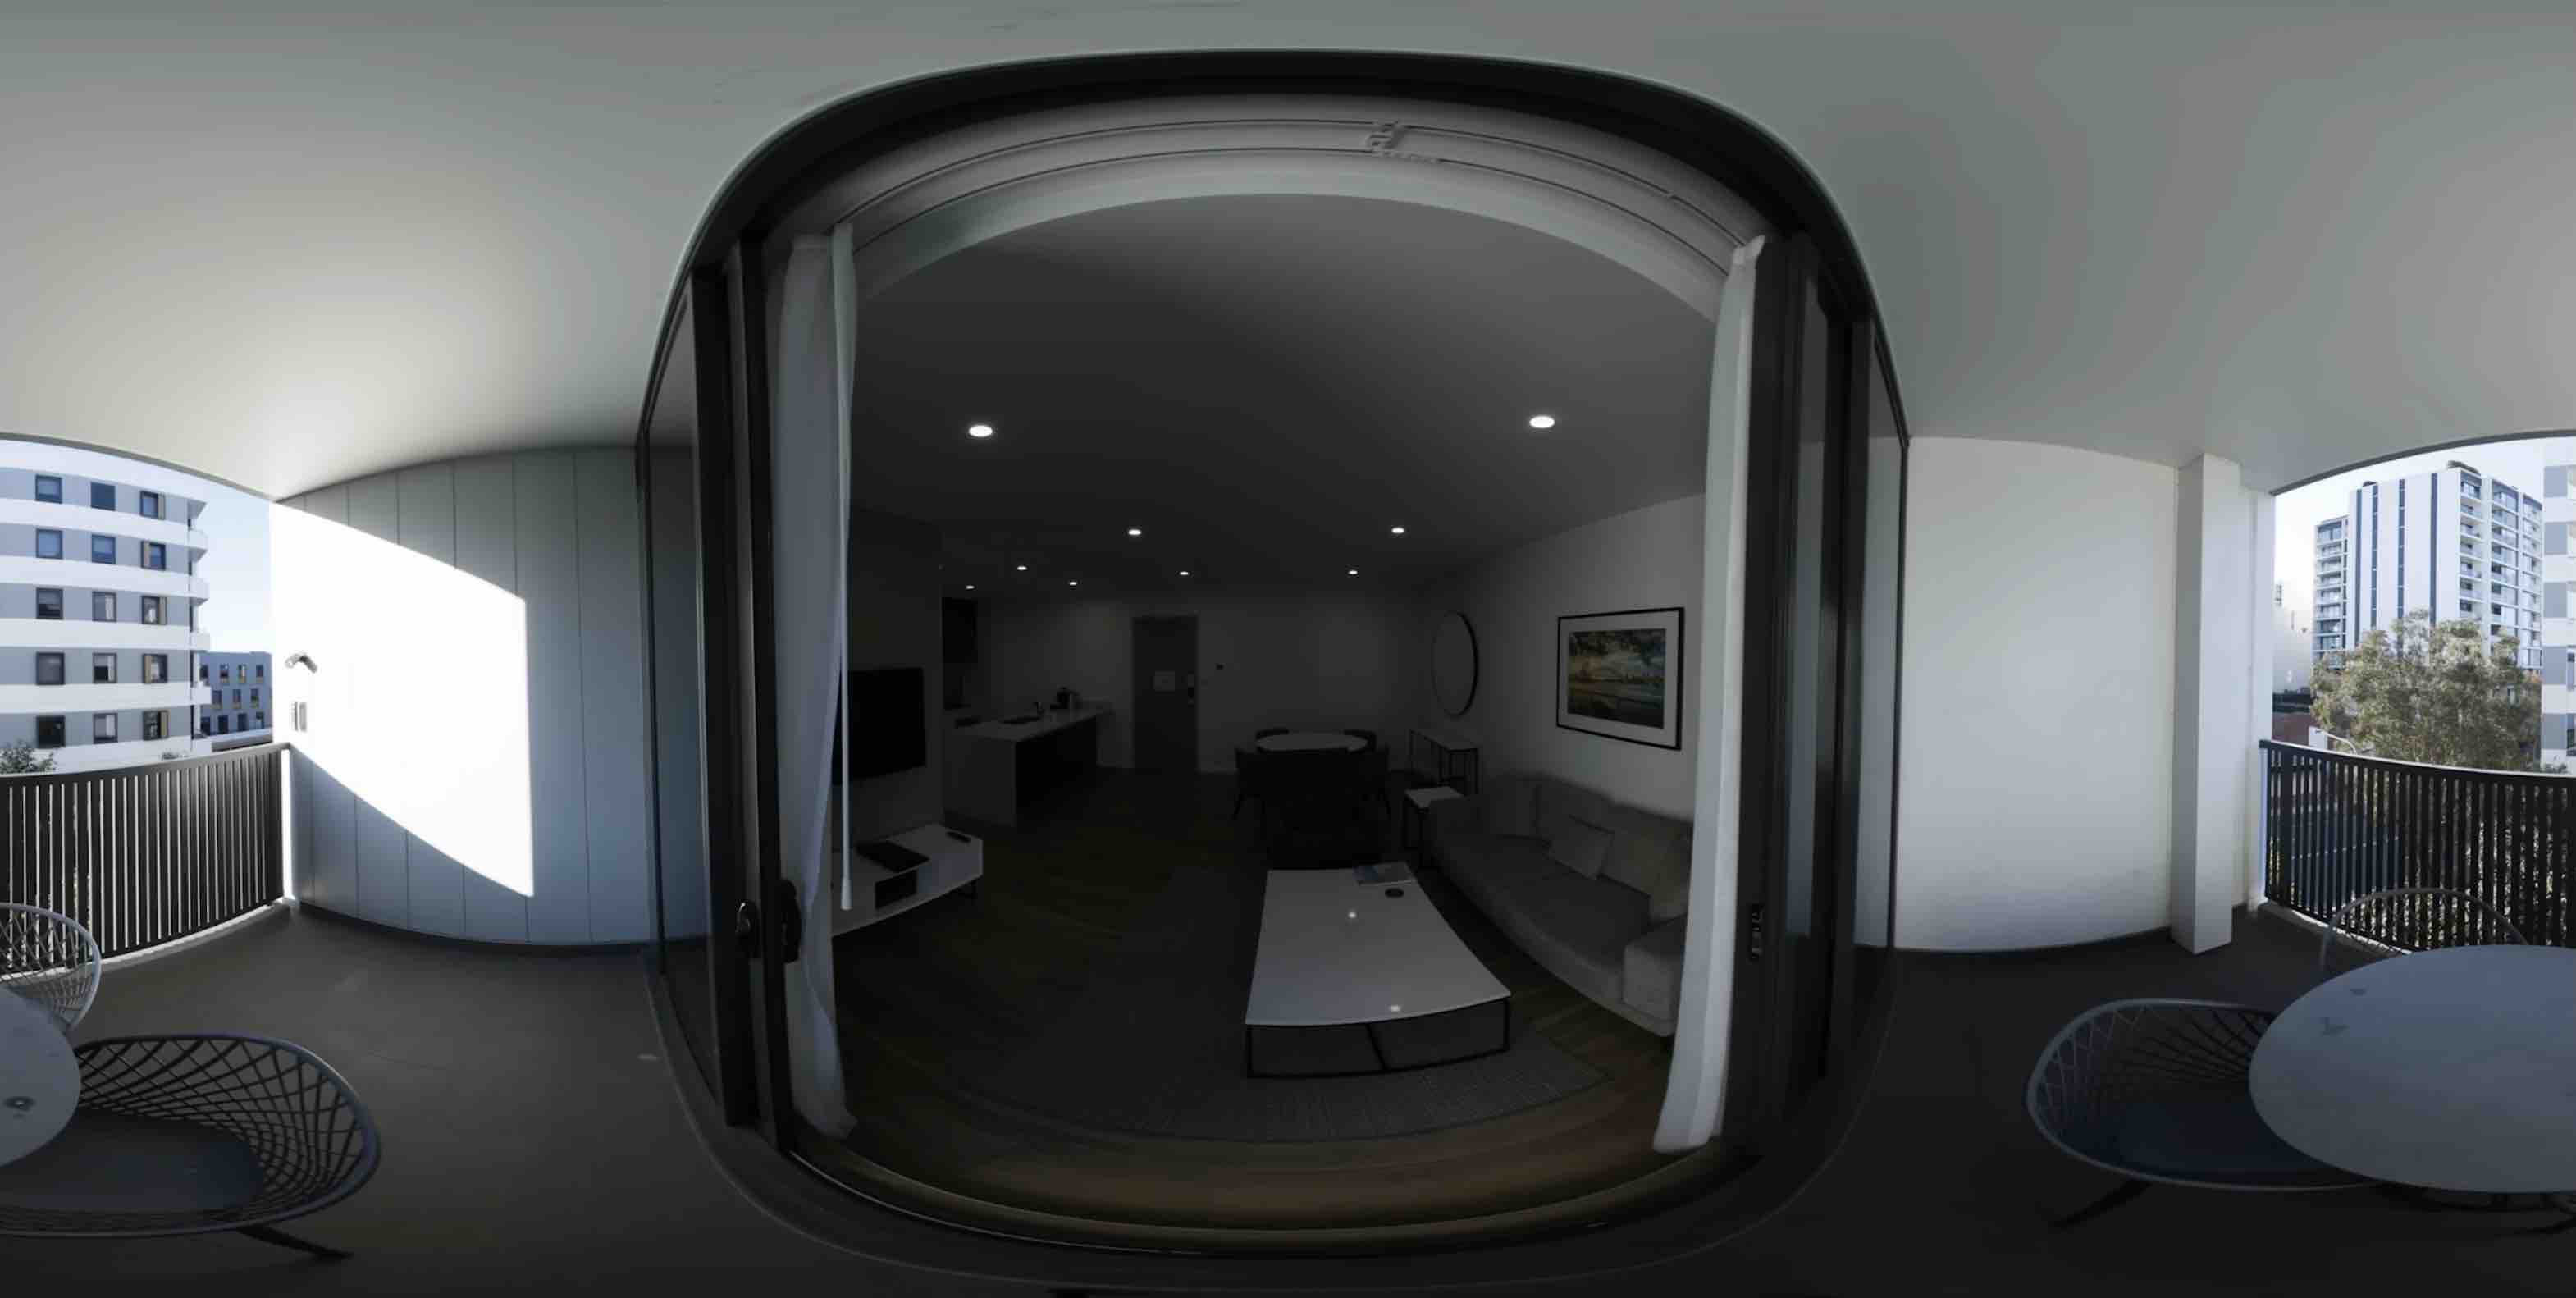
👉 I can't stress enough how important it is to follow the right workflow. Look at the difference between a JPEG straight out of the camera and an edited PureShot HDR dng file.
👉 You really can make a big Improvement by spending a couple of minutes editing. I'd say this took me no longer than 10 minutes total and I was able to significantly enhance the dynamic range, the colors, the noise and the sharpness which is why I'd recommend following a workflow similar to this if you're shooting virtual tours professionally for paid clients.
Step 14: Upload Your Shots 💿
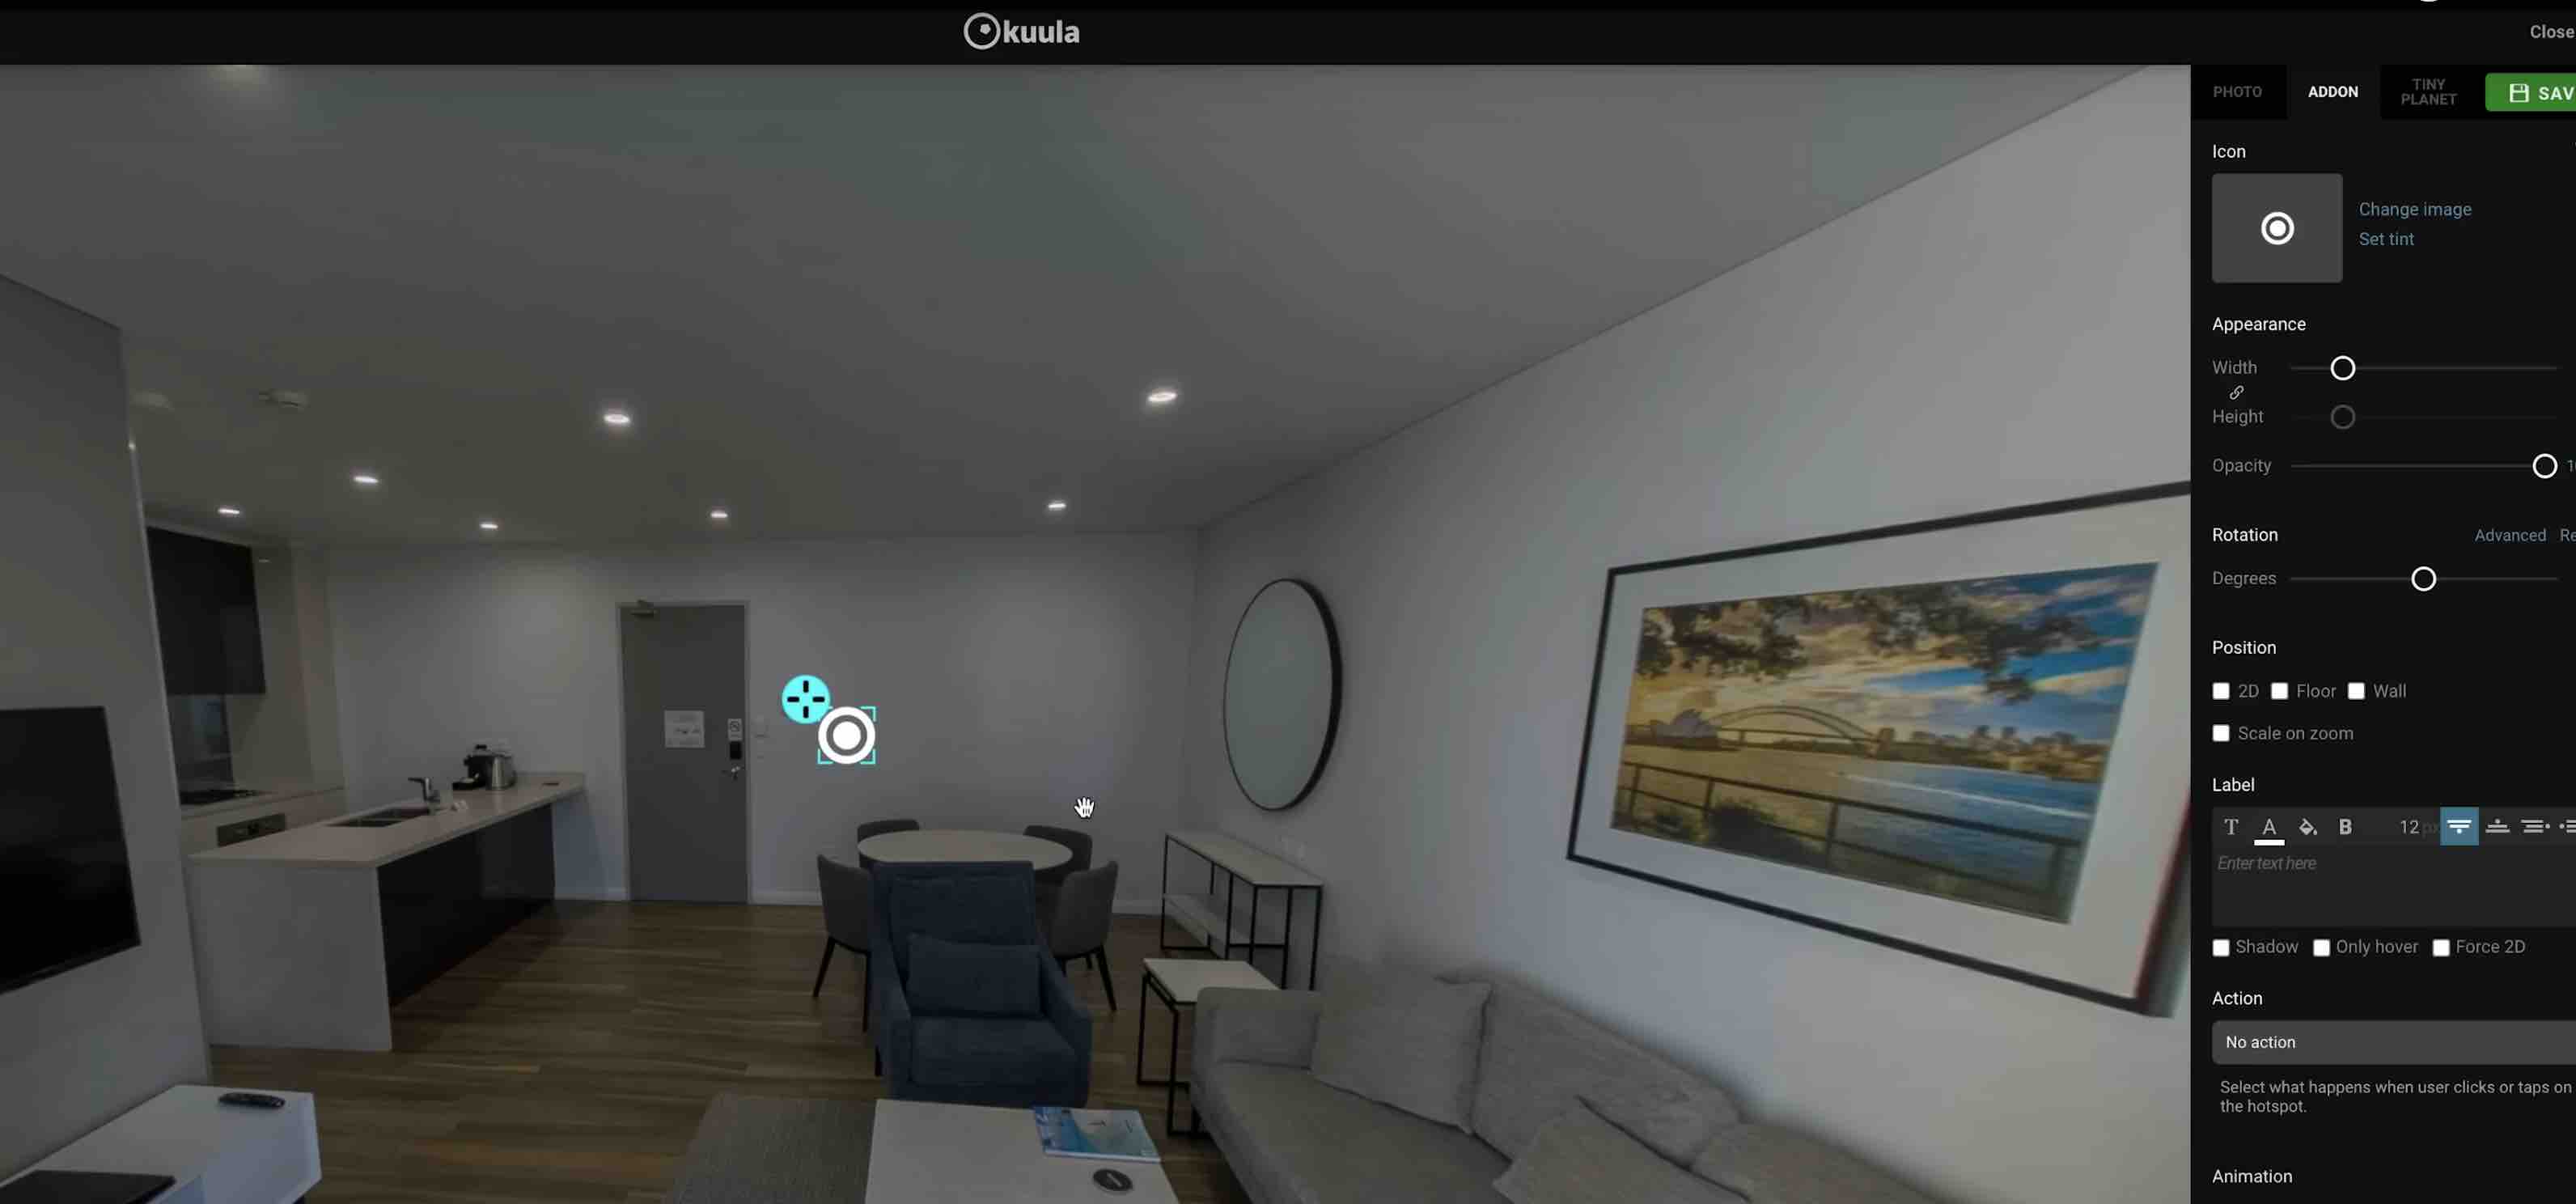
👉 Finally, all you need to do is upload your shots to a virtual tour platform and there's no shortage of options here, there are literally hundreds of virtual tour platforms many of which I cover and compare on my YouTube channel, however if you're a beginner just starting out I would recommend something like Kuula because it's the best bang for your buck and the final results do look pretty professional.
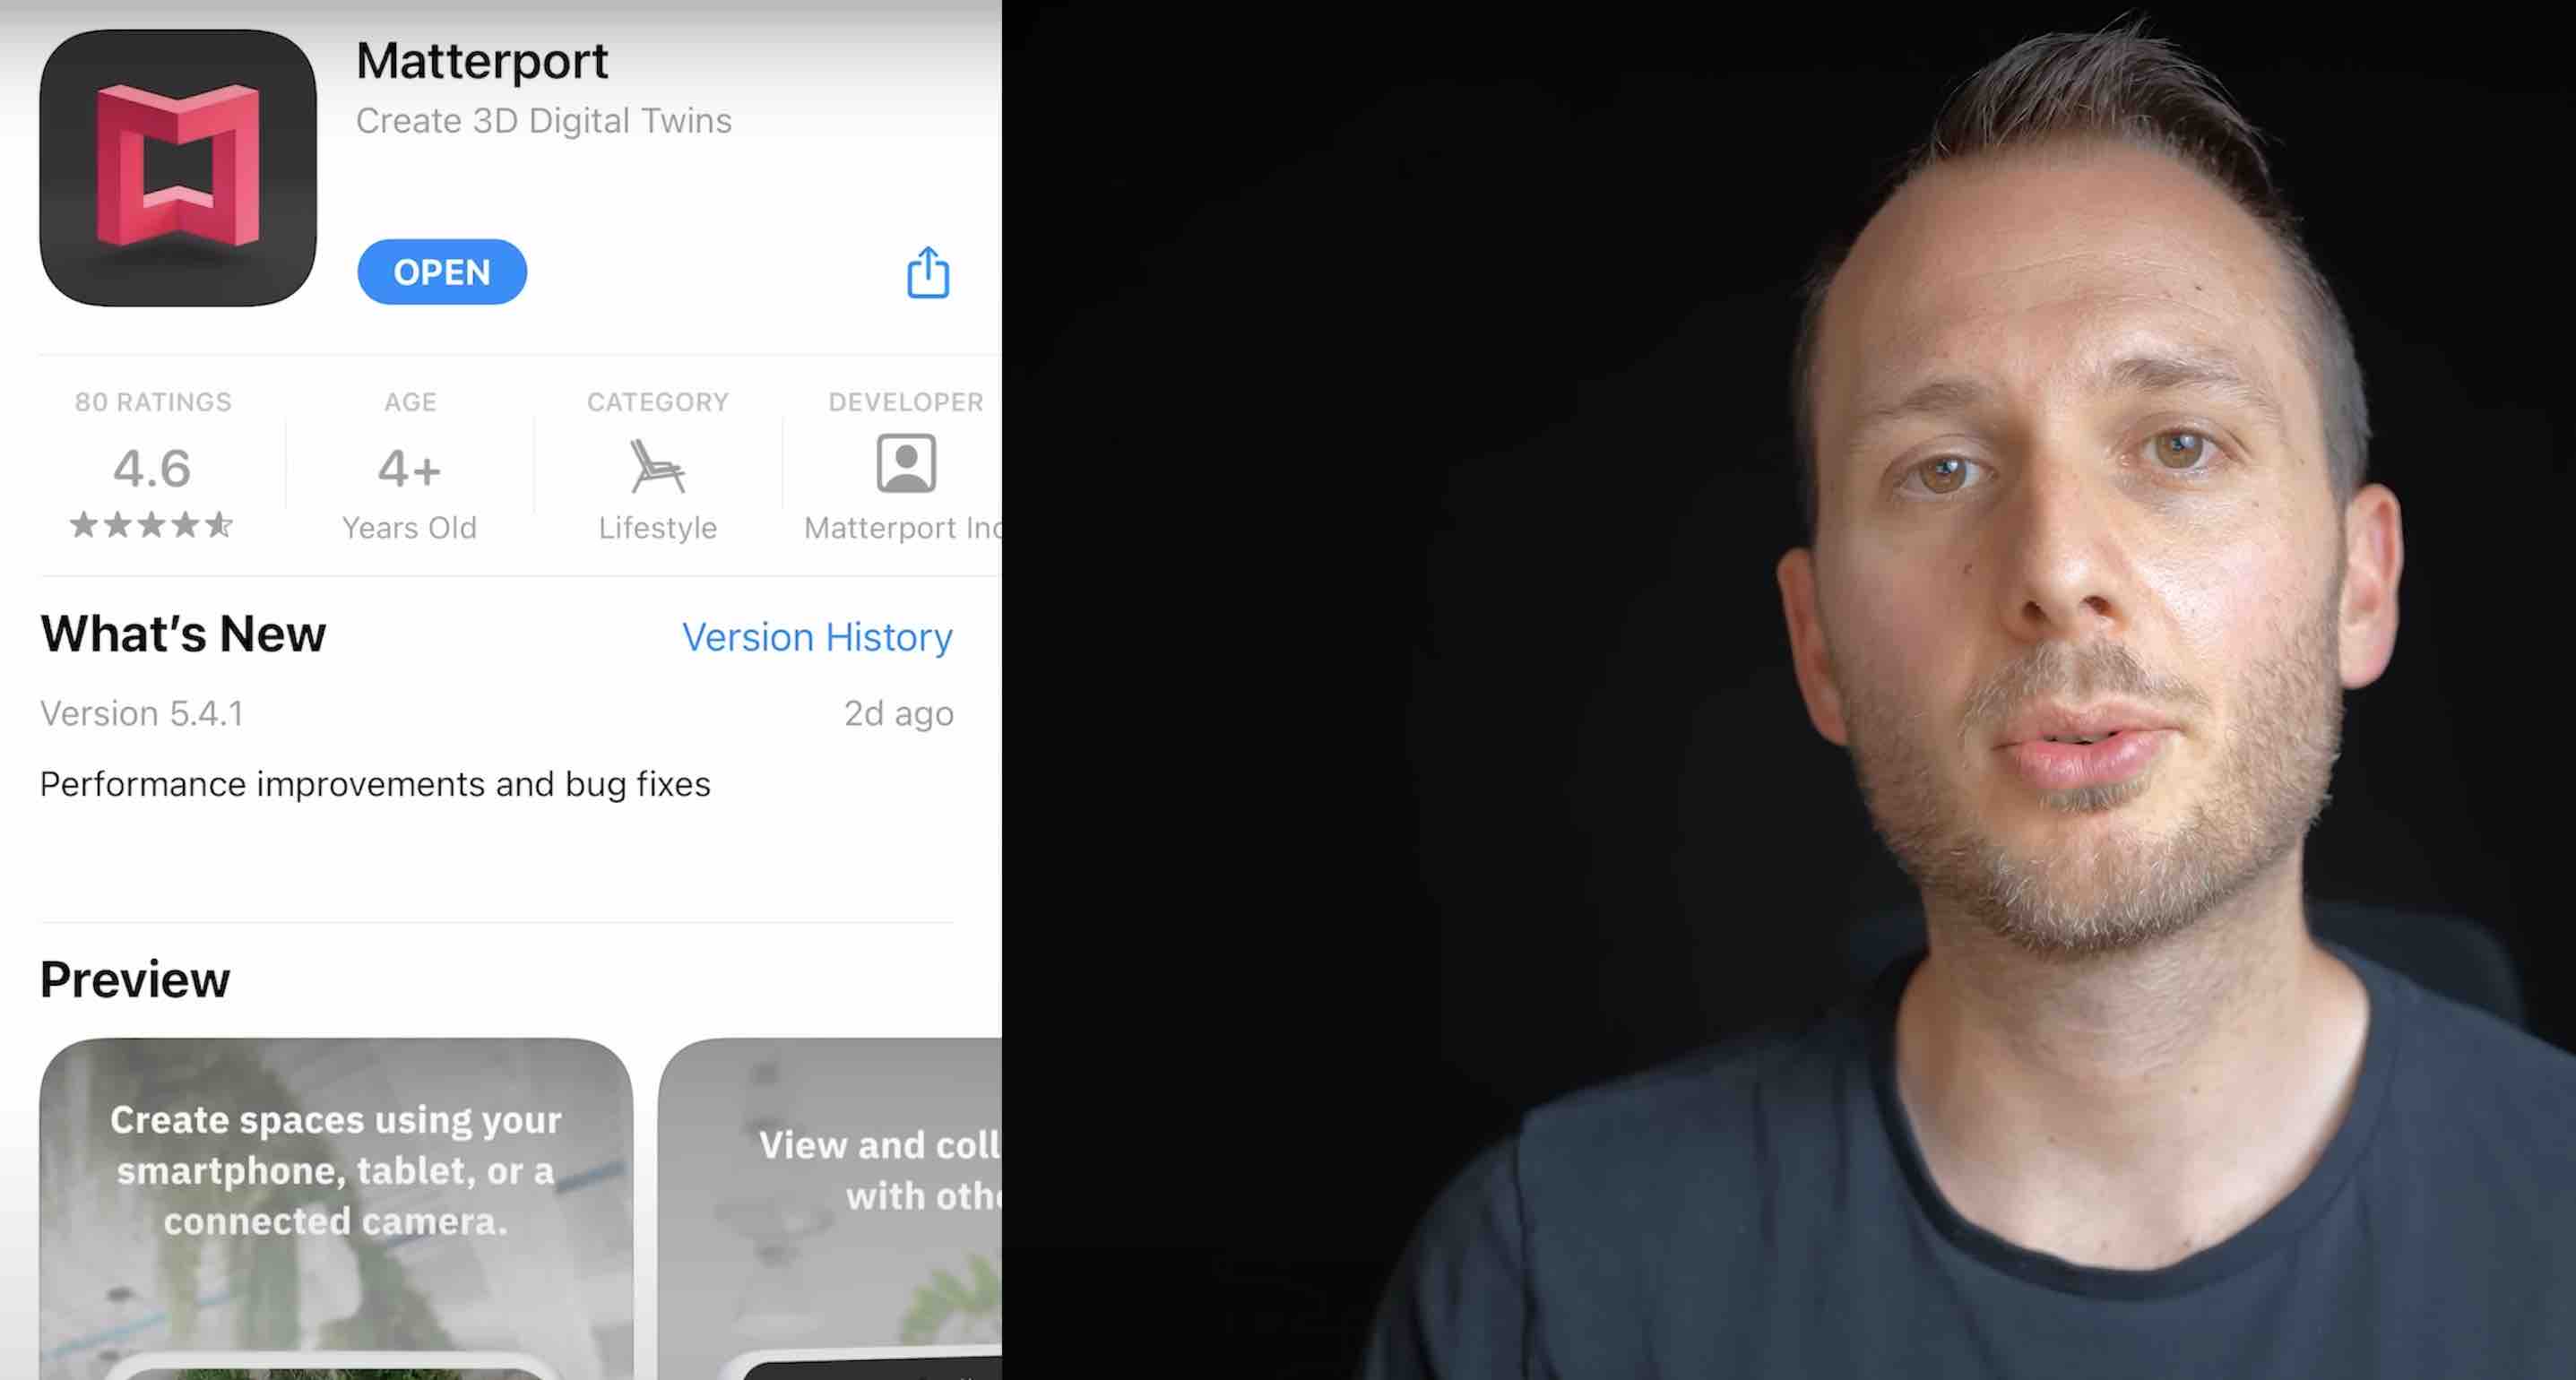
👉 If you really want to use Matterport then the Insta360 cameras that are compatible with it right now are the One X, One X2 and One R and the 1-inch should be compatible pretty soon. Keep in mind though that you won't be able to follow the workflows I discussed in this video since Matterport forces you to shoot within the Matterport app where it chooses all the settings automatically.
👉 You can also upload to Google Street View with any Insta360 camera. Some cameras make this much easier than others and I will be covering this in depth in one of my upcoming videos.
👉 So now that you know the best workflow for your Insta360 camera, the next question you probably have is: how do I earn my first dollar with virtual tours? Knowing the technical stuff is one thing, but without knowing how to effectively monetize your work, unfortuantely it will never become anything more than just a hobby. Which is why you'll want to check out my free training that will share my top 10 tips for starting a profitable virtual tour business from scratch.
Happy 360ing!
Ben Claremont
Blog Author


