
How To Make A Virtual Tour: 5 Simple Steps
May 19, 2022
Virtual tours are now better, faster, and easier to make than ever before.
There are now a lot more options in terms of cameras, gear, shooting techniques, photo editing software, and more virtual tour platforms than we've ever had before.
So in this article, I'm going to share my top gear recommendations for shooting virtual tours, as well as provide a very brief overview of how to shoot and edit them. 🙌
If you want the full breakdown, you can find over 18 hours of tutorials inside my Virtual Tour Pro course.
Now, the first decision you'll need to make is how professional you want your tours to be and what exactly "professional" means to you. Because that will determine what you choose in terms of camera gear, software, and workflows.
Some people out there will tell you that you need the most expensive camera and the most high-end and complicated editing workflow in order to feel like you are a professional who is worthy of charging for their work. Personally, I think that's BS.
In reality, the level of professionalism your virtual tour needs depends on the use case of what you're making it for. If you're shooting for high-end multimillion and billion-dollar companies, then yes, of course, you'll need a high-end workflow using expensive equipment.
But for most other types of virtual tours like real estate, retail, hospitality, tourism, automotive, and more, it's totally fine to stick with a more basic camera and workflow that produces professional enough results, especially when you follow the best shooting and editing workflows like the ones in this article.
Gear 🧳
What kind of camera do you need to shoot virtual tours? 🤔
The most basic way to shoot a virtual tour is with:
👉 A smartphone and a smartphone rotator.
You can normally get these for around $100, and they only work with specific platforms. The quality will be fairly average, but for real estate shoots, it's acceptable.
The next level up from shooting on a phone is shooting with:
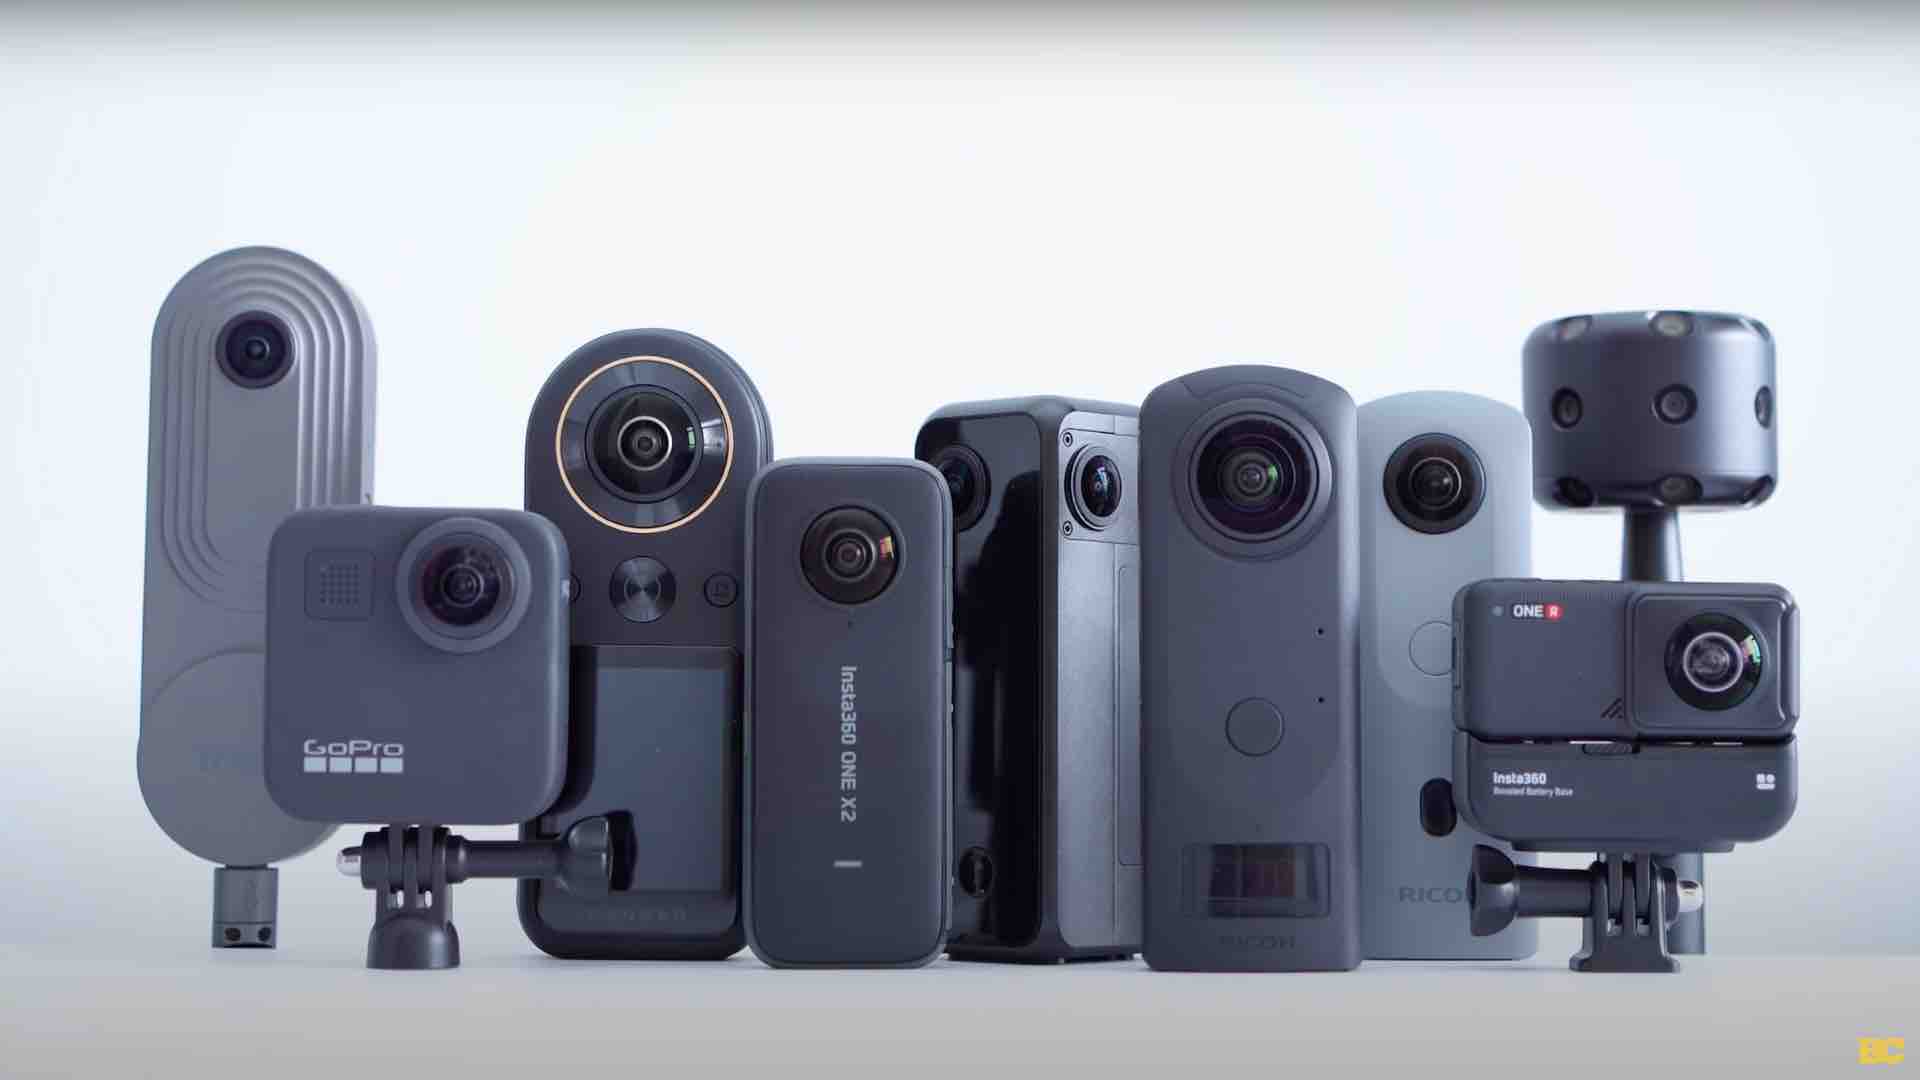
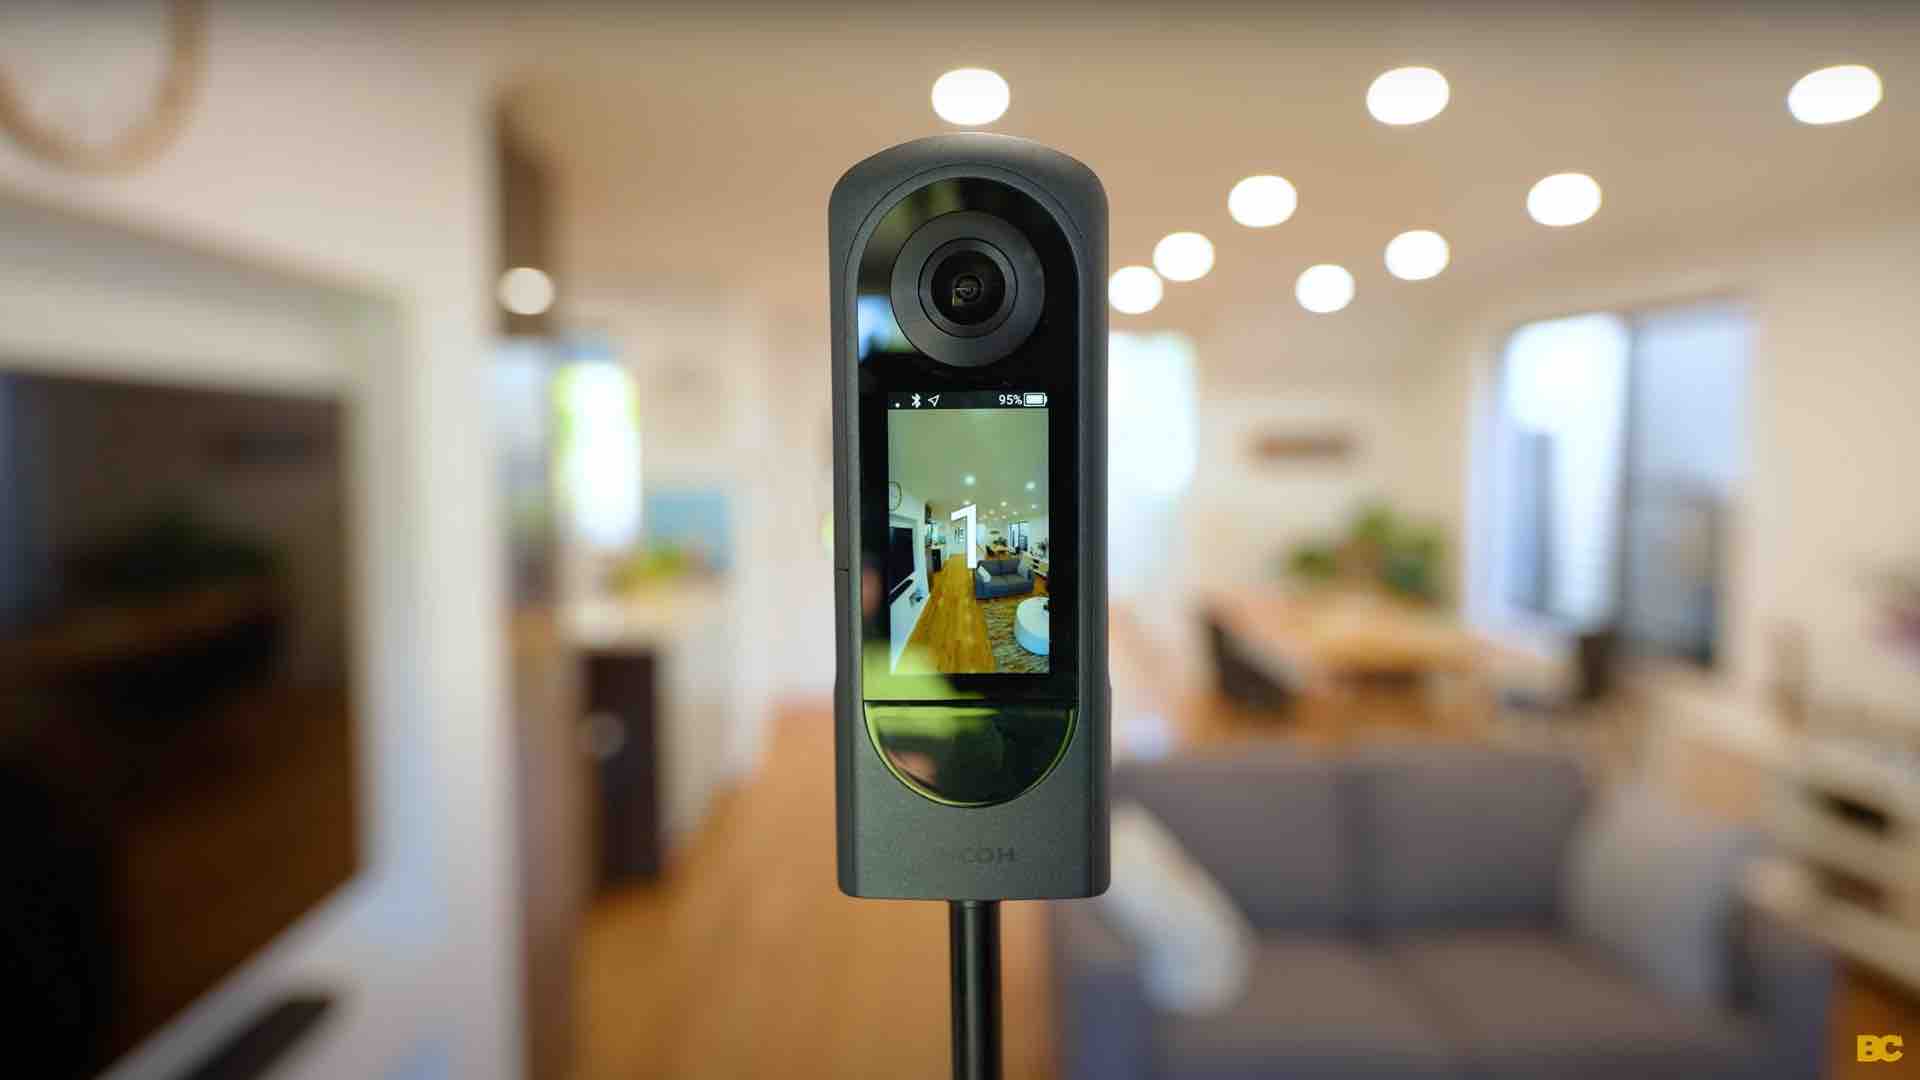
👉 A 360 camera 📷
There are lots of options that range from around $200 up to $2,000.
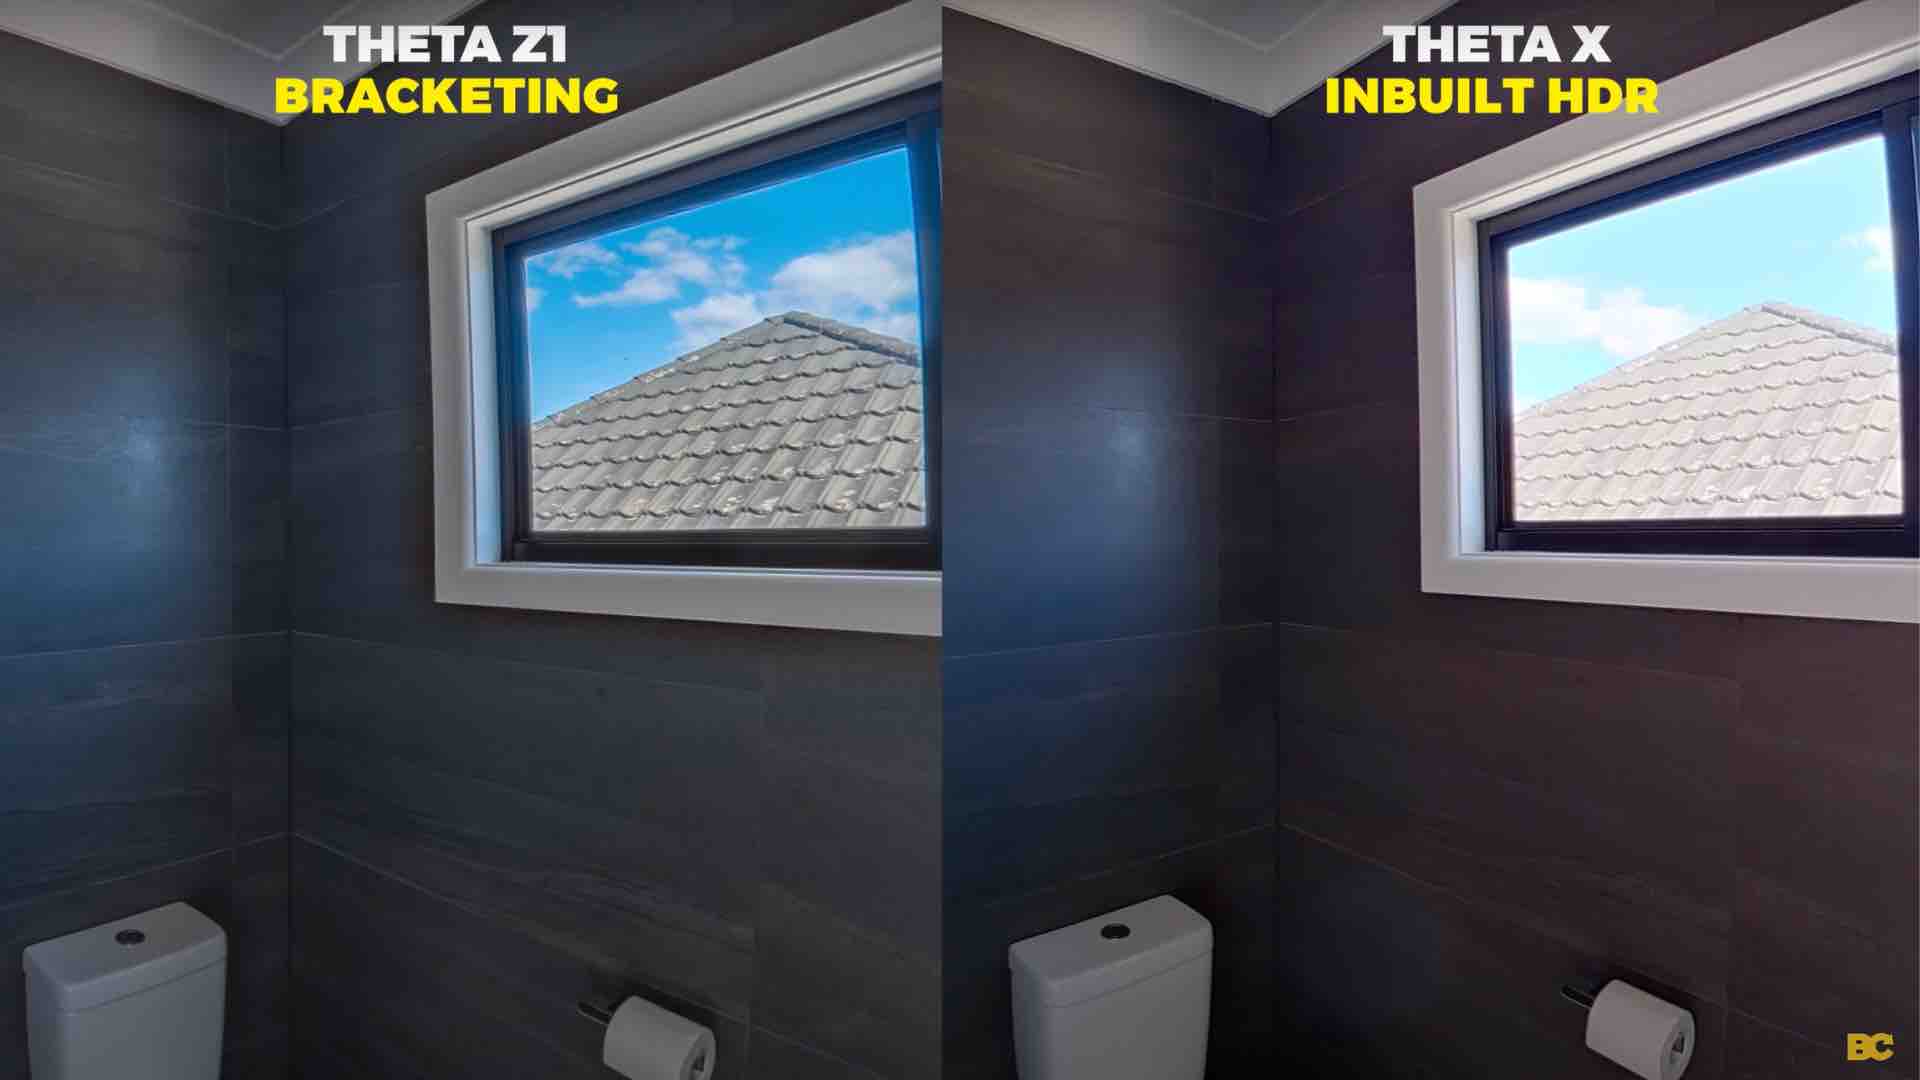
My number one recommendation for a 360 camera right now is the THETA Z1 because it shoots amazing bracketed raw shots, and the final image quality and dynamic range beat every other 360 camera out there right now.
At the moment, the THETA Z1 is $1,000. If that's too much, then I'd suggest going for something cheaper, like the THETA X or the Trisio Lite 2.
Both of these cameras pack a punch for that slightly lower price tag, and you won't be disappointed with the results of either.
Then finally, on the high-end of shooting 360 photography for virtual tours, we have capturing panoramic images with:
👉 A DSLR and a panoramic head like a Nodal Ninja.
This workflow is essential for high-end shoots for big clients. 💰
And if that interests you, then I strongly suggest following one of my good friends, Peter from Little Planet, who is one of the world's top DSLR 360 photographers.
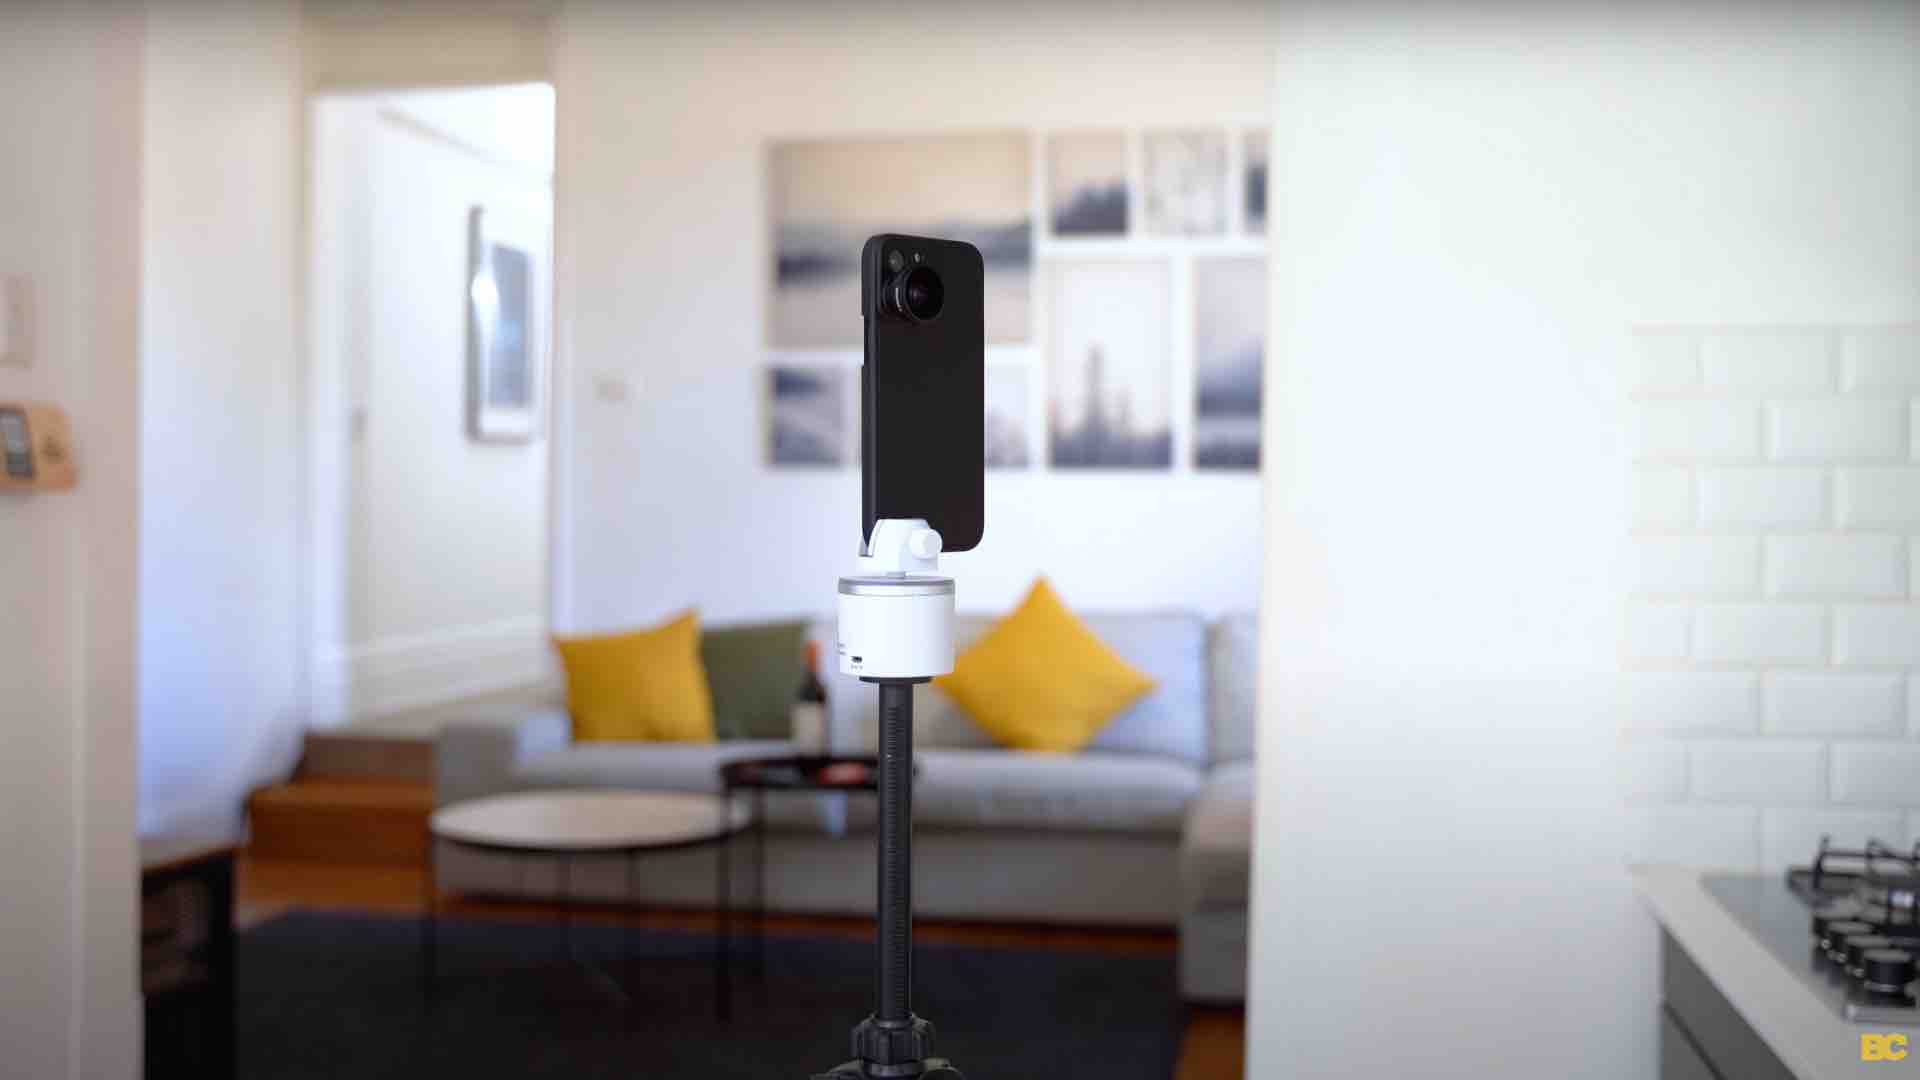
The next tool you're going to need for your 360 camera is:
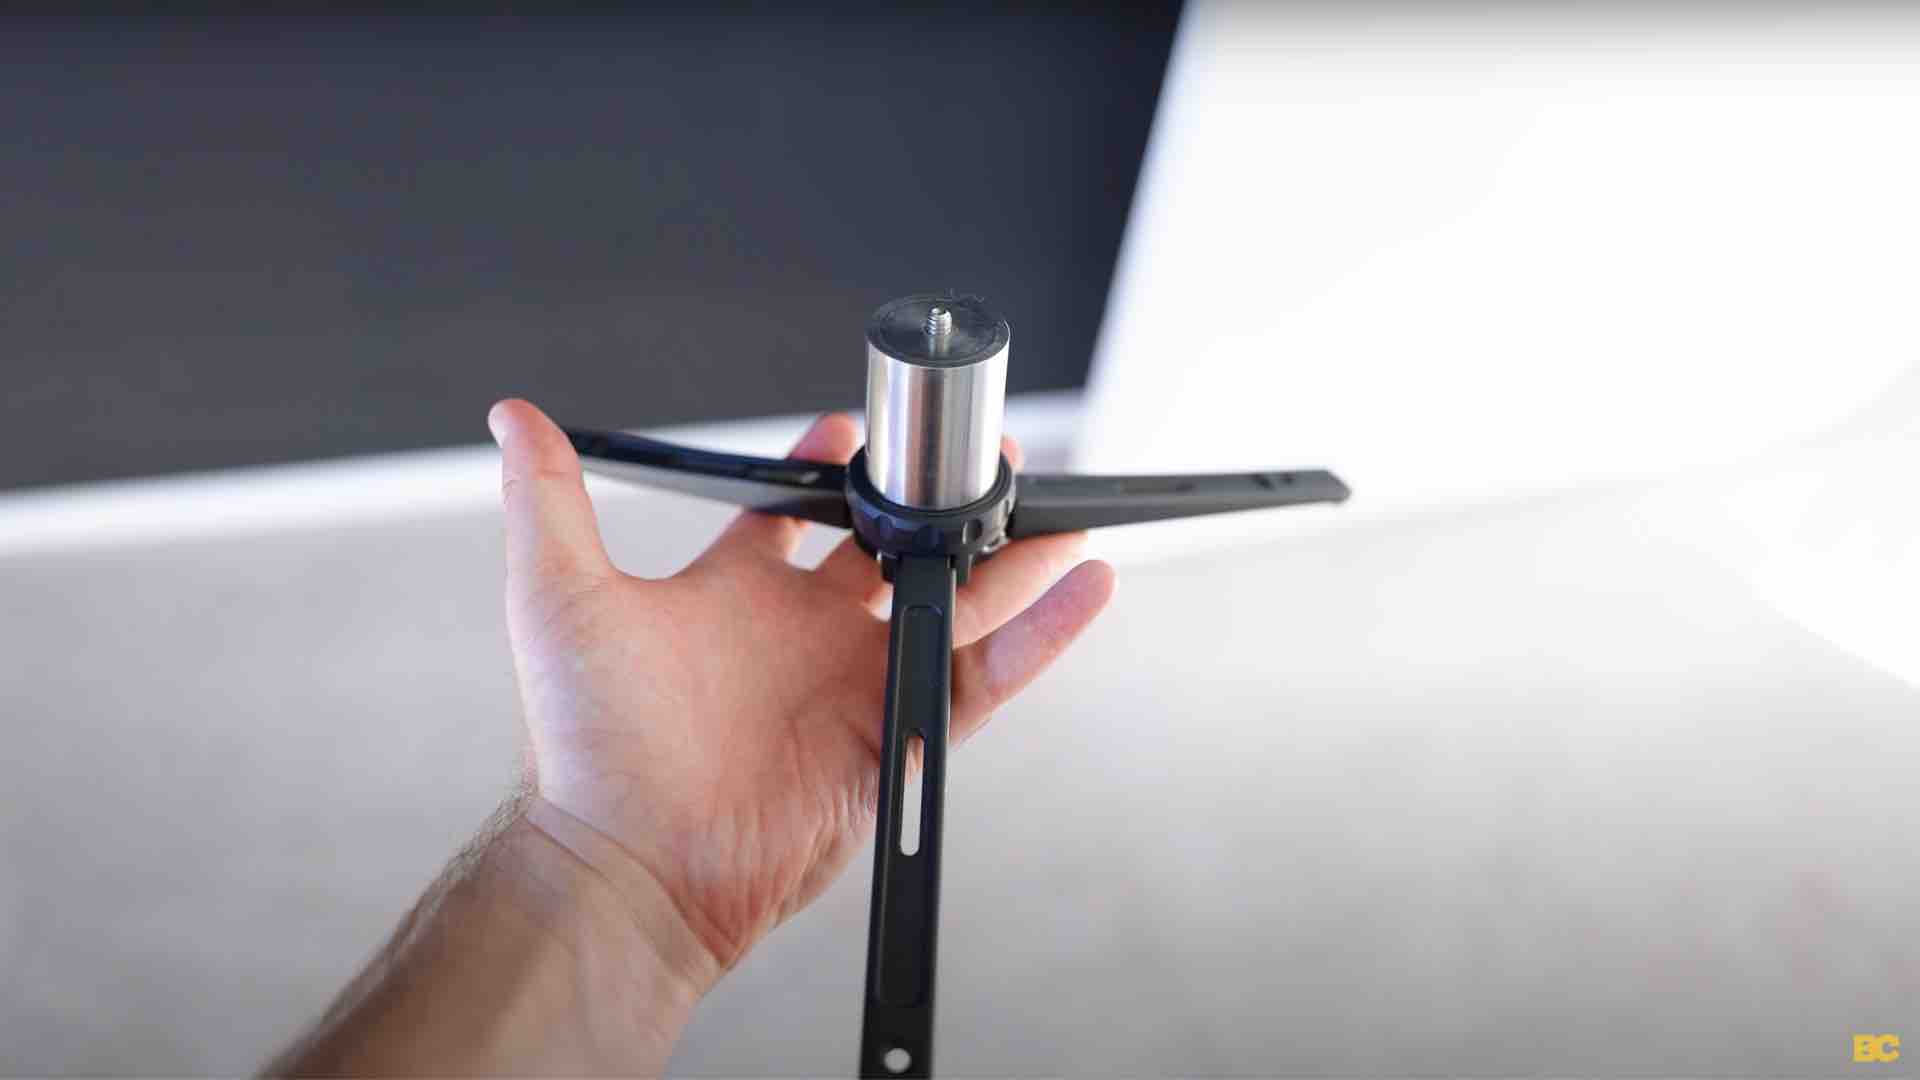
👉 A monopod.
And you'll notice how I didn't say tripod because tripods are not built for virtual tours since the head of the tripod is too thick and shows up prominently in 360 photos.
The monopod I recommend is the Bushman Monopod, which is a bit fancy and higher-end, but it's seriously good quality and will last a long time.
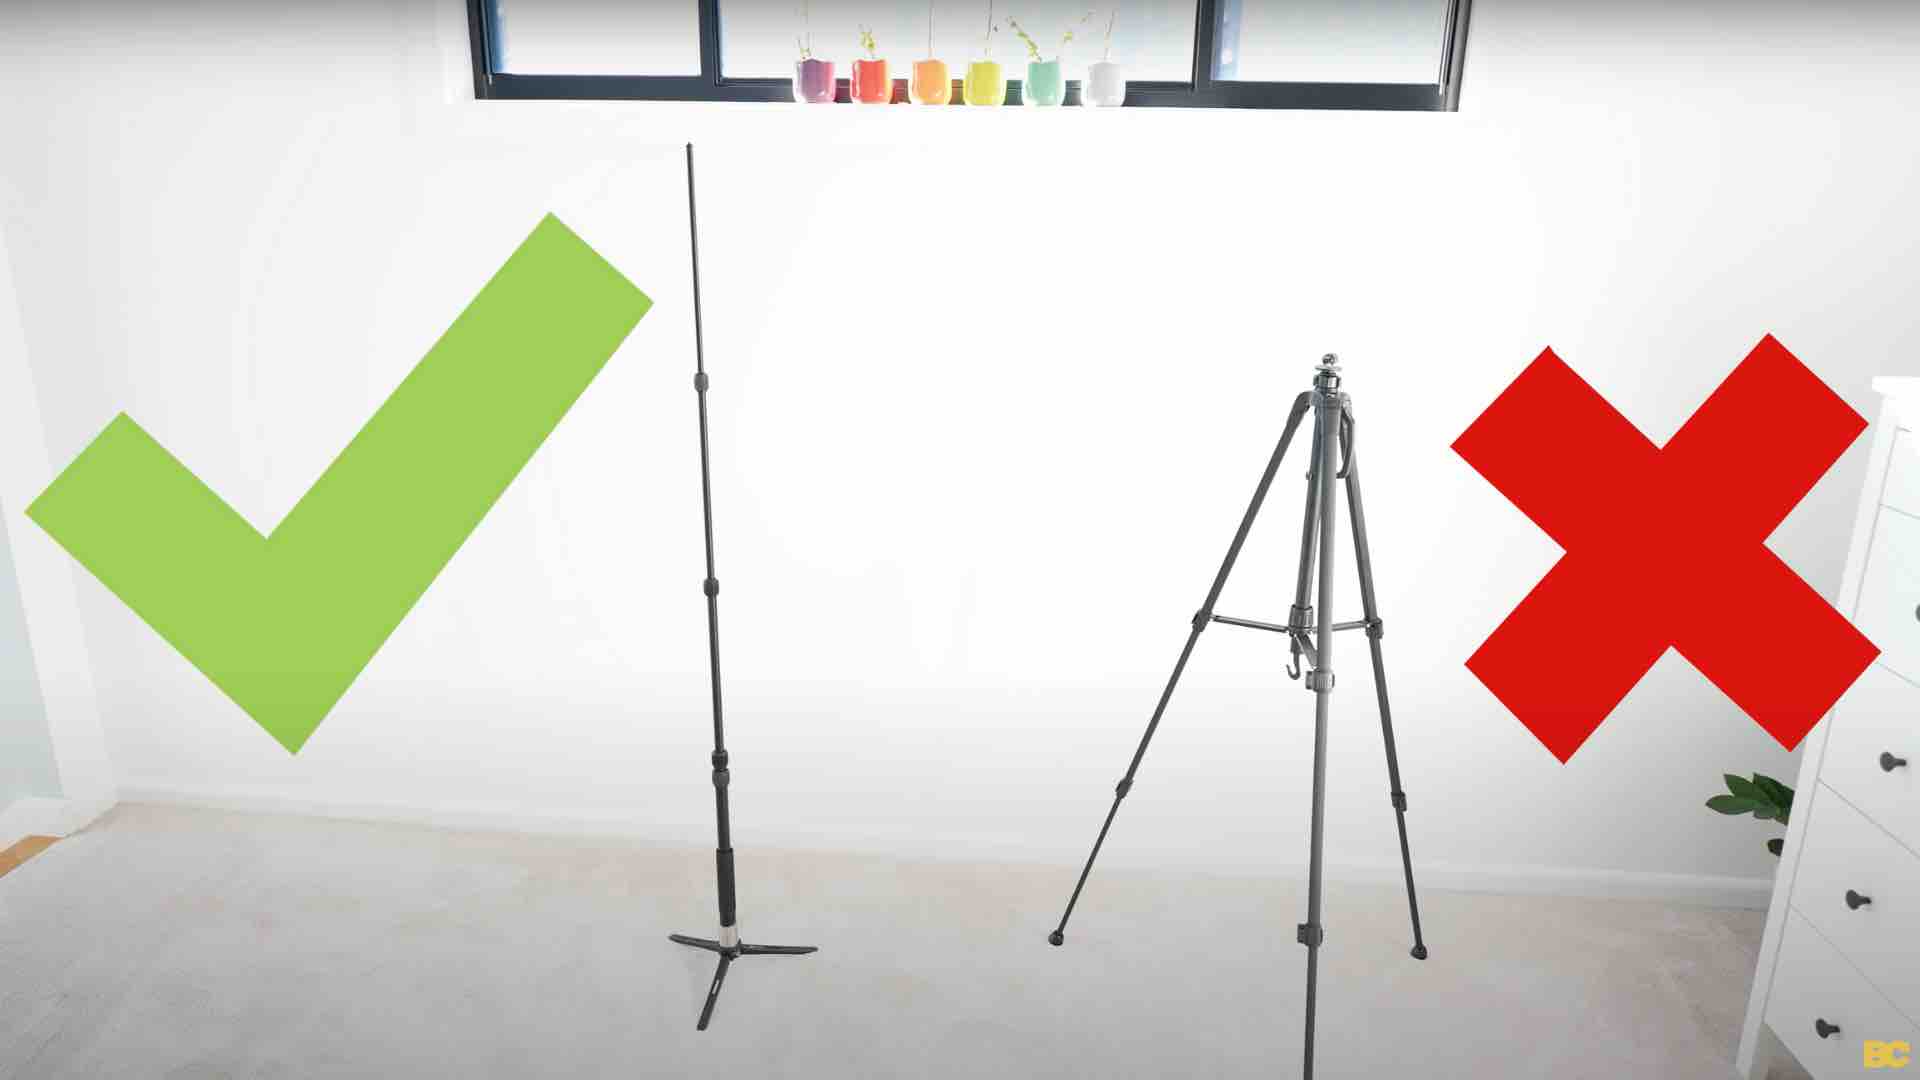
👉 You want to make sure your monopod has a counterweight like this one, as well as some small tripod legs that will be easy to edit out later. 👇
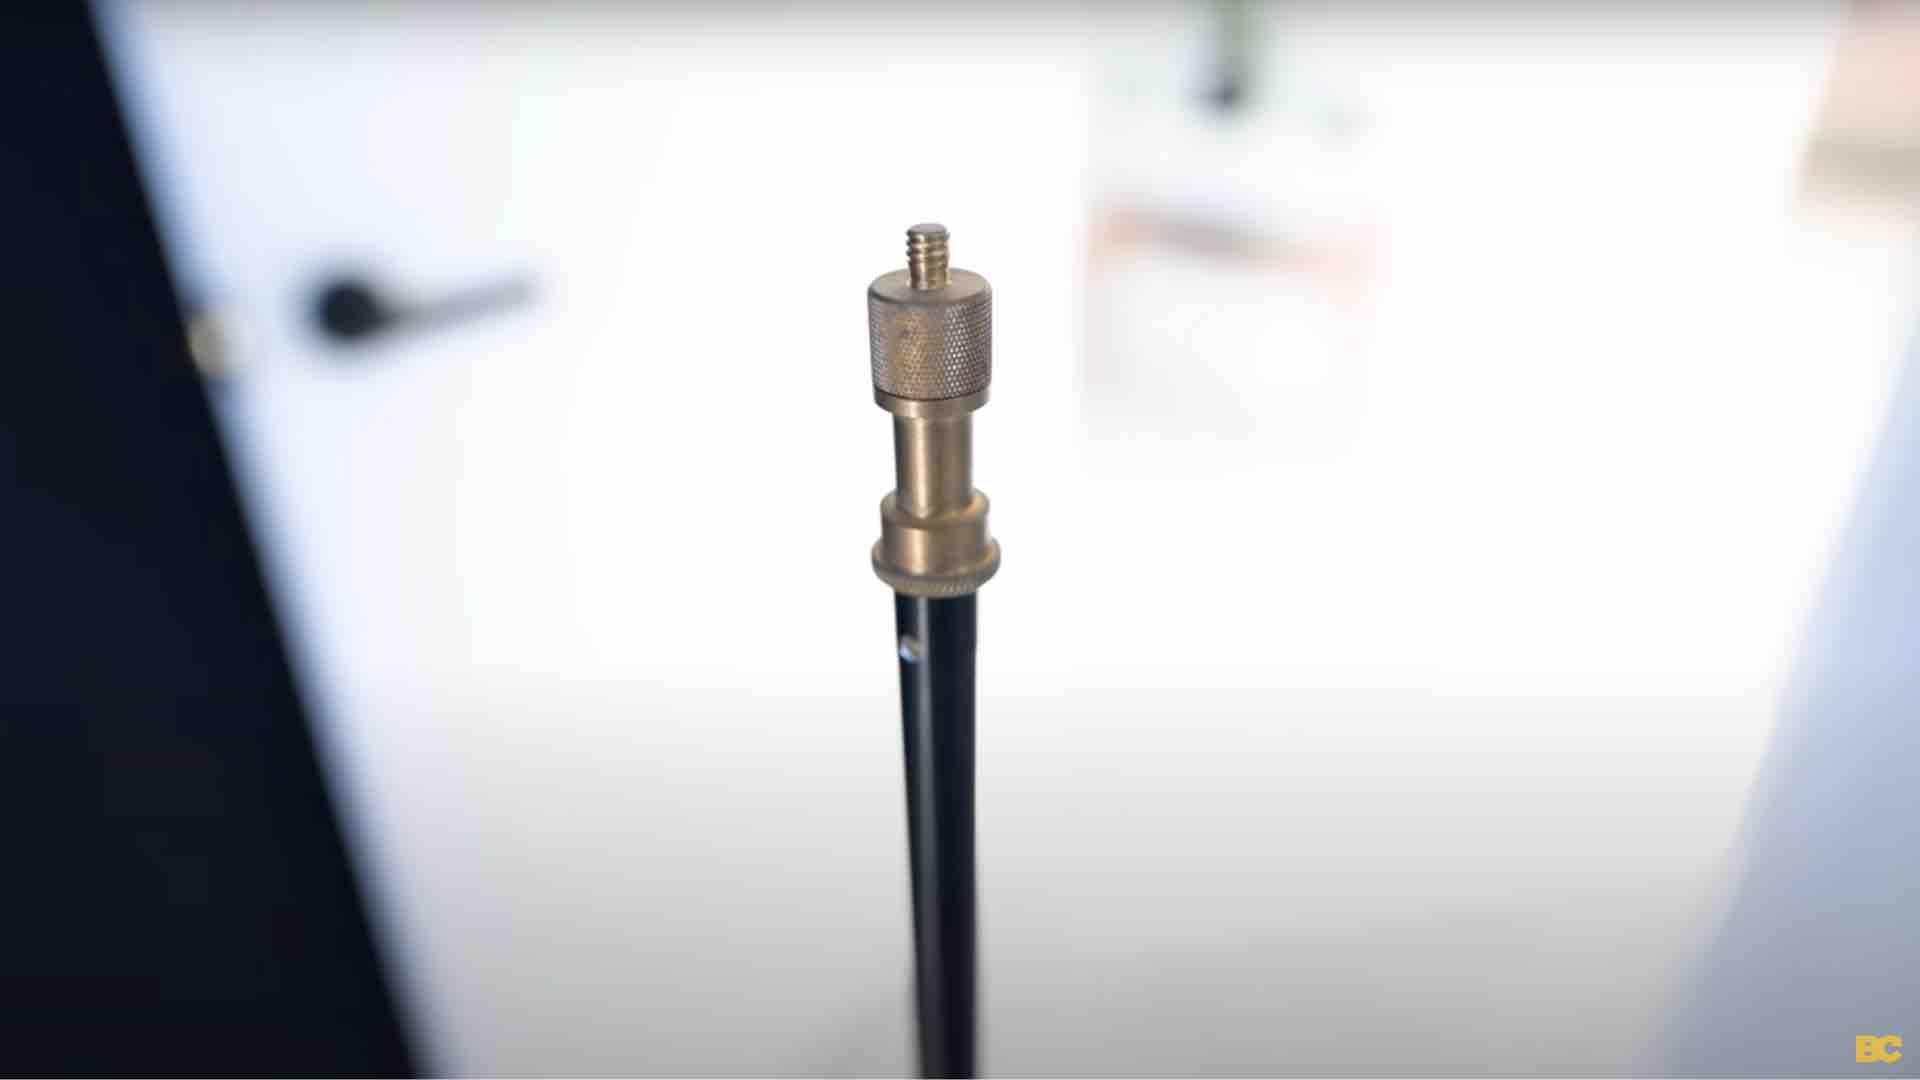
👉 There are more budget-friendly alternatives like using a selfie stick with some tripod legs, or you can buy yourself a light stand from Amazon, which has slightly bigger legs, but it should work fine for virtual tours as long as it has a 1/4 inch tripod thread on the top.
And that's it, really, when it comes to the basic gear you need to shoot a virtual tour. This is because your camera settings and editing techniques will do the rest.
Camera Settings ⚙️
Now, there are a lot of 360 cameras out there with many modes and settings, but to keep it simple, the two best workflows I recommend, regardless of your camera, are:
👉 Shooting with inbuilt HDR if your camera has it.
OR
👉 Shooting with raw plus bracketing if, again, your camera has that feature.
The bracketing workflow will produce better results, while the inbuilt HDR will make the shoots go a lot faster. 👇
Which of these two workflows you choose depends on the camera you own, as well as how much editing you're willing to do.
When you're at your location, the first decision you'll need to make is how many shots you need. The answer changes a bit depending on your use case for the virtual tour.
Generally, I recommend one shot per room of your location, assuming the rooms are average-sized. This avoids your tour feeling too repetitive.
The exception to one photo per room is for real estate, where more coverage is needed to show off every last corner. Additionally, if you plan on uploading the tour to Google Street View, more regular navigation points will be consistent with the Google Street View experience.
It is better to overcover than undercover a location. So as a rule of thumb, shoot every shot you think could work out, and then it will be a process of elimination later in choosing as few shots as you can get away with.
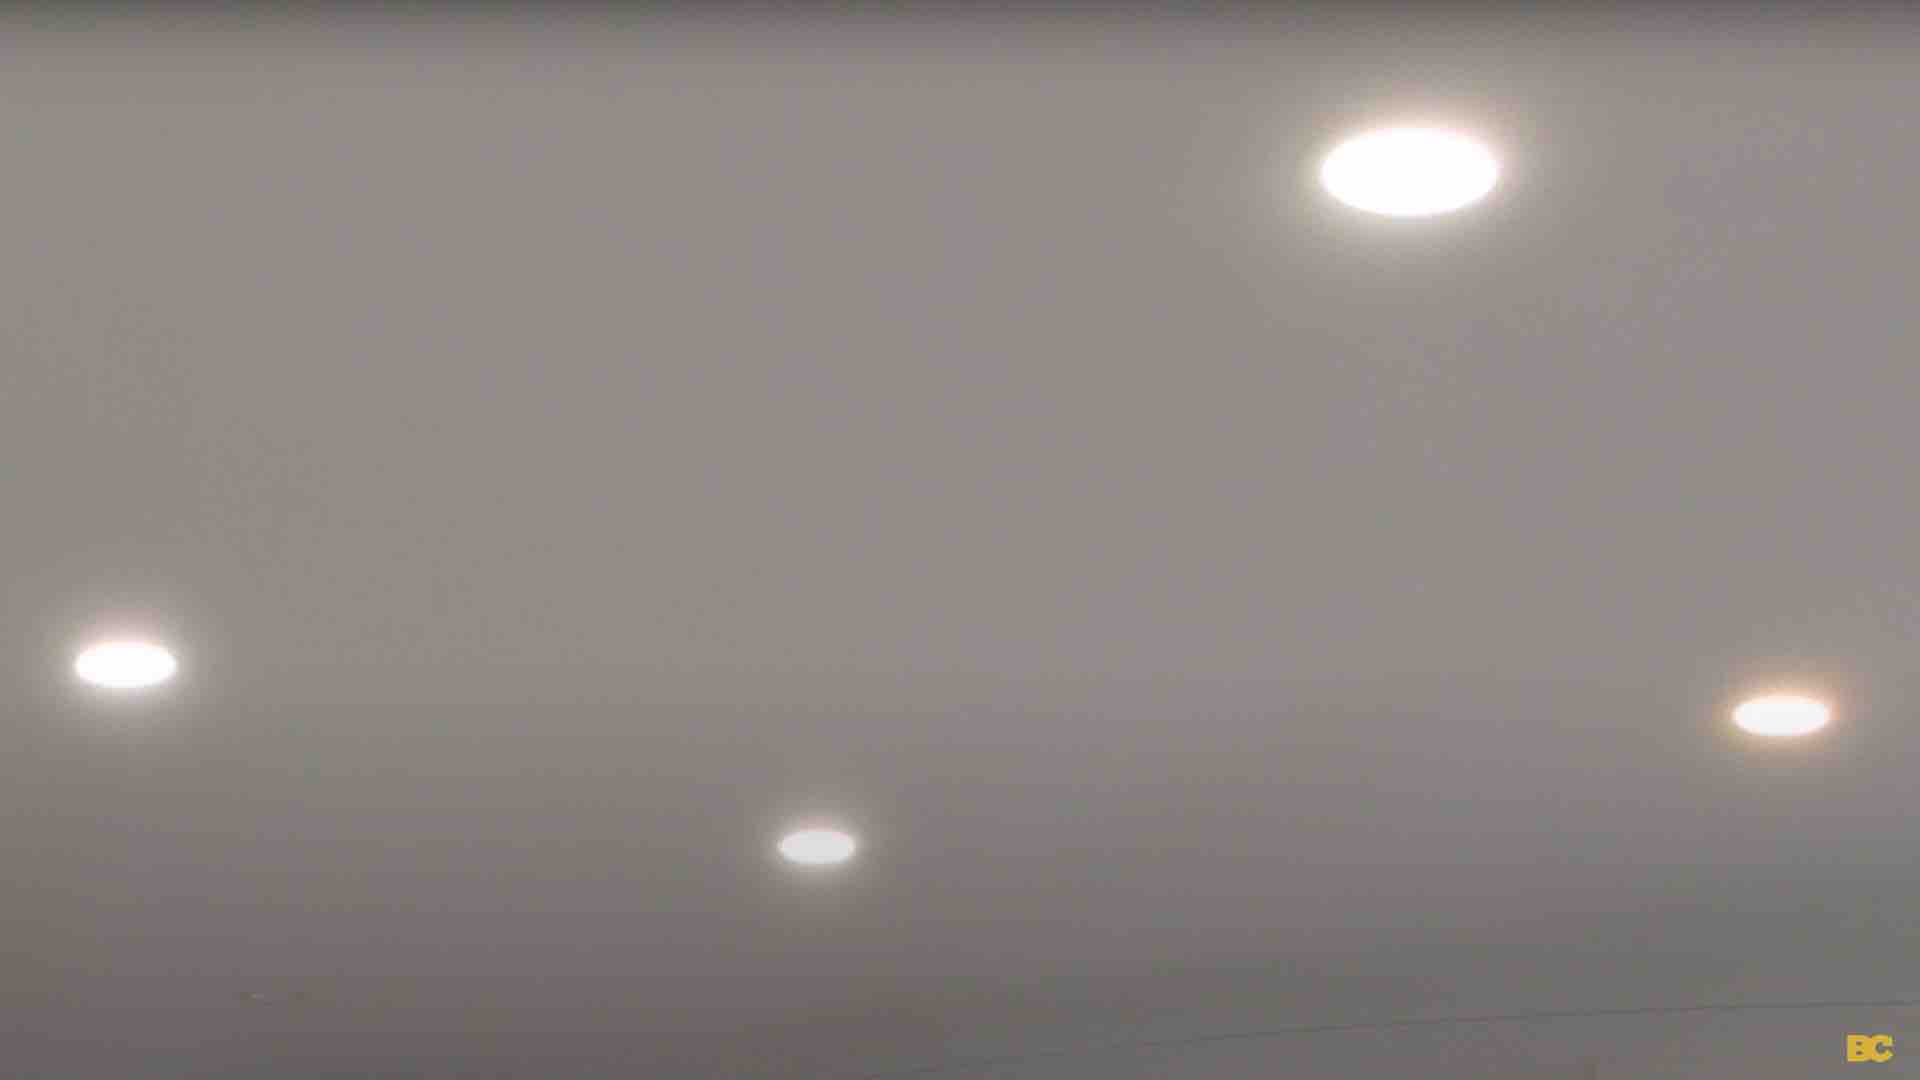
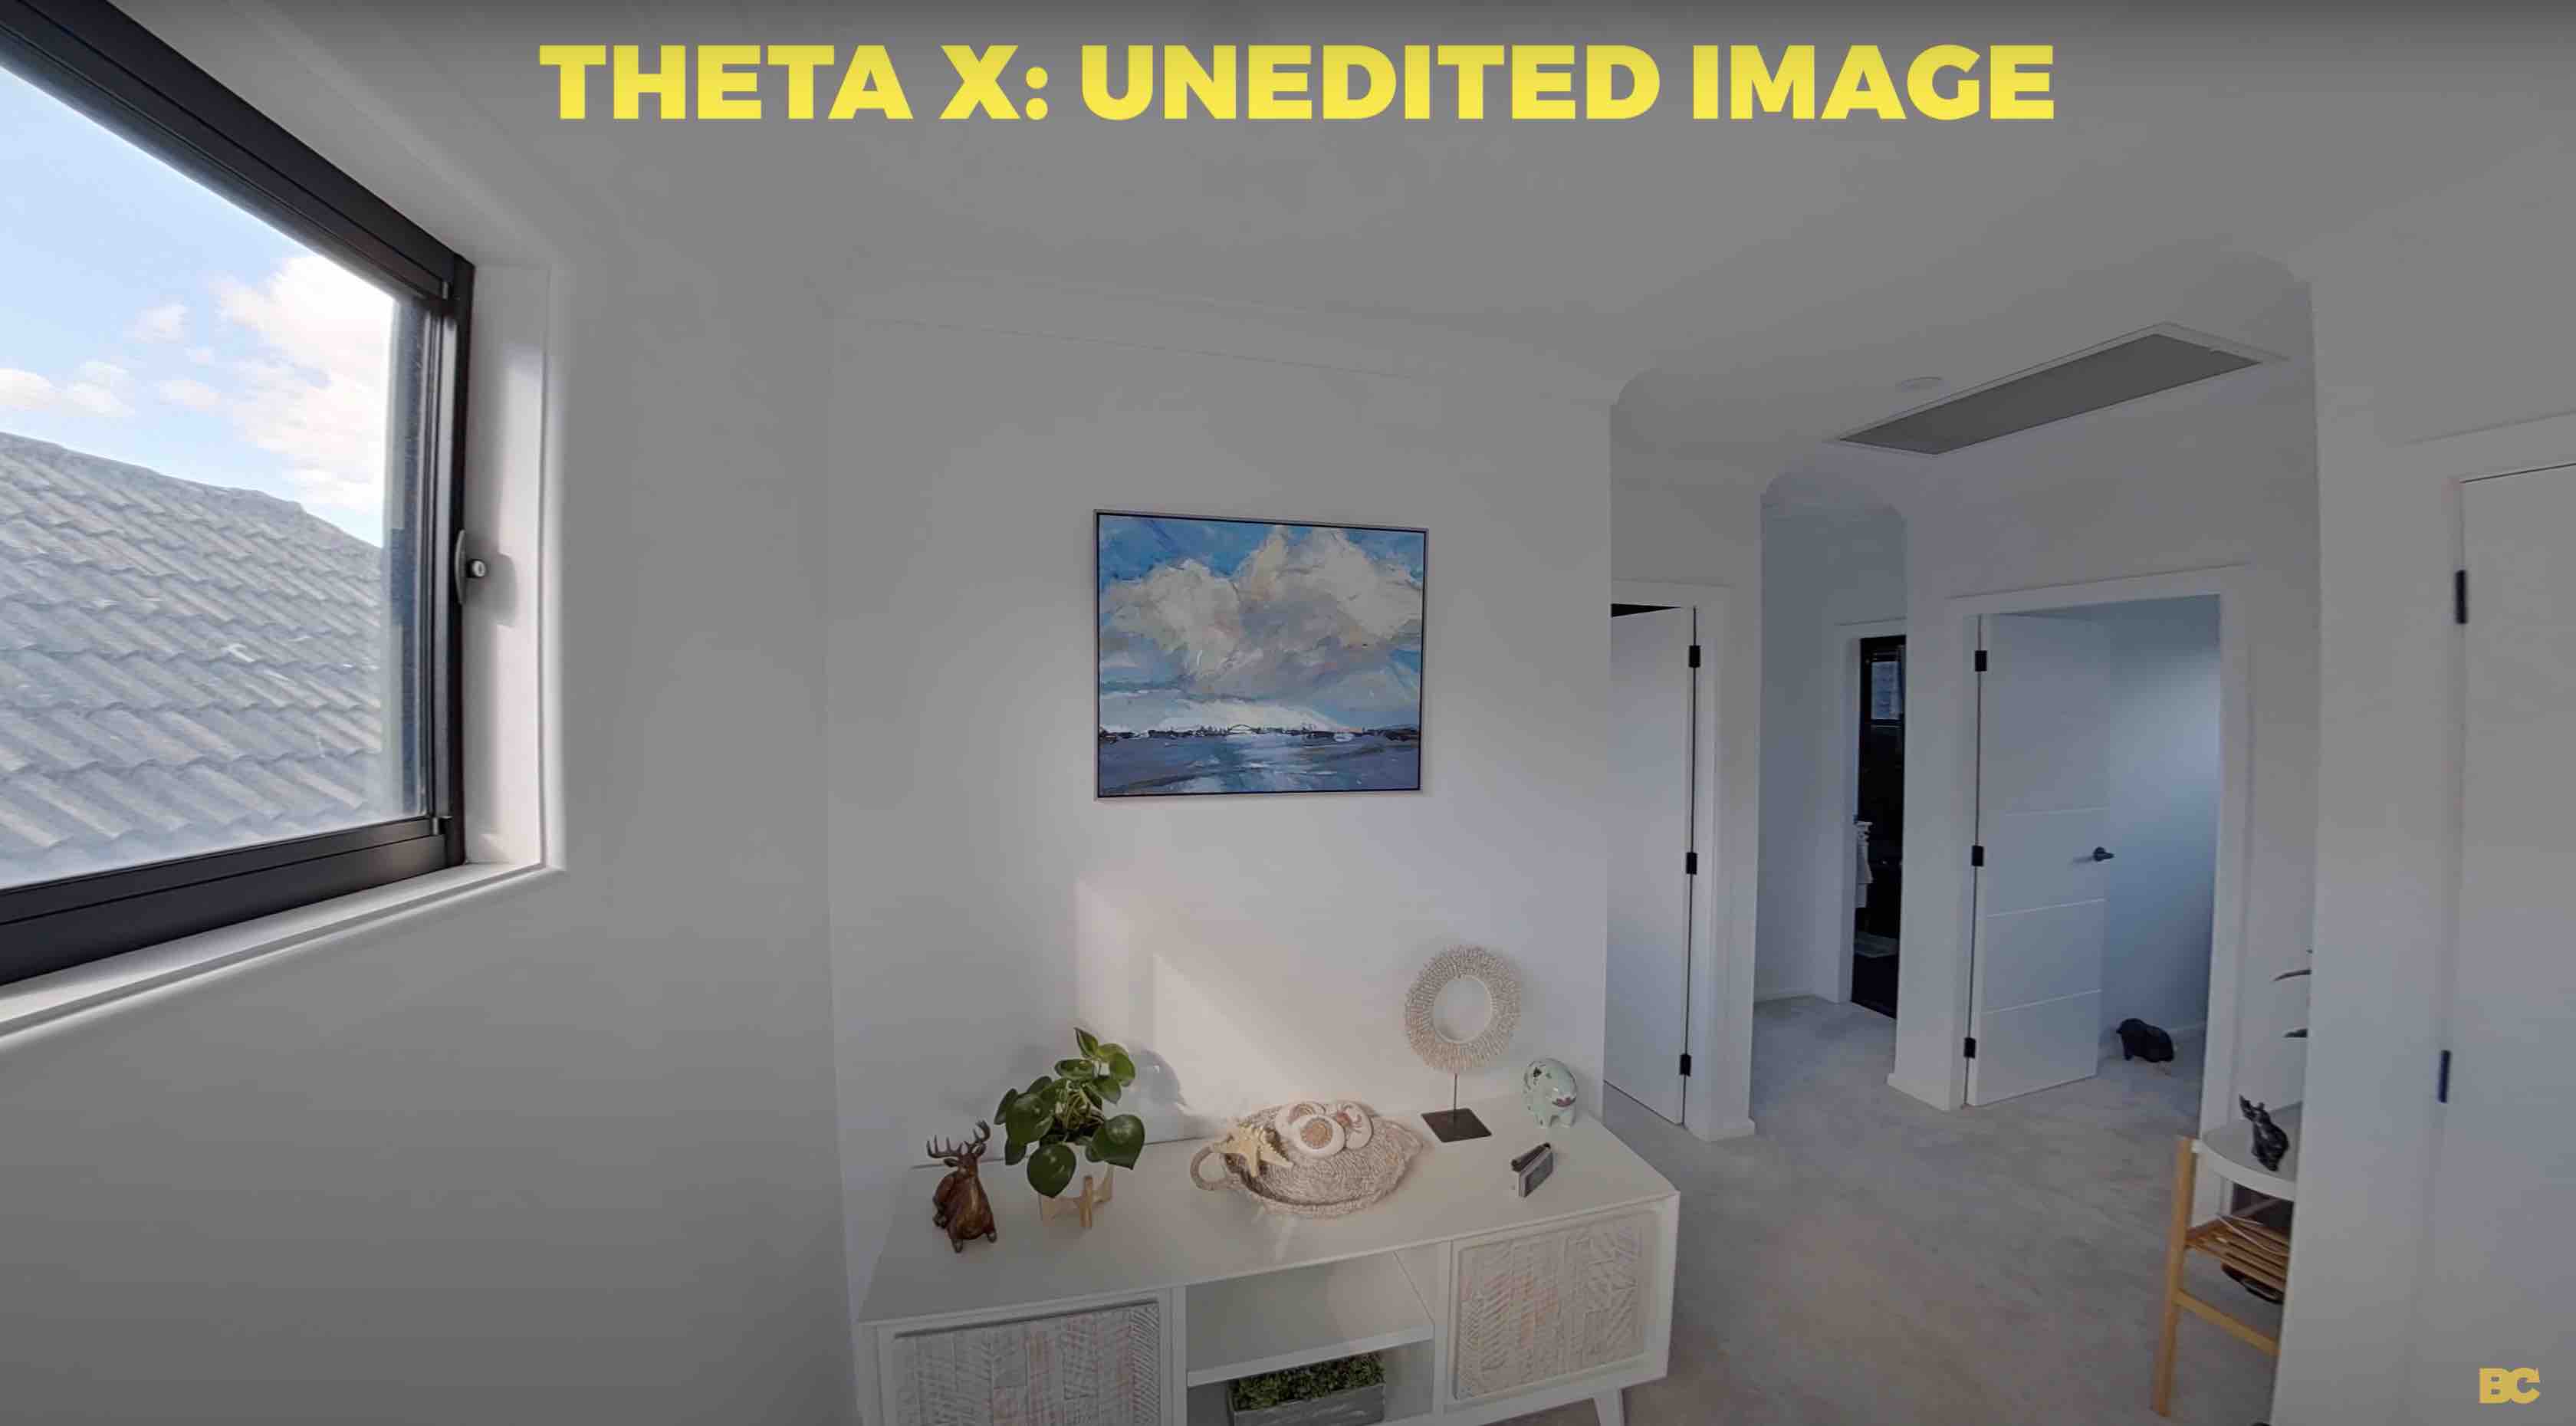
If your location is well-lit to begin with, then you won't need to turn the house lights on. However, if there are any dark areas or if the entire location depends on the lights being switched on to get enough light, then absolutely turn those lights on. 👇

But only if you have to, as direct light sources can cause overexposure in your shots. 👇
Next, set a self-timer of at least five seconds so you have enough time to hide. Once you've taken your first shot, the rest of the shoot will go so fast because your camera's already set up on the monopod, and you've chosen the right settings.
So it's just a matter of moving from room to room, getting the shot right, and then moving on. For the average virtual tour, you won't be shooting for longer than half an hour.
Workflows 👨💻
Because 360 cameras are getting so good, some cameras don't even need editing if you don't have the time or inclination to do so.
However, if you want better quality, I absolutely recommend:
👉 Color correcting your 360 photos
Photoshop used to be the number one software for this, but they've recently discontinued their 3D and 360 capabilities. The new go-to workflow for color correction is using Adobe Lightroom to merge your bracketed photos and color correct.
Then, use a low-cost Photoshop alternative like:
👉 Affinity Photo to edit out the tripod and any other imperfections.
Depending on the camera you're using, you will need to stitch your images at some point.
Stitching is an easy process. Import your shots into your camera's software, and it will quickly generate an equirectangular two-by-one image.
Afterward, you can choose whether you want to do any further editing to increase your image quality.
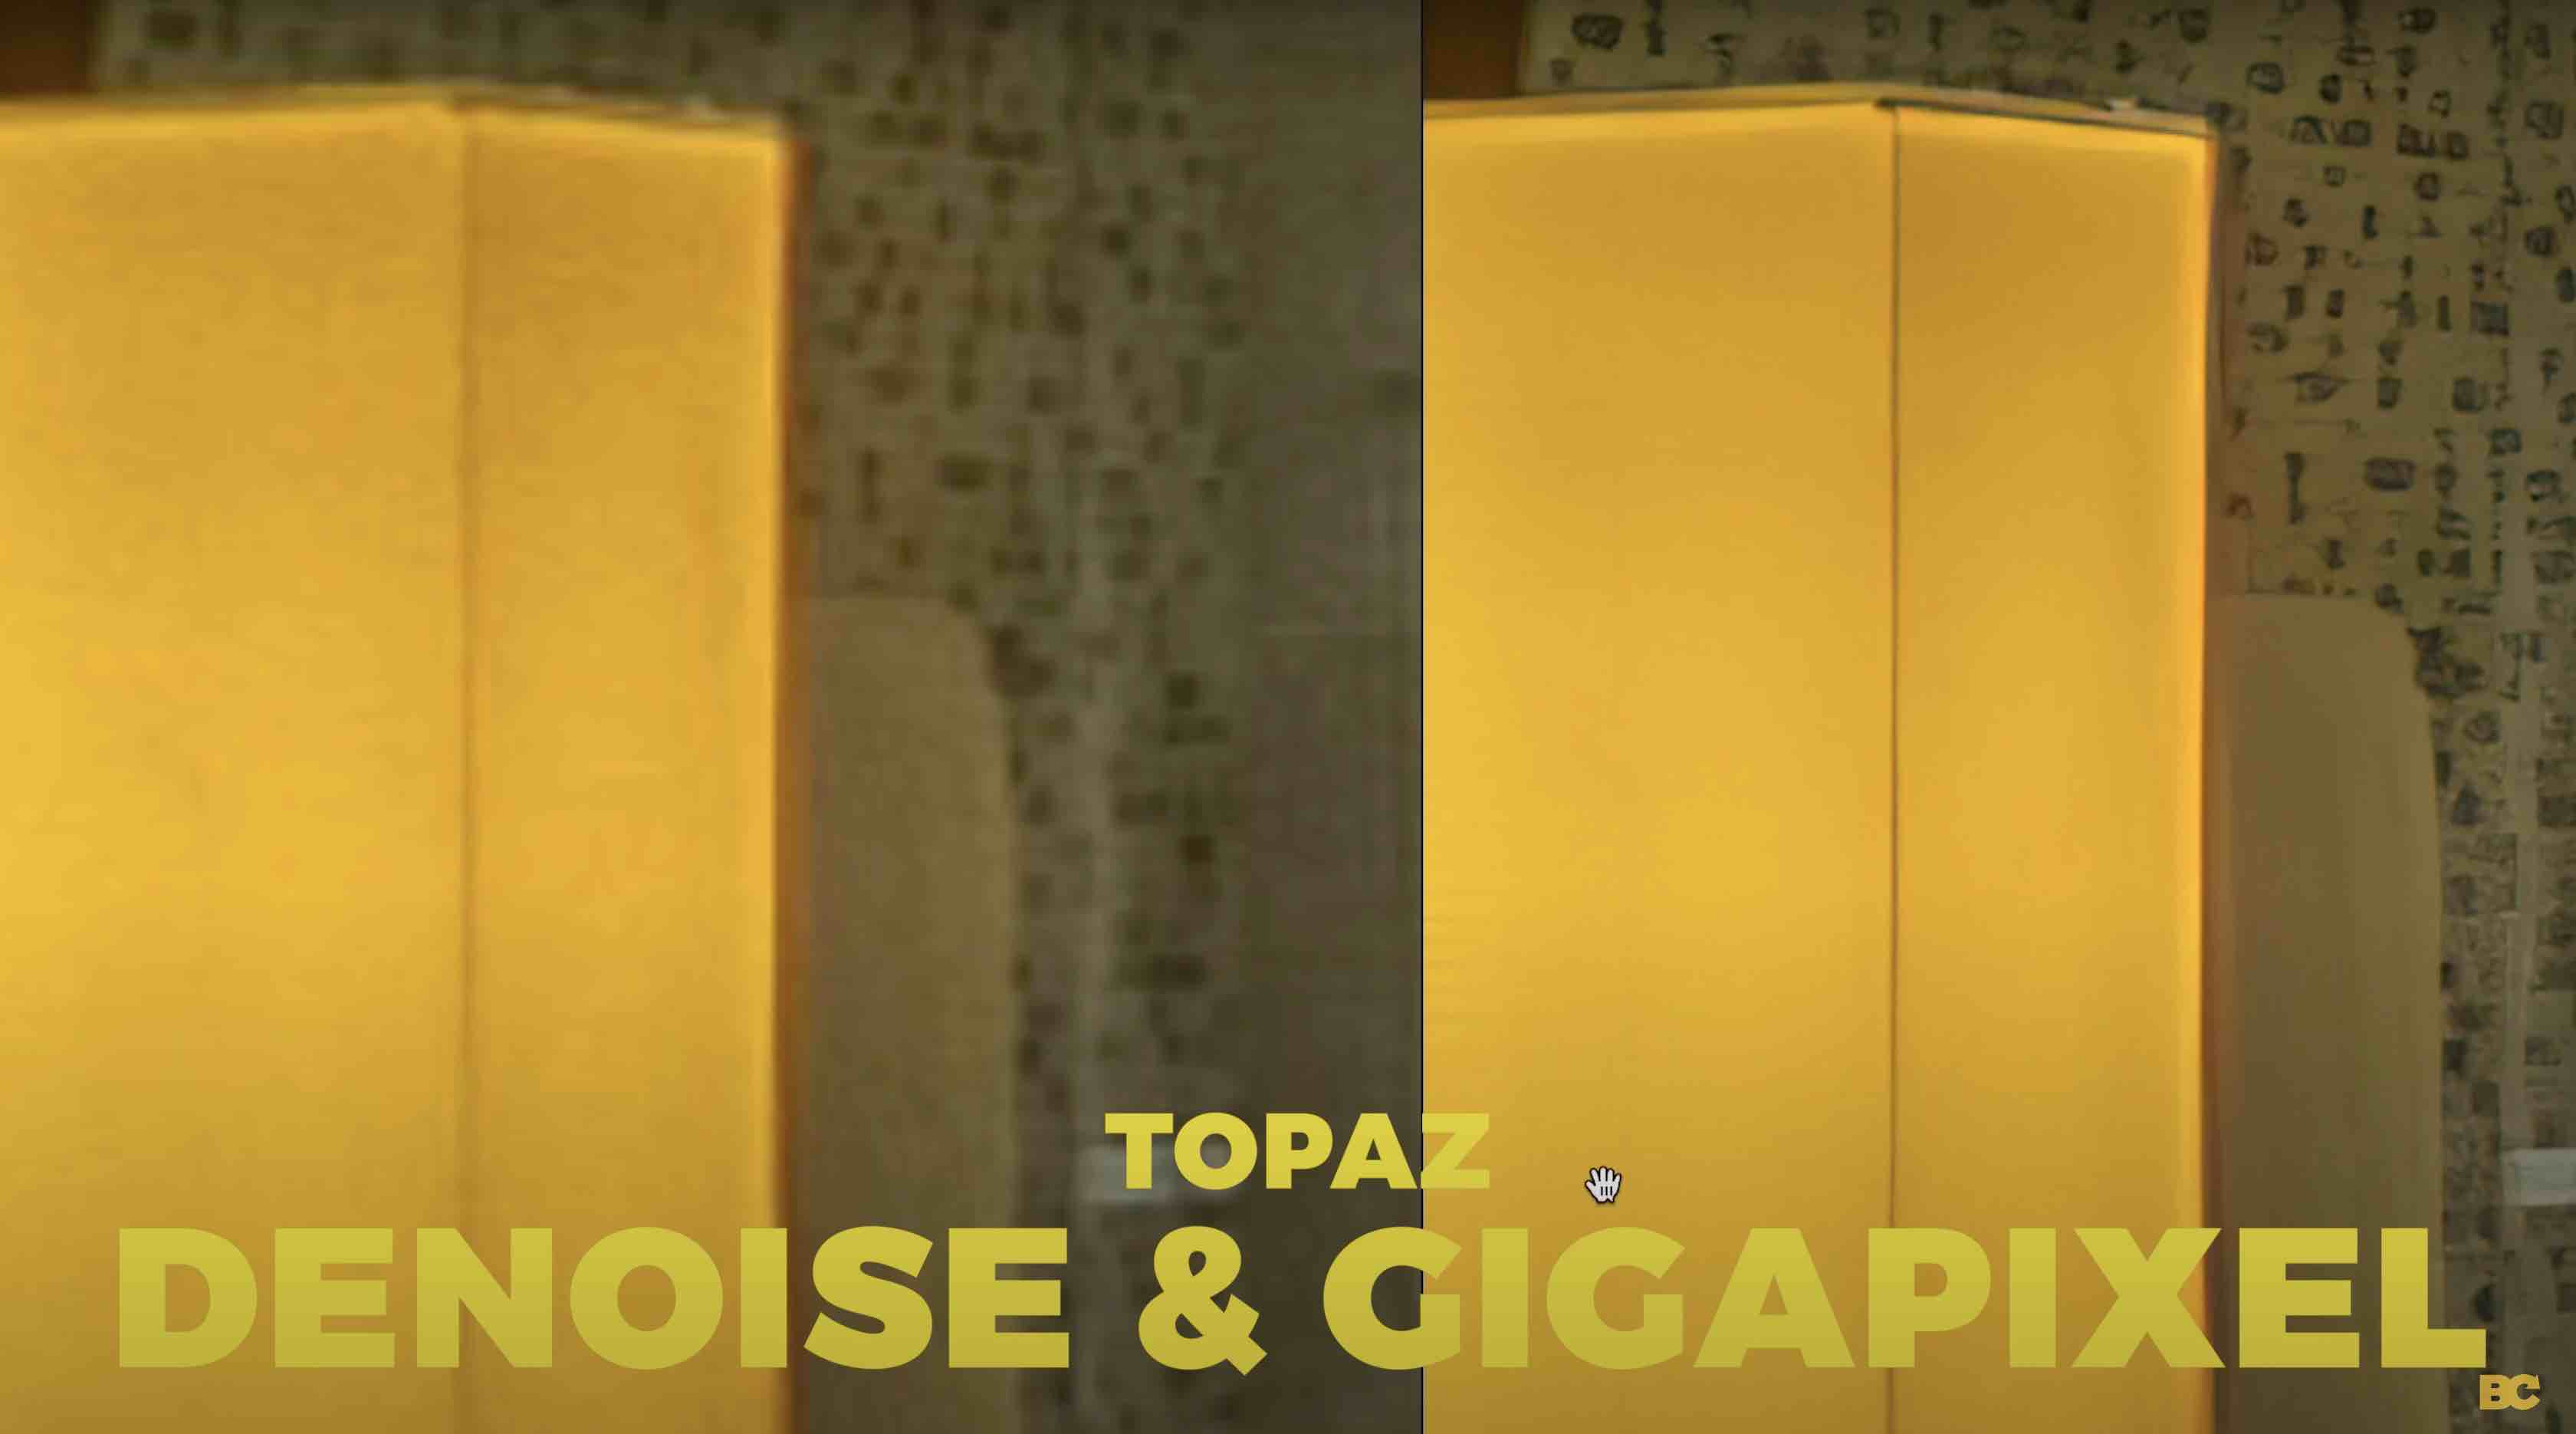
Personally, I like using the Topaz Suite, such as Denoise and Gigapixel, to increase the overall size and sharpness of my shots, as well as eliminate all noise, making everything picture-perfect.
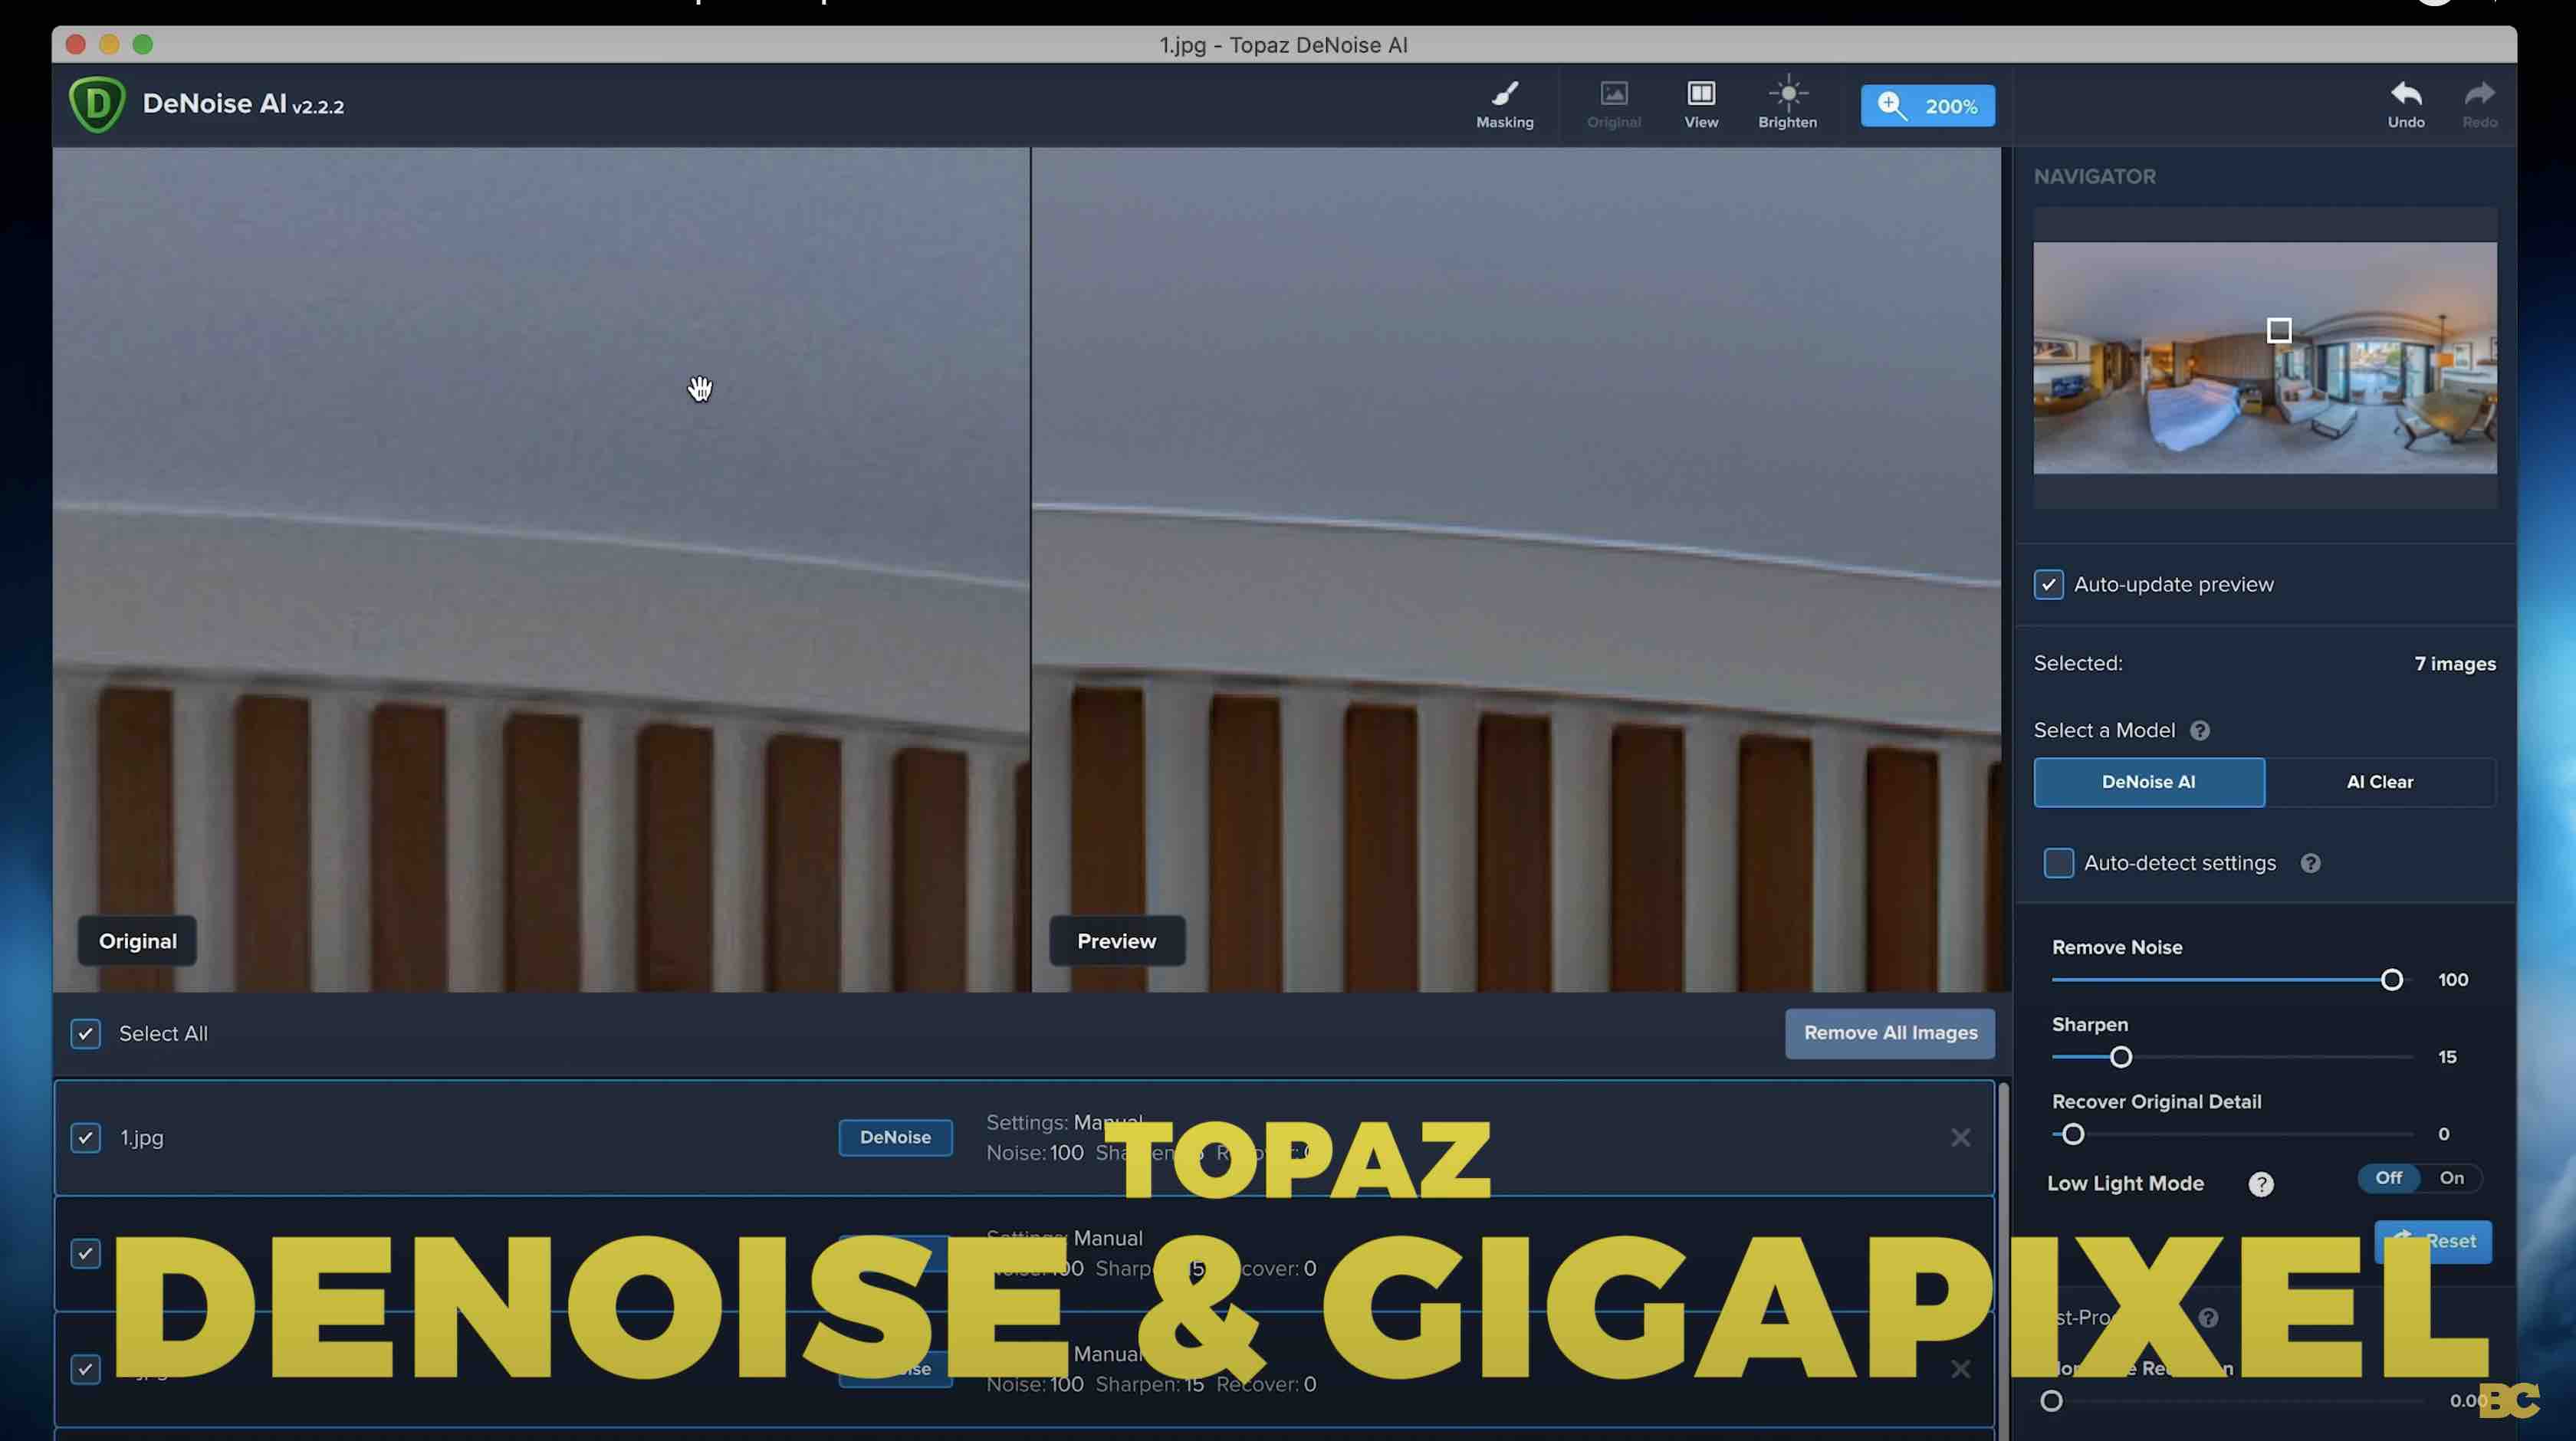
For in-depth tutorials on the Topaz Suite, you can find them inside my Virtual Tour Pro course.
Building Your Virtual Tour 🏠
The final step is piecing together your virtual tour in virtual tour software.
There is absolutely no shortage of choice, with nearly 200 virtual tour platforms out there. It can be challenging to determine which one is the best.
The good news is that it's not just Matterport. There are many different kinds of virtual tour software that cater to different markets.
There are options for every use case, skill level, and budget.
Check out my video:
👉 "Which is the best virtual tour software?"
Whichever virtual tour platform you choose, the editing process will be similar.
Start by uploading your photos, then connect them together by adding hotspots from one to the other. You can also add custom elements like info cards and logos.
Finally, simply share the link of that virtual tour with your client, and they'll be directed to it in their internet browser.
That's at least the basics of how to shoot a virtual tour and my top recommended workflows. 😀
Happy 360ing!
Ben Claremont
Blog Author


